Category Archives: Commodore 64

Oklahoma Video Game Expo 2011: GET TEXT

I can think of three reasons why anybody would rent table space at a video game convention. The first is, you own a video game store. Those guys are there to sell games and promote their stores. The second reason is, you’re a video game collector looking to (a) sell video games (often duplicate titles from your own collection) and (b) trade video games with other vendors. And then there are people like me — people who rent table space for the sole purpose of showing off things.

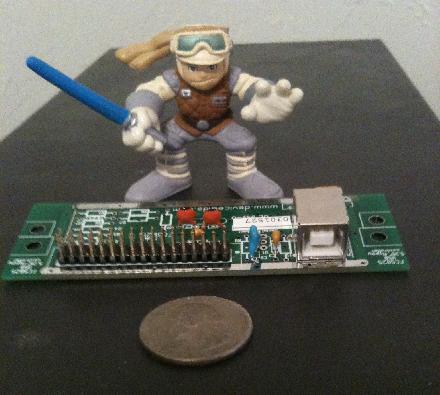
At OVGE 2004 I displayed my collection of vintage console copiers (old devices used to dump cartridge ROM data to floppy disks). It was my first year as an exhibitor at OVGE, and I went all out by decorating my table with a “pirate” theme. (To this day, people at the show still refer to me as “the guy that did the pirate table”.) In 2005, I put together a Star Wars-themed table. Both years I had multiple people ask, “Yeah, but what are you selling?”


OVGE 2004: The Pirate Theme.


OVGE 2005: The Star Wars Theme.

For the 2011 show, with the public’s interest in text adventures possibly the highest it’s been in the past 20 years, I put together a display I referred to as GET TEXT. Get Text consisted of three parts: half a dozen computers running text adventures, a bunch of text adventure-related memorabilia … and Robb Sherwin (of Caltrops.com fame) who generously flew out to Oklahoma on his own dime specifically to attend OVGE 2011 and promote his new game, Cryptozookeeper.

Sherwin arrived in Oklahoma City late Friday evening. That night we ate cheap tacos and stayed up way too late talking about video games. We went to bed around 1am, and woke up a little after 5am to load up the truck and drive to OVGE in Tulsa, picking up my buddy Jeff before hitting the turnpike.

(For the record, I cannot state strongly enough how important Jeff is to the show. Jeff is the rock that allows me to roam around, talk to people, take pictures, and let my Attention Deficit Order run wild. He calms me down before the show, helps me focus, helps me set up my displays, and If I’m gone from the table too long, he puts on my name tag and signs books for people until I get back. Without Jeff, my table would consistently suck. I thank him every year for all he does, but really, if you’ve ever enjoyed any of my displays over the past five years, you should thank him too.)

Enough with the gushing; on with the display.

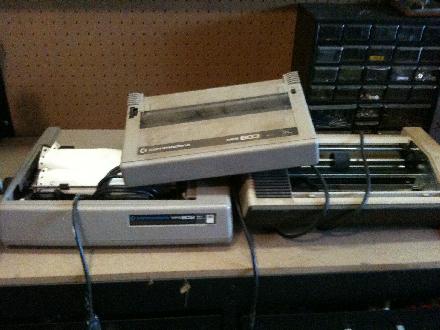
Not seen in this picture is my Commodore 64 system. Starting next to it, I had an Apple IIc, a DOS machine, an Amiga 600, a TRS-80 Model 4P (portable/luggable), an iPad, and a Windows 7 machine.

(Nerdy details: the Commodore alternated between running two Scott Adams games, Adventureland and The Hulk. The Apple II was running Oo-topos and
Indiana Jones in Revenge of The Ancients. The DOS machine (an Acer netbook running DOSBox; yes, I cheated) ran a couple of different text adventures, including my own game, Hangar 22. The Amiga 600 was running The Pawn and Guild of Thieves, both by Magnetic Scrolls. The TRS-80 4P ran Zork on its green screen all day long. On the iPad I had installed Frotz and was running Hangar 22. The last machine was a Windows 7 laptop, running Robb Sherwin’s Cryptozookeeper.)

When I was coming up with the theme for my table, I expected a few of the attending adults to say, “I remember those!” and for everybody else (specifically everyone under the age of 30) to point and laugh and guffaw at such old and outdated technology.

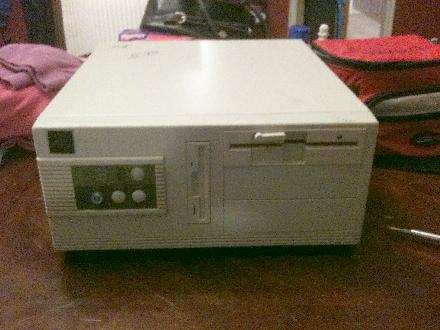
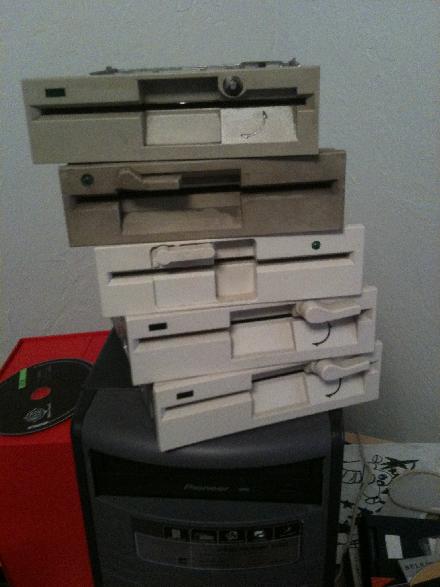
Instead, what I saw, was this:

… and this …

… and this …

Consistently throughout the day, someone was on at least one or more of the machines. Often times, the people playing the games were young children. Although I failed to capture it on film, at one point in time there were people on all six computers. Seriously, how cool is that? Surely my table was the only place in the world that day where six strangers stood side by side, pecking away at text adventures on vintage hardware.

The two machines that seemed to get the most use throughout the day were the Commodore 64, and surprisingly, the TRS-80. I think the TRS-80’s allure was its green screen and decidedly retro styling. The Commodore 64 is always a hit, and both of the games I ran on it had color graphics as well, which may have drawn people to it. The least popular platform (surprisingly) was the iPad. I’m not sure if people weren’t comfortable in picking it up, but I don’t think anybody did. Maybe they were just being polite.

Robb Sherwin and I spent much of the day talking to visitors about text adventures: about Robb’s game, about my game, and often just about old games in general. Some of the older visitors’ eyes would light up as them remembered old games they used to play. One guy mentioned the classic Broderbund title The Ancient Art of War, which we all discussed. Man, I used to play that game all the time my Dad’s IBM PC Jr. I was so terrible at that game that I’m sure Sun Tzu rolled over in his grave every time I booted it up, but boy was it fun.

Prior to the show, I advertised that I would have (a) free CDs full of text adventures to give away, or that (b) if you brought by a USB stick, I would fill it with text adventures. Due to woefully poor planning on my part, I ran out of CDs an hour into the show. I did have approximately a dozen people take me up on my USB offer, which we awesome. I also promised a couple of people that I would put the cache of text games online for download — I’ll do that tonight.

For most of the day, people of varying ages, gathered around machines, playing text adventures. If that doesn’t sound like a good time, I don’t know what does.

Thanks to Robb Sherwin for coming out and sharing his game Cryptozooker with the crowd, Jeff Martin for all the help and assistance, and Brian Green from AmigaCD32.com for loaning me his TRS-80, Amiga 600, and various software packages for the show. Without help from these three fellows, “Get Text” would have been “Get Poop”. Thanks again, guys.

For more pictures from the show, check out my 2011 OVGE Photo Album.

EDIT: Robb Sherwin wrote his own thoughts about the show over at Caltrops.

Oklahoma Video Game Expo: June 18, 2011

The 8th (!) annual Oklahoma Video Game Expo (OVGE) will take place this Saturday at the Spirit Bank Event Center in Tulsa, OK.

Out of the seven OVGE shows (there was no show in 2007) I’ve had a table at five of them, each year with a different theme. So far I’ve done Console Copiers (2004), Star Wars games (2005), Commodork (2006), Invading Spaces (2008), and “Stuff For Sale!” (2009). This year I’ll be doing GET TEXT, a tribute to text adventures.

GET TEXT will consist of several retro computers (Commodore 64, Apple II, Amiga 1200, DOS) running classic text adventures. I’ll also have a couple of modern computers running text adventures, including the iPad!

There will be two brand new text adventures available at my table. The first is the official debut of my brand new game, HANGAR 22. The second is CRYPTOZOOKEEPER, the new graphical text adventure from Robb Sherwin. Robb will be sharing my table with me, signing autographs. Robb was featured in a documentary about text adventures. Of course I’ll have copies of my books Commodork and Invading Spaces on hand. There may be some other things for sale at the table as well. I don’t know. The show’s still four days away, gimmie a break. I’ll decide by Friday night.

I’m going to be compiling and burning a limited number of CDs to give away at the show that will contain lots of free text adventures, including HANGAR 22 and CRYPTOZOOKEEPER. If I run out of CDs, anyone stopping by with a USB memory stick can also get a copy.

If you’re on the fence about attending, check out these photo albums of previous OVGE shows. The show is always great fun, with lots of old and new games to play and buy. The OneUps will be playing a free show at 3pm. They were great last year and I look forward to seeing them again this year!

Link: OVGE.com.

The All New “Commodore 64”

About two dozen people have sent me the following link, so I suppose it’s time I comment on it:

In case you missed it: Commodore 64 Revived

Quick summary: A new company (“Commodore USA”) has licensed the rights to the Commodore name and has begun pre-selling new computers in new cases designed to look like the old Commodore 64.

Commodore USA already sells two computers, the VIC-Pro and the VIC-Slim (VIC being the Commodore line of computers before they released the C64). Neither of these machines look anything like an old VIC-20 computer. In fact, Commodore USA doesn’t even build these machines; they buy off-the-shelf computers, slap their logo on them, and re-sell them. If you don’t see the silliness in this, it would be as if Ford purchased the rights to the Lamborghini name, slapped a new logo on a Ford Fiesta, and began selling them as the new Econo-Lamborghini. Ridiculous.

At least Commodore USA’s new “Commodore 64” is a new product. It’s biggest selling point is that it actually looks like a vintage Commodore 64. The outside of the machine, from the case to the keys, looks very much like an original Commodore 64. Under the hood, the guts have been updated with an Intel Atom D525 1.8GHz Dual Core CPU (all models share the same CPU). Commodore USA is offering their new Commodore 64x in four different configurations. The C64x Basic, which sells for $595, gets you the computer with 2Gb of RAM and a 160Gb Hard Drive. For another $100 you get the C64x, which adds WiFi, a DVD drive, and a 250Gb Hard Drive. Another $100 gets you the C64x Deluxe model, which bumps the machine up to 4Gb of RAM and a 500Gb drive. The C64x Ultimate (we’re up to $895 now) swaps the DVD-Drive for a BluRay one and gets you a 1Tb drive.

Finally, for those of you wishing to build your own, Commodore USA will be selling empty cases for $250.

And therein lies the problem. Last year, for a few dollars more than the price of one of those empty cases, I bought a computer with a ton more processing power than even the top of the line Commodore 64x. For around $400 last year I bought a refurbished Acer Aspire desktop with a a quad-core processor, 6 Gigs of RAM, and a 1Tb drive.

What makes this new Commodore 64x even more laughable is the fine print:

Play all your favorite 8-bit era games within seconds of turning the Commodore 64 on, by either selecting the C64 icon from the boot menu to run a C64 emulator directly, or from a media center program within our own Commodore Operating System.

Note: Commodore OS 1.0, along with emulation functionality and classic game package, will be mailed to purchasers when available. In the meantime, units come with the Ubuntu 10.04 LTS operating system on CD ready to install.

Translation: We plan on putting some cool features in our new Commodore Operating System, but it doesn’t exist yet. Instead, this computer ships with a free Operating System that you will need to install yourself.

To play old Commodore games on this thing, you will need an emulator like Vice. The thing is, Vice is free. You’ll also need some D64 disk images containing games. Those are also free. Suddenly this thing isn’t starting to sound so wonderful.

Years ago at a thrift store, I bought a broken calculator simply because it had the Commodore logo on it. (Before making computers, Commodore made lots of other things including calculators.) I’m a huge Commodork and would buy almost anything with the Commodore logo on it. The difference is, that calculator was $1. The Commodore 64x, from what I see, is way, way overpriced. The original Commodore 64 was a low cost computer that introduced many of the world’s current IT departments to the wonders of home computers three decades ago. I don’t see the Commodore 64x appealing to that demographic today.

I feel like, if anybody, I should be the guy standing in line to buy one of these … but $895 is an expensive trip down retro-lane.

Link: Commodore USA

The Great Commodore MPS Printer Curse!

Although “back in the day” there were dozens of third-party compatible printers, during my prime C64 years if you wanted a Commodore-brand printer there were essentially three models to choose from: the MPS-801, MPS-802, and MPS-803. Two of those printers were old VIC-20 printers updated with new case molding; the VIC-1525 and VIC-1526 were updated from “VIC-Creme” to “Commodore-Brown” and became the MPS-801 and the MPS-802, respectively. The MPS-803 came later, and was offered both in “C64 tan” and “C16/C+4 black”.

(Trivia fact: “MPS” stood for “Matrix Printer Serial”.)

To be sure, there were lots of other Commodore-compatible printers. I had friends that owned Okimate, Okidata and Epson printers and with the proper adapter you could even use IBM printers on your Commodore! There were also more than a few color printers (Commodore 1520, Epson Stylus, Okimate 20) and daisy wheel printers too, but most people considered the MPS-series to be the official Commodore printer.

There’s a reason Commodore’s line of MPS printers has been on my mind lately. Over the past few months, I’ve acquired one of each:

That’s an MPS-803 on top, with an MPS-802 on the bottom left and an MPS-801 on the bottom right.

“Retro printer collector” is not a demographic I particularly wish to be a member of. And I’m not, at least not intentionally. Each of these printers have been “gifted” to me as parts of larger collections. While I’m always grateful to receive them … I’m never sure what to do with them! As “hardcore” as I am, I can’t see myself ever printing from a retro system.

Like Dante’s Nine Levels of Hell, there too exists multiple levels of retrocomputing enthusiasts. The most basic level are those who enjoy modern remakes of old Commodore games (the recent Wiiware releases are a good example). On the next level you’ll find Commodore emulation. Past that are the guys who acquire and use original hardware. I suppose past that is the level where I’m at, the guys who are still buying new Commodore devices like the 1541 Ultimate and the ZoomFloppy. If you have ever connected a 1541 disk drive to a PC, you’re probably in this group. Somewhere though there’s a group of guys beyond that, guys who would actually take the time and put in the effort to get an old printer working. (If you’re that guy, let me know — I have some printers for you!)

The only thing keeping me from throwing these printers in the trash is THE PRINTER CURSE.

Yes, that’s right. I’m cursed. Every time I throw one of things away, two appear and take its place. When I threw one old printer away a few years ago, within a few months I had acquired two. I got rid of those by giving one away and hiding the other in a friend’s truck while he wasn’t looking. Now, I have three. I’m almost afraid to get rid of these three; I don’t have room for four.

1541 Parallel Port Install

(Sorry kids; another technical post. I finished this project late Wednesday night and scheduled the post to go live at noon on Thursday. I’m warning you now — it’s late, and there could be tpoys … er, typos.)

ZoomFloppy (which I wrote about earlier today supports parallel file transfers. This would be great news, except for the fact that the 1541 disk drive doesn’t come with a parallel port. If you want one, you’ve got to add one.

On his website, Peter Schepers sells pre-wired piggyback kits for installing parallel ports into 1541 disk drives. Peter was super easy to deal with and super helpful. On his website, Peter also provides all the pinouts for people wanting to make their own cables. It’s a win/win situation. I went with the piggyback (read: solderless) solution. The custom cable, a 15-pin parallel cable, and shipping (from Canada) set me back a little over $30. Absolutely worth it, in my book.

Before ordering one of Peter’s kits, you’ll need to determine which model of 1541 you actually have. The easiest models to modify are the old white VIC-1541 drives, and the common beige C64 1541 drives (both pop-tab drives and the turning-handles models). 1541C, 1541-II and 1571 drives can also be modified, but each of those require additional and extensive disassembly of the drive. Fortunately for me, my garage looks like this:

Most of the drives work. Most of the C64s do not.

After choosing a victim, “Project Parallel Punch” began! As you can see below, the one I picked still had a price written on it in “thrift store grease pencil” — $3.98. One summer several few years ago I managed to snag half a dozen or so 1541 drives at thrift stores and garage sales. Hey, you never know when, five years from now, you might need one to install a parallel port into!

Once the patient was moved to the operating table, the first order of business was to remove the case and the metal shielding. The case is held in place by four metal screws — the shielding, another two.

With the shielding off, you can see the middle (6522) chip that needs to be pulled. With the 6522 removed, the socket is inserted, and the 6522 is reinserted. This was by far the hardest part of the installation. The socket pressed in with no problem. When I reinserted the 6522 chip I managed to smash half of the chip’s legs. ARGH. I really suck at this! It took me half an hour and four or five attempts to get all the legs straight enough to reinsert into the socket. Why am I so bad at this?

Eventually, this is what it looked like.

The next part of the install was making a hole in the back of the 1541 for the parallel connection. Using a Dremmel, in about two minutes I shaped out a workable solution. It ain’t pretty, but it works. Going against Peter’s suggestion I mounted the port from the inside of the drive, rather than from the outside. This is a terrible idea because the plastic is so thick that I had to Dremmel an extra 1/4 inch all the way around the socket to make room for the metal housing around the cable.

Here the drive is, reassembled and ready for action.

Unfortunately, mounting the port on the inside made it to where I couldn’t push the parallel port in far enough. After a quick trial run, I mounted the plate on the outside of the drive with a couple of computer screws. Not only does the cable work better with this mounting, but it hides my shoddy Dremmel work to boot!

With the parallel port in place I fired up D64Copy and ran a quick test:

— Serial only: About 90 Seconds.
— Serial w/Parallel: About 25 Seconds.

As I mentioned earlier, the parallel port not only transfers data more quickly, but it also allows for the capturing of the entire disk’s contents, not just the programs. This is invaluable for people wanting to not only capture programs, but preserve disk formats and study copy protection. I’m having trouble with some of the advanced tools in Windows 7/64-bit at the moment, but since the ZoomFloppy is USB, trying it on other machines won’t be a problem in the near future/

ZoomFloppy (First Impressions)

Today I will be giving my first impressions of the ZoomFloppy, a new PCB that allows people to connect old Commodore floppy disk drives to modern PCs via USB.

(I’ll pause a minute while most of you leave the room. You are excused. See you tomorrow.)

I have, on several occasions, talked about the process (and difficulties) of converting physical Commodore 1541 diskettes into D64 disk images, the format used by most Commodore 64 emulators (including WinVice). Most recently, I talked about it here, here, and here. To save you an hour of back-digging, here’s the gist of those posts: I’ve found two reliable methods to convert real disks into D64 images (and back). One involves using a 486 running DOS and a special cable (x1541). The other involves using a 1541 Ultimate, a device that attaches to a Commodore 64. While both solutions work great, neither is without its drawbacks. The 1541 Ultimate runs around $200 US (with tax and shipping) and requires a working C64 computer to run. X1541 cables work best with older parallel ports on 486 computers running DOS, which brings its own unique logistics.

There’s also the FC5025, a USB controller for 5.25 floppy drives. The FC5025 is $60 (shipped), plus you’ll need to supply your own 5 1/4 floppy drive. The FC5025 is good at what it does, but it doesn’t do what I need it to do. It archives PC/DOC-based disks perfectly, but can only read the front side of Commodore 64 and Apple II disks. The FC5025 is also a read-only solution. I own one and use it for archiving old DOS disks, but for archiving Commodore 64 disk collections (almost all of which contain disks with information on the flip side), it’s not a good solution.

This brings us to the ZoomFloppy.

The ZoomFloppy was developed by Nate Lawson and is being manufactured by Jim Brain. It currently sells for $35 US, which makes it the most inexpensive solution to date. It’s USB, so “installing” it is a matter of connecting the card to your computer using a standard mini-USB cable and supplying the drivers.

The ZoomFloppy’s packaging is sparse. The card shipped in an anti-static bag. Inside the box there was also some tissue paper, and a folded-up piece of paper with the GNU General Public License printed on it. Something noticeably missing was a piece of paper with some instructions. A sticker on the anti-static bag pointed me to http://www.go4retro.com/products/zoomfloppy. After searching that page longer than I’d like to admit, I found the link to Nate’s page, which contains links to the installation manual and drivers. The driver installation on my 64-bit Windows 7 machine did not work like the documentation suggested it would, but after manually installing the driver, Windows 7 saw the card. It wasn’t a particularly difficult installation, but the whole process reminded me that the ZoomFloppy is currently, and probably always will be, intended for computer-literate hobbyists.


The 1541. She lives.

ZoomFloppy supports transferring data to and from 1541 disk drives using either serial or parallel cables. Serial cables are the ones most Commodore owners are familiar with. On its side, the ZoomFloppy has a female serial connection identical to the one found on the back of a 1541 drive. A standard C64 serial cable is used to connect a 1541 to the ZoomFloppy. That configuration supports both converting real C64 diskettes to D64 images, and writing D64 disk images out to real floppies. I suspect this is what most people will use the ZoomFloppy for. The ZoomFloppy also supports parallel connections. This requires, at a minimum, modifying your 1541 by adding a parallel port to it. I purchased my parallel port kit from the highly recommended Peter Scheper. (I haven’t installed it yet, but when I do, expect another post on the topic.) Using the advanced parallel connection allows the ZoomFloppy to also read and write nibbled G64 disk images. It’s not a feature most people need or will even want, but if you’re interesting in backing up (or studying) copy protected diskettes, it is well worth the effort.

The ZoomFloppy is designed to work with the OpenCBM tools which are command line tools available for Windows, Linux, and Macintosh machines. For those who prefer GUI interfaces, there are also free front ends available. I downloaded CBMXfer, just to give it a whirl.

Within fifteen minutes, I had discovered the ZoomFloppy in my mailbox, opened the box, installed the drivers, found online documentation, got the card installed, fetched a working 1541 drive from my garage, retrieved a random C64 floppy from the archives, transferred a real disk to a D64 disk image, and launched the image in WinVice.

Click to Enlarge

The only real issue I’ve encountered so far is that one of the D64 images I copied was corrupt. I couldn’t find an option for retries or error checking on CBMXfer, but I see it as an available option via the command line. I’ll do some more experimenting with that tonight. It “seems” like I got better results by turning “warp mode” off, which increases the copy time from just under a minute to just over one.

I can’t believe I’m saying this, but once I get a parallel port installed on my 1541, it looks like I’ll be transferring my old C64 collection over one more time. It’s a Herculean task, but doing it and doing it right is important to me.

Commodore Cassettes

While visiting this weekend, my Dad mentioned that while cleaning he had run across some “old Commodore games.” He then handed me three old homemade cassette tapes full of games.

Out of the box the Commodore 64 only supported cartridge-based games, but most owners quickly upgraded by adding either a cassette-based Datasette drive or a floppy disk drive. Back in 1985 when I got my first C64, Datasettes cost around $40 while floppy drives were $200 — about the same price as the computer itself. By the time I got my Commodore, anyone who had previously owned a Datasette and had upgraded to a floppy disk drive would have gladly given you their old Datasette for free.

And while Commodore’s disk drives were notorious for being slow, the Datasette was unbelievably slower, transferring data at a whopping 50 bytes/second. To put that in perspective, a 5 megabyte mp3 file (5,242,880 bytes) would have taken 104,857 seconds (just over 29 hours) to load. So while Commodore’s floppy disk drives seemed (and were) slow, they sure seemed fast to previous Datasette owners. Of course, 5 megabyte files were unheard of to home computer users in the 1980s. As a matter of fact, Commodore cassette tapes could only store around 100 kilobytes of data, which means to store that one single mp3 you would have needed 420 cassette tapes to do so (technically only 240, if you used both sides).

I didn’t personally use a Datasette for more than a couple of weeks back then. I got my Commodore sometime during the summer of 1985, and got a disk drive for my birthday that August. In later years there were advances in tape-loading technology (speed loading techniques and the like), but in 1985 loading from and saving to cassettes was akin to digital masochism. While I have read that especially overseas there were Commodore users that primarily used the Datasette, in the US I didn’t know a single person who did.

Based on the program names handwritten on the sides of the cassette cases, it appears these tapes are filled with small, public domain games. Still, I think it might be fun to dig out my old Datasette and see if these tapes still work. I was under the impression that cassette programs could be transferred to mp3 format and loaded via emulation, but I can’t find any reference to that online. Assuming all the programs are written in BASIC I should be able to load them into memory and save them onto floppy disks. It’ll be fun trying.

FC5025: The Review, Part I

I am, as the kids like to say, “old school”. I like old technology, I like old video games, I like old arcade games, and I particularly like old computers. When I say “old computers”, I am mostly referring to 8-bit machines from the 1980s: the Commodore 64, the Apple II, the TRS-80, and so on.

In the spirit of Jeopardy, if the preceding paragraph was the answer, the question would be, “What kind of person would be interested in purchasing (or would even have a use for) an FC5025?”

The FC5025 is a custom USB drive controller for 5 1/4″ floppy drives. That, in a nutshell, should tell you right away if the FC5025 is something you need in your life. Some of you are excited. Some of you are scratching your heads. The rest of you probably just quit reading, which is my sign to crank the “geek dial” up to 11. Brace yourselves.

For my generation, the 5 1/4″ floppy represented computers. Back before we had 3 1/2″ disks — hell, back before we had hard drives — we just had floppies. Our family didn’t own a hard drive for our PC until the late 1980s. For almost a decade, my house was Floppy City.

As I’ve stated multiple times on my blog, I still own a lot of floppy disks from that era. And even though I still own a lot of those diskettes, what has disappeared are the disk drives needed to read them. It’s getting tougher these days to find a machine with an internal 3 1/2″ floppy drive, much less a 5 1/4″. Multiple manufactures have created external USB 3 1/2″ drive solutions, but unfortunately none of those are compatible with 5 1/4″ drives.

That’s where the FC5025 comes in. The board itself is tiny, and despite the fact that it’s USB, it’s designed to be mounted inside your PC. Why they built it that way, I’m not sure. Everybody I know who owns one of these boards (okay, all 3 of us) immediately mounted them in external drive caddies. Installed as intended, a person would mount a 5 1/4″ drive internally inside their PC, connect a power cable from their PC’s power supply to the back of the floppy drive, and connect the FC5025’s USB port to an internal USB port inside your computer (to power the card). An external solution requires mounting a 5 1/4″ floppy inside some sort of external drive caddy for power and running a USB cable from the caddy to an external USB port on your computer. The latter solution makes much more sense to me, personally.

To break up all this text, here is a picture of the card itself. I put Luke in the picture for scale but then I decided people might not know how tall Luke is so I put a quarter in there too.

The FC5025 costs $55.25, which does not include a floppy drive. I thought for sure I had saved one or two old 5 1/4″ floppy drives out in the garage, but I had not. An acquaintance of mine (“Aardvark”) kindly mailed me an old floppy drive — and when I couldn’t get that one to work, he mailed me another one. Not only does the guy have access to 5 1/4″ drives — he has 5 1/4″ drives to spare. Aardvark is cooler than you. In between those two arriving, I began searching thrift stores for a working drive. I bought this beast for $5, and although the computer itself worked, the drive was still giving me fits.

The software that comes with the FC5025 claims to be able to back up Apple, Atari, Commodore, MS-DOS, North Star, and TI-99/4A diskettes. This is the unit’s main (really only) selling point. The only reason someone would want to own an FC5025 is if they intended on backing up/archiving old floppy disks (the unit is read only and does not support writing disks of any kind). And yet, despite my efforts and no matter how many different floppy drives I tried, I could not get the unit to read the back side of any of my old floppy disks.

To give you an idea of how many different floppy drives I tried, the top of my computer looks like this right now:

Yeah. So after a bit of investigating (ie: reading the directions), I learned that the FC5025 is basically currently incapable of reading the back side of old diskettes. Old disks that you “flipped” over are referred to as “flippy” disks, and due to a difference in manufacturing techniques, PC floppy drives cannot read the back side of old flippy disks. Apparently they can be modified to do so (see here and here), but it ain’t easy.

In my defense, this is what the website says:

“The FC5025 may be unable to read the second side of “flippy” disks, depending on the drive it is attached to.”

(I saw the word “may”. I thought I had a chance.)

“Many drives won’t read from the disk unless they can see the index hole. If you have one of these drives, the FC5025 will be able to read from the first side of the disk only. When you flip the disk over to read the other side, the drive will not send any data to the FC5025, and the FC5025 will not be able to read that side.”

(Again, I saw “many drives won’t”. That made it sound like “some will”.)

“The FC5025 … has been tested to work well with the TEAC FD-55GFR drive and should also work with most other 5.25″ drives.”

I guess I read between the lines a bit too much. Based on the above information, I assumed that TEAC FD-55GFR drives would, in fact, read the second side of a “flippy disk”. I can tell you that, unmodified, they will not. The top two drives on my pile are TEAC FD-55GFR drives.

The reason I am putting so much emphasis on this one particular “flaw” is that, besides that, the FC5025 is incredible. With my computer case open and cables strung out across my desk, it took me about a minute to connect the card, a drive, and install the included drivers and software. The included transfer program gets right to the point. Pick a disk format, a location and a file name, and you’re on your way. The FC5025 is faster than you would imagine; disks transfer in well under 30 seconds. There are PC, Mac, and Linux versions of the software included.

Although every Commodore 64 diskette I transferred using the FC5025 reported multiple read errors, every one of them worked. Perhaps the read errors were on parts of the disk that didn’t contain data, I’m not sure. Bottom line though, in under 30 seconds I was able to transfer a 25-year-old Commodore floppy disk to a .D64 disk image, double-click the file, and play an old game in using WinVice on my modern PC. That’s pretty impressive. I had similar luck with the Apple II floppies I tried.

And yet, I can’t help but feel a little bummed. For how great this device performed, for most real world collectors, it’s essentially worthless. I don’t know a single old school computer guy who didn’t save files and programs onto the back of any diskette he could get his hands on. Yes, the FC5025 works great — for the half of my collection that sits on the front side of flippy disks. I suppose if one wanted to archive IBM PC diskettes, the FC5025 would work grand. For anyone wanting to archive old C64, Apple, or Atari diskette collections, unless you’re willing and able to heavily modify an old floppy drive, you’ll be disappointed.

The reason I named this article “Part I” is because I am hoping someday there will be a Part II. I will write Part II when I have either modified a floppy drive to read flippy disks, or some update to the software/firmware allows me to do it on a stock drive. Until then, the FC5025 (in its custom-but-unfinished Commodore 1541 case) will probably go up on a shelf, sitting alongside all the other gadgets I’ve bought that were “almost” perfect.

Failing Media (Part 2 of 2)

My other hobby, retrogaming, also suffers from failing media.

First, you’ve got old cartridges. Atari 2600 is as far back as I go, and I would group Atari 2600, 5200, Intellivision, Colecovision, and all the other classic systems together. Other than Intellivision carts which seem to have a higher failure rate than the others, it’s pretty rare that I find one of these that either doesn’t work or can’t be coaxed back into working with a bit of cleaning. For Atari 2600 games, I’d guess my success rate is near 99%. For Intellivision it’s much lower, but since most of my Intellivision games came from the same seller, maybe that person had a large collection of non-working games. Hard to tell.

Next up are Nintendo (NES) cartridges. The problem with the NES wasn’t the games as much as it was the connecting pins inside the console itself. There are a lot of myths and legends behind the act of blowing on your cartridges like a harmonica (which pretty much everyone did at one point in time) before inserting them into the NES. Everyone agrees that this helped, although many disagree why. While as kids we thought we were “blowing the dust out of the carts,” what it appears we were doing was actually improving the poor connection between the cartridge and the systems connector by covering the contacts with a layer of spit. Like earlier carts, I’ve seen a pretty high survival rate of NES carts; the systems, however, typically need repairing (see replacing the NES 72 pin connector). There are other NES (top loading) systems and newer 3rd party clones that don’t have this problem and as all my gaming friends know you could write a hundred pages about the issue.

All newer cartridge-based games, from the Super Nintendo and the Sega Genesis to the Nintendo 64 all have extremely high survival rates — 99%+, in my experience. At one point I had almost 500 Sega Genesis games and I think I had two that didn’t work. In my opinion you have to work pretty hard at breaking one of these things, like storing them underwater, outside, in a toilet, etc.

That leaves us with CD and DVD-based media which, again, as long as they are treated properly seem to have a really good success rate. Like the NES, the actual consoles seem to have more problems than the media. The original PlayStation had some wonky laser issues and certain Xbox 360s have a propensity to scratch people’s discs, but unscratched disc-based games seem to be holding out just fine.

As many of you already know, I also collect arcade games — those big, giant, almost archaic behemoths. There are so many things that go wrong with these machines over time that you could write a book about it (oh wait I did), but here’s just a few things I see. Arcade monitors use paper capacitors; they’re located in the worst possible place (heat rises …) and as a result, most of these capacitors are brittle and/or just worn out. Lots of old machines also contained batteries for various reasons; those are all suspect at this point. The actual electronics depend on the machine itself, but there are plenty of parts still available for repairs. Most of the moving parts (joysticks, buttons, coin mechs, etc) can be fixed or replaced. Arcade games don’t really fall under “media” but since I was talking about games I thought I’d throw it in.