Category Archives: Computers/Tech/Games

23 Tiny Screws

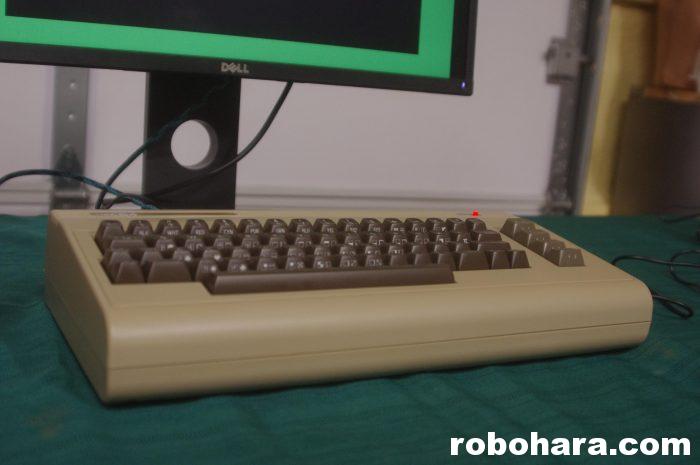
Today I am repairing a Commodore 64 keyboard. Not just any keyboard, but the one I grew up using back in the 1980s.
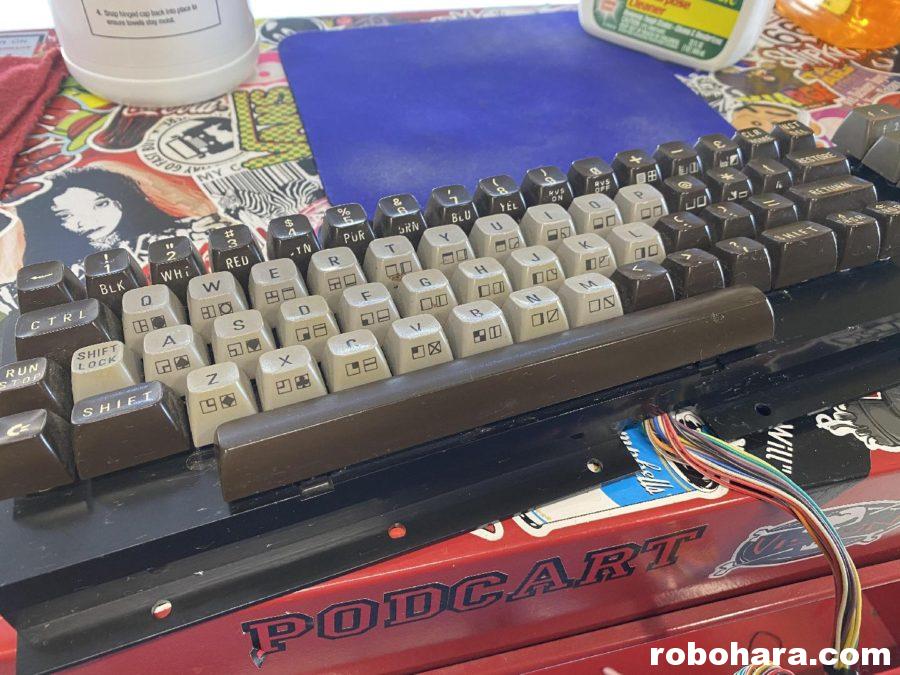
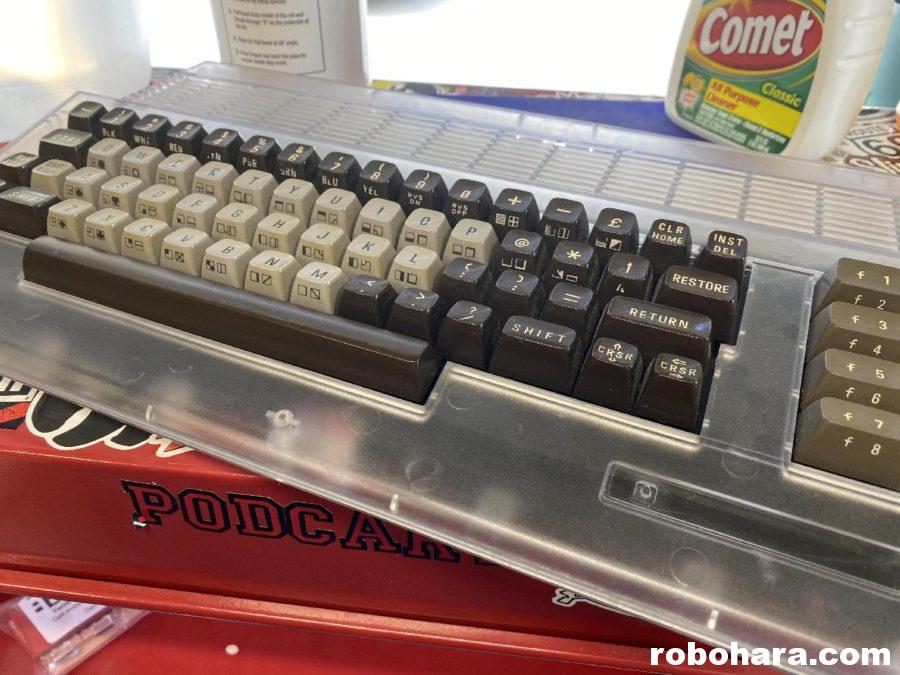
The original Commodore 64 came with brown keys. For a brief period of time, Commodore made a similar computer, the Commodore 16, which came in a black case with grey keys. A few years after the C16 was discontinued, Commodore’s stock of replacement keyboards flooded Radio Shack. Although the two keyboards were not electronically compatible, the keys themselves were. I bought one of those keyboards back in the late 1980s, plucked the gray keys off of it, and swapped them onto my C64. While I’m sure I wasn’t the only person to think of doing this, I’ve never seen another one exactly like it in person.

Unless you paid good money for one, it’s just as easy to swap out a USB keyboard as it is to repair it. That’s not the case with vintage computers, a market that has seen skyrocketing prices over the past several years. A broken Commodore 64 is liable to set you back $50 at this point. Elbow grease, some Google-Fu, and a bit of luck all contribute to keeping these old machines functioning.

With the case separated, the machine spills its guts like a dishonored samurai. Underneath this brown board are a series of contacts. Each key consists of a cap, a post, and a spring. When you depress a key, the bottom of the post makes contact with the circuit board. It’s incredibly simple and incredibly complicated at the same time.
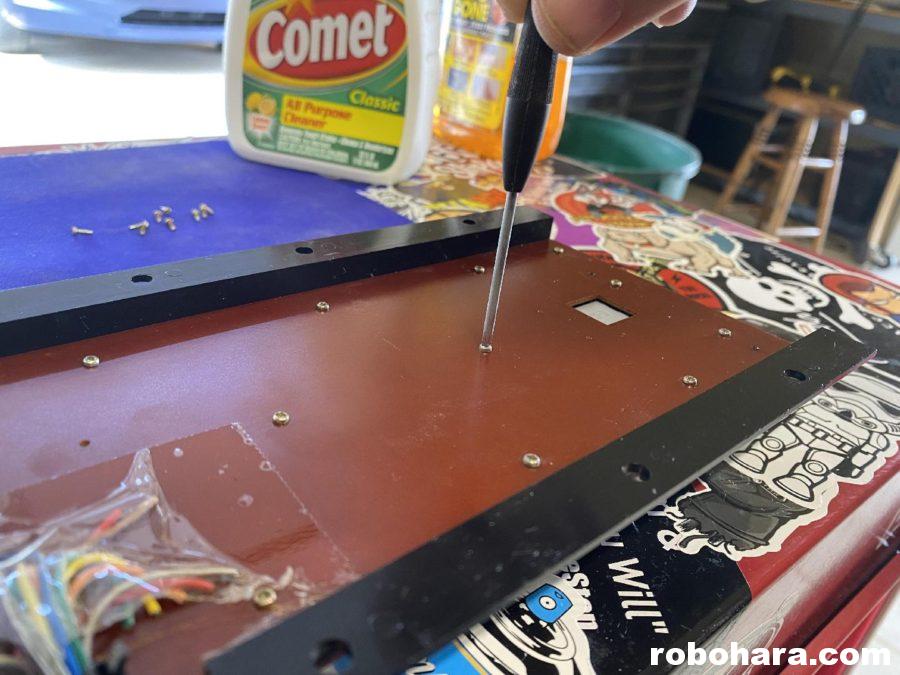
The circuit board is held in place by 23 tiny screws. If it were built today it might have six, or four, or none at all — just some tabs that would break when you tried to remove it. Someone, at some point in history, looked at this circuit board and decided 23 was the perfect amount. There is no shortcut to removing them. A few of them are located under a clear piece of tape. I peeled away the tape trapping those screws 30 years ago. Thanks, younger me.

The “Shift Lock” key (what we now call Caps Lock) was a mechanical key that had metal leads running to it that were originally soldered in place. There are two ways to remove the circuit board. One is to desolder the leads and carefully remove the wires so that they can be reattached. The other is to cut them off and say “to hell with caps lock!” which is apparently what I did when I was a kid. Oh well.
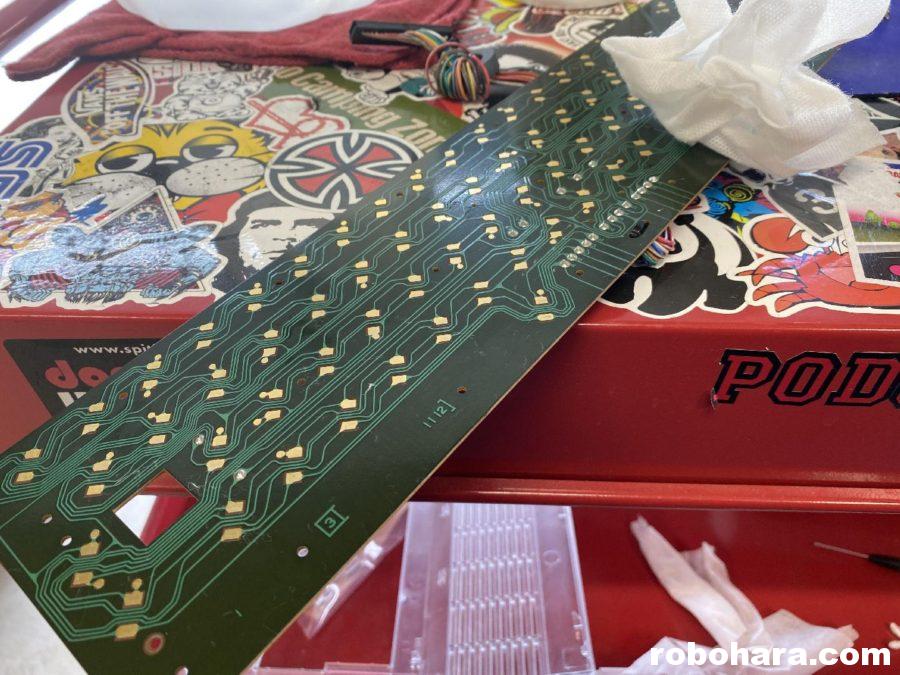
I used a bit of electronics cleaner to clean off the contacts. There are many arguments on the internet as to whether electronics can be safely cleaned with 50% and 70% isopropyl alcohol, or if 91% is required. The last time I cleaned the inside of the keyboard three decades ago, I used 100% spit.

With everything clean and dry, I reassemble the keyboard. As I work my way down the circuit board, I wonder if all 23 of these screws are necessary. Would it work with only 22? 21? 3? By the time I’m done daydreaming, they’ve all been reinstalled.

The old keyboard has been installed in a new case. The new case has three spots for screws, but it also snaps together so I didn’t use any.
Visiting Friends and Barcades

Earlier this week my buddy Robb and his wife Mel flew in from Colorado to celebrate his birthday. The two flew into Arkansas, drove over to Oklahoma to visit me, and eventually returned to Arkansas to visit the Arkadia Retrocade in Fayetteville before returning home. While they were here we ate onion burgers, had Mexican food at Ted’s, and had breakfast at Hatch. We also did some shopping, sight-seeing, and even stopped by Bob Funk’s stable to check out the Clydesdales. I had a great time visiting with Robb and his wife, and I hope they had a good time too.

Tuesday evening, the four of us (Robb, Mel, Susan and I) visited the newest barcade (bar + arcade) in town. Because I’m not trying to put anyone on blast, I’ll just refer to this place as the “Barcade.” Robb and I have both collected arcade games over the years (his worst games were in better condition than my best ones!) and still enjoy classic arcade games, so we were both looking forward to checking the place out.

When we arrived, we were overwhelmed at how awesome the place was. The walls were covered with retro-themed wallpaper, and up near the ceiling more than a dozen televisions were playing classic movies like Labyrinth, Back to the Future, and Robin Hood: Men in Tights. The game selection read like a list of classic “must own” games, a mix of games from the 80s and 90s. Along with all their games, the Barcade also has a small selection of pinball machines along with Skee-ball and a few other machines.

After ordering a couple of drinks at the bar, Robb and I acquired some tokens and began playing games.

On Spy Hunter, the first game Robb played, the “weapons” button didn’t work. On the first machine I tried, Tron, the spinner didn’t work right. From there, we moved upstairs. The next game we played, Super Off Road, had something wrong with the gas pedals and most of the nitro buttons didn’t work. The last two games we played (Tetris and BurgerTime) worked, but both had monitor issues.

The four of us wrapped up the evening chatting while sitting on the Barcade’s outside patio.

Summary: The people were great. The atmosphere was great. The décor was great. The drinks were great. The patio was great. The vibe was great.

And more than half the games we played had issues.

Man, I wanted to like this place. I mean, I did like the place, but retro arcades attract retro gamers, and retro gamers know when things aren’t working right. We had a good visit and a good time, and I might even take a friend there for a drink… but probably not for a round of Spy Hunter.

Buying Time

Saturday morning, the power supply in my home file server died. According to Amazon, the power supply was three-and-a-half years old and already out of warranty. The 486 computer I bought in 1996 still has its original power supply. It seems to me they don’t build things like they used to. Or maybe I’m just old.

My server has all my movies, all my music, and all of my data. I have backups (my backups have backups), but accessing them involves physically moving drives around and isn’t as easy as one might imagine. Because my server also handles services like DHCP and DNS, I was pretty motivated to get things up and running as soon as possible. I checked Best Buy’s website Saturday night and found a power supply listed for $39.99. Sunday morning, when I was ready to purchase it, the price had jumped to $64.99. My options were to pay the full retail price, or order one from Amazon, save ten dollars, and wait a day or two for it to arrive. Begrudgingly, I went with Best Buy.

I used to be better at working with hardware. Over time, technology changed and I didn’t. I didn’t have any problems swapping out power supplies, but I was left with a dozen connectors I didn’t recognize. Much like leaving out a few screws when assembling a set of shelves, they must have been extras. Everything fired up, and the server once again lives.

The way I do things, like maintaining a server with a huge array of hard drives connected to it, is an old way of thinking bordering on outdated. When all of my friends were moving to digital media, I was clinging to my CDs and DVDs. Now that I’ve gone digital, everyone else seems to have moved to cloud storage. Maybe someday I will too. Today, I bought myself a few more years with a $64.99 power supply.

Review: Old Skool USB HDMI Capture Device

I’ve been streaming games on Twitch (twitch.tv/RobOHara) for a few months now, and I am constantly adding software and hardware to my little bag of tricks. One limitation I’ve had is that I haven’t been able to pipe video from real consoles and computers directly into my computer. For a lot of streams emulation is fine, but to show off things like the MiSTer, THEC64, or any of my newer devices that output HDMI, I needed a capture device. Most of the devices I’ve seen for sale cost around $200, which is more than I was willing to spend. Recently I ran across a USB device from Old Skool that claimed it could do the same thing for a tenth of the price. At that price, I had to find out for myself how well it worked.

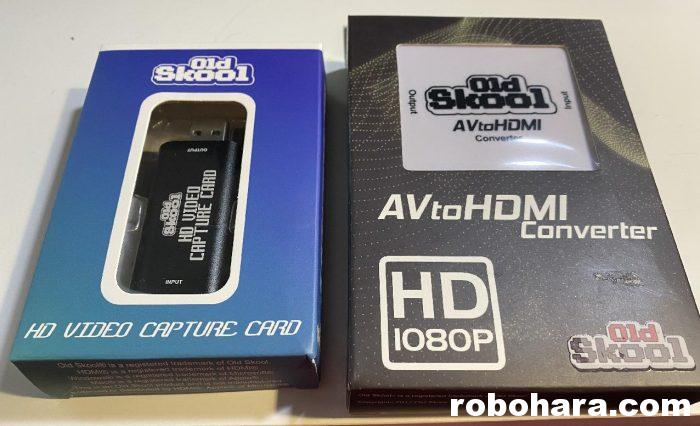
Although Amazon is full of HDMI capture devices in the $20 range, I ordered mine from J2Games.com. It’s no secret that independently owned businesses have been greatly affected by COVID-19, so I was glad to support one with my purchase. J2Games has been in the video game business for many years and a lot of the capture devices on Amazon looked like cheap garbage and had bad reviews, so ordering from J2Games was a no brainer. I ended up purchasing two items: the Old Skool Video Capture Card ($20), and the Old Skool AV-to-HDMI adapter ($20). I got my package in three days and even got free shipping on my order so, win/win.

Old Skool Video Capture Card

As far as I know, the primary (only?) reason for purchasing Old Skool’s HD Video Capture device is for capturing video from HDMI devices, which is how I’m using it and the scope of this review. The device is about the same length but slightly thicker than your average USB memory stick. The only other obvious difference is the HDMI port in the end of the device. Installation consisted of inserting the device into a USB port on my computer. Windows 10 instantly recognized the device, and that was that. Because my PC’s tower sits on the floor, I plugged the device into a USB hub, and had zero issues.

I use OBS to capture video and stream, so my first test was to see how difficult Old Skool’s capture device would be to set up inside OBS. I am glad to report that OBS instantly recognized the device as a Video Capture Device, so once I added that along with an Audio Capture Device to my OBS setup. For my first test I connected an HDMI cable from my THEC64 to the capture device, and the audio and video instantly appeared in OBS.

Not only did the audio and video appear, but I was surprised that the lag time was low enough for me to actually play games while monitoring the video in OBS. That is not to say there was no lag at all, but I was running THEC64 HDMI out into Old Skool’s USB device, which was plugged into a USB hub, which was routing the video into another program (OBS). The other caveat I’d offer is that I was playing Commodore 64 games. newer, faster games that require exact timing may not work as well. As for me, I was able to play a few rounds of Paradroid and Lode Runner with no problems.

In Amazon reviews of cheaper Chinese models, I saw several complains about these devices getting hot (as in, too hot to touch). I captured video with the Old Skool device for over an hour and did not detect any significant heat. While slightly warm to the touch, I have several USB sticks that get much hotter under normal use.

Since my initial test I also connected my PlayStation Mini console and my MiSTer to the Old Skool capture device, with the same results. The thing just works. PC installation time was around five seconds, and I had audio and video showing up inside OBS Studio within five minutes. I am not naïve enough to think that a $20 capture card is providing the same quality that a $200 (or more) device provides; that being said, I’ll let the video below speak for itself.

Old Skool AV-to-HDMI Adapter

Unlike their capture card, I can think of two distinct uses for Old Skool’s AV-to-HDMI Adapter. First, it can be used as a way to connect old school computers or video game consoles with composite (RCA-style) output into a television that only has HDMI inputs. As someone who recently purchased a 32″ flat screen television for his game room, I can tell you that out of the five or six televisions Sam’s Club had on display, only one of them had a composite input. The other obvious use for the Old Skool AV-to-HDMI Adapter is coupling it with Old Skool’s HDMI Capture Card, allowing the capture of RCA audio and video in OBS.

There are a couple of things to know about this adapter. The first is that it requires USB power. Inside the box you’ll find a USB cable, but you’ll need somewhere to plug it in. If you’re using the device on your computer you can plug it into a USB port to provide power, but if you’re using it in combination with the HDMI capture card, now you’ll be tying up two USB ports instead of one. If you’re using the adapter as a television input and your TV has a spare USB port, you can steal power from there. If neither of those options are available to you, you’ll need to provide your own power adapter for the USB cable to plug into. The other thing to take note of us that there’s a manual switch on the side of the device to switch between 720p and 1080p outputs. This is a setting you’ll probably only need to set once.

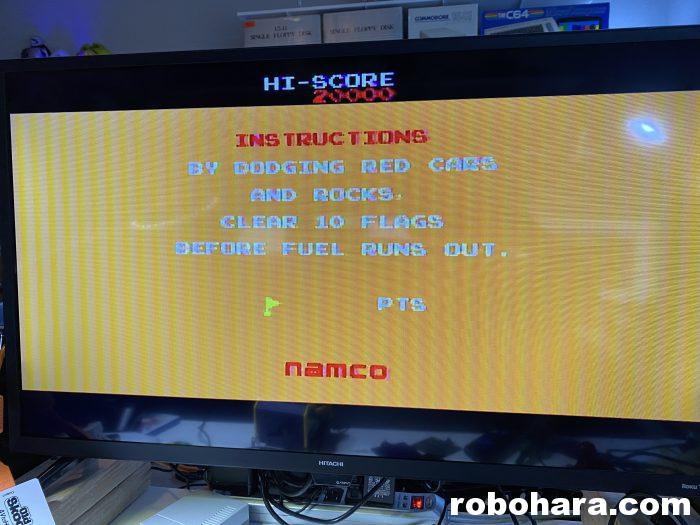
To test the adapter, I connected it to my new 32″ television and pulled out all my All-in-One joysticks from Jakks Pacific and TV Games. I tried multiple joysticks, and the results were… not great.

There are two issues with the video produced by the adapter, and I’m not sure which is worst. First is the weird vertical banding that is introduced by the device. It doesn’t make games unplayable, but it’s very noticeable. The other issue is the fact that the video is stretched to fit the screen. Given the fac that Almost anything you would connect via composite video would be in 4:3 format, it’s surprising that there’s not a hardware toggle on the device itself to switch between 4:3 and 16:9. I also learned that my new television does not have a manual way to adjust aspect ratios, so I was stuck with a stretched out picture. (The television’s built-in composite input correctly resized the input to 4:3.)

For a second test, I paired the AV adapter with the HDMI capture card. I ended up with the same results in OBS Studio: distorted vertical bands running through the screen, and a stretched picture. I could not find a way to resize the video source in OBS.

Summary

Old Skool Video Capture Card: This little capture card is worth every bit of its $20 price tag, and then some. Installation was quick and painless, and the quality was everything I expected. I’m sure $200 solutions do more, but I can’t imagine what.

Link: J2Games

>Old Skool AV-to-HDMI Adapter: Works if you have no other way to get composite input into an HDMI device, but the results are stretched to fit widescreen, and some distortion is introduced. Games are playable, but the quality isn’t perfect.

Link: J2Games

Finally, here is a quick video demonstrating the quality of the HDMI capture card.

A New Toy Enters the Ring: The MiSTer

After waiting almost a year, I finally decided to buy a MiSTer FPGA computer. If talk of cutting edge FPGA computers doesn’t interest you, I’ll spare you — it’s okay to skip this entry.

FPGA (Field Programmable Gate Array) computers are fascinating little devices. Most computers contain CPUs with their code permanently etched into them. An FPGA has no code of its own; instead, “cores” are flashed into the chip. Imagine a magical car that could instantly change from a van to an SUV to a sports car with the press of a button — and that every day, people out there were creating new car models that could be downloaded and used for free. That’s kind of what FPGA computers are like.

You may be familiar with emulators — software that allow computers to run programs or play games written for other computers or game consoles. FPGA computers are similar, but under the hood there’s a big difference. Technically, emulators translate software to run on different platforms, while FPGA computers simulate the original hardware. While a layperson might look at both systems and say, “huh, they both play Super Mario Bros.,” the difference between the two has led to aggressive shouting matches between nerds.

I bought my MiST, the predecessor to the MiSTer, back in 2013. Originally the MiST was designed to run Amiga and Atari ST cores, which is where the name came from (A”mi”ga, Atari “ST”). By the time I bought mine, developers were alread writing and porting cores from other systems to the MiST as well. The cut off of what the MiST can simulate falls somewhere between 16-Bit and 32-Bit systems. It has no problem with 8-Bit computers or consoles, but consoles such as the original PlayStation and Nintendo 64 are beyond its capabilities. The original MiST’s design is also on par with other small systems of the early 2010s — it has VGA output, a limited amount of RAM, and no (out of the box) network capabilities.

One look at the MiSTer and a person can see how far the technology has advanced in almost a decade. Right off the bat, the MiSTer has been built using off-the-shelf hardware. Not only is the MiSTer more powerful than the original, but the motherboard itself is about 1/3 the price of the original. Don’t worry, though — with the addition of a USB hub, 128MB of RAM, and a third digital I/O board, I managed to drive the price up to almost what I paid for the original MiSTer. (The addition of a case would have pushed it past the $400 mark. I’ll be 3D printing one of my own, instead.) The MiSTer also has a built in ethernet port, and supports WiFi and Bluetooth dongles.

A larger FPGA combined with the addition of more RAM allows the MiSTer to play a few more cores that the original MiSTer could not (see: Neo Geo), although that’s not the biggest difference between the two. The biggest difference is that most of the people developing, maintaining, and improving the cores have moved to the MiSTer. If you’re content with what the MiST currently runs, it’s still not a bad deal (and I’ll be selling mine soon!). But if you want to play newer systems or want to be on the cutting edge, the MiSTer is the way to go.

Vacation Project: Movies to Google Sheets

For the past five years, I’ve been tracking every movie I watch, every television show I watch, and every book I read. I set a few parameters for myself when I started — I only track movies I watch from start to finish, entire seasons of television shows, and books I finish. I don’t track sporting events like basketball and football games or individual episodes of television shows I catch while couch surfing.

I’ve been keeping the list on a standard webpage and I’ve been doing the HTML code by hand. Not only has the page become a long unmanageable mess, but it doesn’t lean itself to easy data analysis. I can’t easily count or sort movies with a static list.

Early this morning, I spent several hours importing the list into a Google Sheets. Each line of the spreadsheet tracks the year, the order, the category, the title, the year the movie/show/book was created, whether or not I’ve seen it before, and a very short one line comment. Not all of the fields are populated; I’m working on it.

Google Sheets includes code that allows you to insert a sheet into a standard website. I’ve replaced the old list with the sheet. Every time I update the sheet, the page updates in real time. Ain’t technology somethin’. Also, now that the data’s in a spreadsheet, I can sort it any number of ways. I can easily find the oldest movie I watched this year.

I did all of this while meeting my other goal, which was to go 24 hours without wearing pants on my vacation. Check, and check.

At the end of each year I write a summary of that year’s consumption. I’ll be doing that sometime after Christmas but before New Year’s. This spreadsheet will make it easier to do.

Link: Media List 2020

Can You Go Back? A Look at the THEC64 Maxi

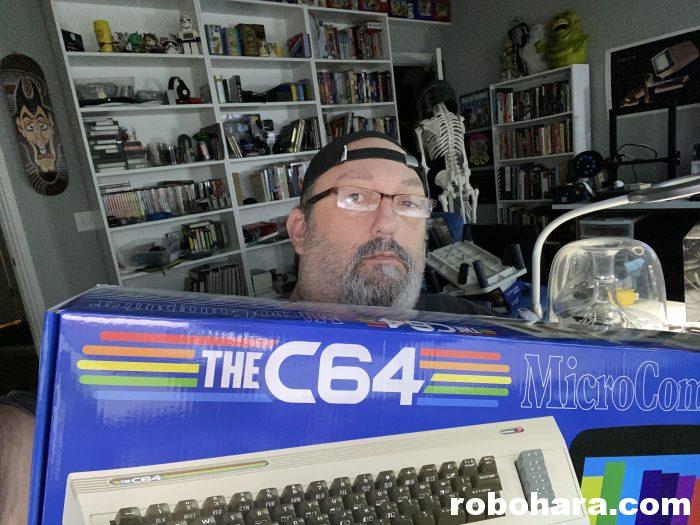
Late last week my newest computer, THEC64, arrived. I’m not in the business of buying things for myself this close to Christmas, but this was a computer I pre-ordered back in August. After multiple production and shipping delays, the machine finally found its way to me the first week of December.

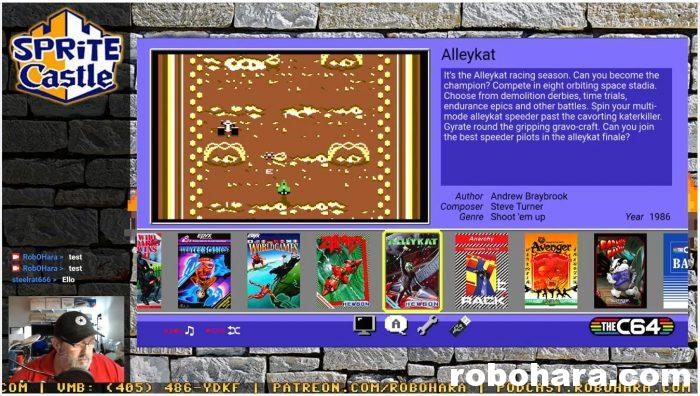
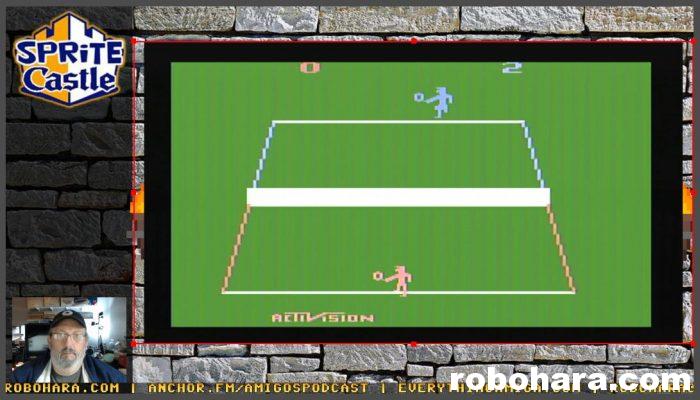
Most people know I’ve been a fan of Commodore computers, and specifically the Commodore 64, since the mid-1980s. I’m still a fan of the computer today; I’ve written two books about my experiences with the computer (Commodork and Commodorkier), and record a podcast called Sprite Castle where I play, discuss, and review Commodore 64 games.

For many years, it hasn’t been necessary to own a real Commodore 64 to enjoy Commodore games. There are free emulators for every platform imaginable, which allow hobbyists to play C64 games on personal computers and consoles. There are several other alternatives as well: I own an Ultimate 64, a MiST FPGA, and a BMC64 setup, three Commodore solutions that in many ways are more convenient and arguably better than owning and using the original software.

Which begs the questions: what is THEC64, why did I buy one, and should you?

In 2018, Retro Games released THEC64 Mini, a miniature Commodore 64 with sixty-four built in games. The system, about 1/4 the size of a real Commodore 64, was meant to compete with similar miniature consoles like the miniature NES, SNES, and Sega Genesis. Unlike those systems, which added layers of security designed to prevent gamers from modifying the system and adding additional games (ROMs), the THEC64 Mini embraced openness by building in a simple way for owners to add their own games to the system. Nearly any Commodore game imaginable could be downloaded, saved to a USB stick, and played on the system.

The new THEC64 (sometimes referred to as THEC64 Maxi) is, more or less, a 1:1 scale version of the original C64. Like the Mini, the Maxi comes with sixty-four built in games, but this one also has a fully functional keyboard.

From the front, THEC64 could pass for the original. It’s only after looking at the ports on the rear and side of the new machine that you can spot the differences. Unlike the original which sported a user port, a cartridge port, a cassette port, and multiple connectors for video and serial accessories, the rear of the THEC64 is a sea of beige save for three tiny ports: USB, mini USB (for power), and HDMI. Replacing the original’s joystick ports on the side are three more USB ports and a soft power button. THEC64 comes with a USB joystick that includes multiple buttons to save players from constantly having to hit keys on the keyboard. Retro Games has revised the joystick since the release of the Mini. That one sucked; this one’s passable.

THEC64’s biggest selling point is the low cost of entry. For just over a hundred dollars, you get everything you need to get started. Simply plug the computer into the wall using the included USB cord (with adapter), connect the HDMI cable to your television, plug in the USB joystick, and you’re ready to go. Of the sixty four games included, a third were relatively popular, a third will be recognized by more dedicated fans of the system, and a third are downright obscure. The ones I immediately recognized were Boulder Dash, California Games, Gateway to Apshai, Impossible Mission I and II, Jumpman, Paradroid, Pitstop II, Street Sports Baseball and Basketball, Summer Games II, Super Cycle, Sword of Fargoal, Temple of Apshai, Uridium, Who Dares Wins II, Winter Games, and World Games..

From the same menu, users can drop directly into BASIC. In this mode, you can write programs and even save them to virtual floppy disks on a USB stick. You can also switch the machine into a VIC-20, the predecessor to the Commodore 64.

Commodore 64 disk images (in .D64 format) can also be loaded from USB. This takes the system’s library from sixty four games to tens of thousands. Literally every Commodore 64 game you can recall can be found using Google, and 99.9% of them work on THEC64. The functional keyboard even allows users to play text adventures and role playing games. With THEC64, there’s no need for physical floppy disks, cassettes, and cartridges. Everything is read from a USB stick (that you provide).

For casual gamers looking to quickly scratch a nostalgic retrogaming itch, THEC64 is likely to meet their needs. That being said, true hobbyists and discerning fans of the system may end up wanting more. THEC64, like most emulators, trades authenticity for convenience. The emulation is close, but not perfect. The machine also lacks the physical connections required to connect vintage accessories like disk drives and vintage joysticks to the system. It also lacks any online capabilities, if that’s your thing.

For anyone who owned (or was friends with someone who owned) a Commodore 64 for a few years back in the 1980s and wants to revisit some 8-bit memories, the THEC64 Maxi will probably meet those needs. The sixty four included games may be enough for some people. While I would be a little hesitant to let children use some of my vintage computers, I would have no qualms with hooking this thing up to the family television and letting kids (or drunken friends) bang away on it. While emulation is free, it can also be complicated. THEC64 is intended for people who want a slice of nostalgic pie, not for those wanting to set up their own bakery.

Ultimate 64 Assembled

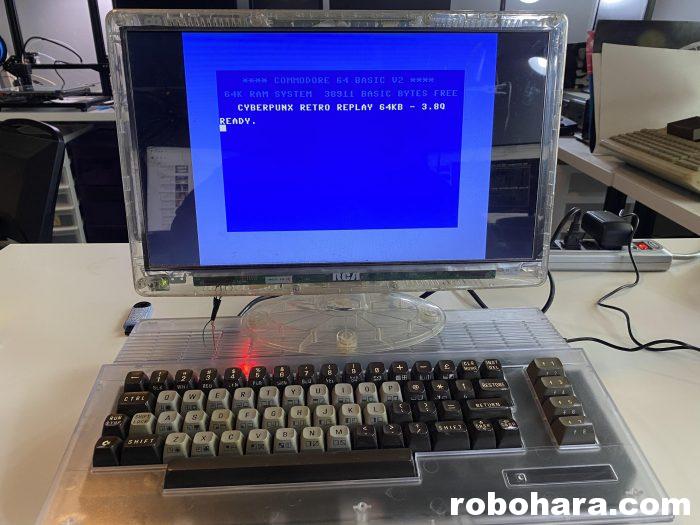
Ultimate 64 with clear case, clear monitor, Commodore

After an extroidinarily long period of procrastination, I got my Ultimate 64 up and running over the weekend.

The Ultimate 64 is a drop-in motherboard replacement for the original Commodore 64. Not only does it retain most of the original’s ports (joystick, cartridge, video, and serial) but it adds USB, ethernet, and HDMI output to a nearly 40-year-old computer. The USB ports allow modern joysticks to be used and games to be loaded directly from a USB stick, eliminating the need for a physical disk drive. The ethernet port can be used to connect to BBSes hosted on the internet, or control the device. The addition of HDMI obviously allows the computer to to be connected to modern monitors.

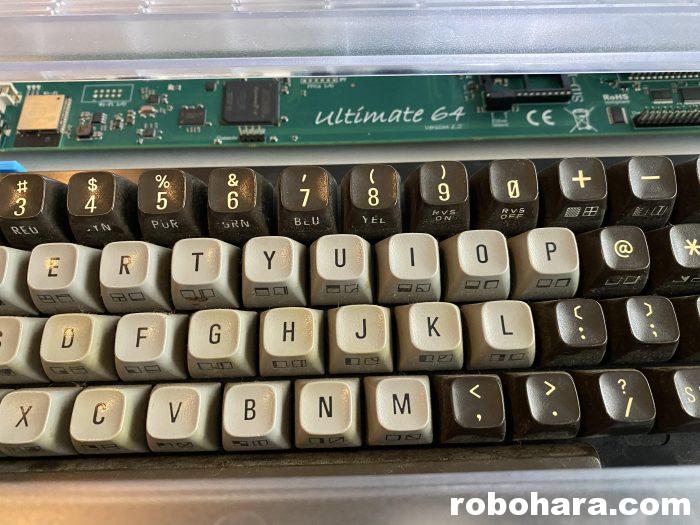
The Ultimate 64 only comes with a motherboard; owners have to provide their own “donor system” to house the device. Several years ago I purchased a bunch of Commodore 64 cases through Kickstarter (including this clear one) which I used, but I still needed the actual keys. In the late 80s, I built a custom Commodore 64 keyboard by mixing and matching brown C64 keys with gray ones from a C16 replacement keyboard I found at Radio Shack. I don’t remember why I disassembled that machine (maybe it died) but I’ve had the keyboard stored away in a box “just in case I need it” since sometime around 1990. 30 years later, I finally needed it. (It ain’t hoarding if it’s useful!) It feels a little weird to type on the same keys I used 35 years ago.

To match the clear case, I pulled out a clear monitor I’ve been saving for just this occasion. I own two clear computer monitors, purchased at separate garage sales. If you’ve never seen or heard of a clear television before, you’re probably a good person. Clear televisions are most commonly found in prisons; the clear plastic makes it difficult for prisoners to hide contraband inside them. I have two, one CRT and one flat screen, and if you were to purchase one new they are unreasonably expensive compared to traditional monitors. The flat screen one I’m using is a 15″ model that sells on Amazon for $150 (you couldn’t give away a traditional old 15″ flat screen monitor). It’s part of the prison racket; prisoners are forced to buy these see-through electronics through the prison system at an exorbitant markup (which traditionally means their families pay for them). Once they leave prison they can take the electronics with them, but if they ever return, they cannot take them back inside and must purchase new electronics. Typically once purchased they tend to stay inside the prison system, which is why it’s so rare to run across them on the outside. I’ve only run across two of them for sale in my entire life, and I own them both.

My Ultimate 64 build isn’t finished. The main problem I’m having is the keyboard’s keys are stiff and partially non-responsive. A friend of mine is shipping me his dead Commodore 64 so that I can salvage the keyboard from it. In the meantime I was planning to disassemble this one and give it a thorough cleaning, but I ran out of weekend before I ran out of projects. Maybe one day this week after work I’ll find some time.

There are dozens of ways to enjoy the Commodore 64 today, from inexpensive models such as the Commodore 64 Mini and TheC64, to homebrew applications like BMC64 (a Commodore system that runs on a Raspberry Pi) to expensive FPGA implementations like the MiSTer and the Ultimate 64. The flooded market is the opposite of a problem; there are solutions for every price point, and the number of solutions points to both how popular the Commodore 64 was, and how active its fan base is to this day.

Pushing Projects Forward

I can’t remember if I mentioned this or not — I can’t remember anything, anymore — but my 3D printer wasn’t working properly for a while. It was working okay, but not great. Everything I printed was coming out with a weird, rough finish. For the longest time I thought there was something wrong with my printer, but after doing a bunch of online research I narrowed the issue down to a single software setting. Literally, checking a single box in the software fixed the issue.

I bought an Ultimate 64 over a year ago. The Ultimate 64 is a modern replacement motheboard for the old Commodore 64 computer. I bought a new case to install the new motherboard in, and discovered that it required some additional plastic brackets for everything to fit together. The brackets can be purchased, or 3D printed… if you have a working 3D printer. For a while, I didn’t have a working 3D printer. By the time the printer was working, I had torn down my office to install new tables. The takeaway here is that I spent a lot of money on a project that’s been collecting dust for over a year.

it’s ironic how during the pandemic I have nothing but time and yet seem to get very little done. Setting up my office should have taken a weekend; it’s taken me a month. Lately it seems like nothing is a priority. I’m spending a lot of my spare time working on podcasts and videos, and not wanting to work on much else.

Susan is participating in an online Girl Scout meeting this weekend. Saturday, she was online for twelve hours, from 10 a.m. until 10 p.m. That gave me some guilt-free time to organize, clean, and do some 3D printing. I know I’ll feel better and enjoy these projects after they are finished, so I’ll keep pushing forward until they are done.

Home Office Coming Together

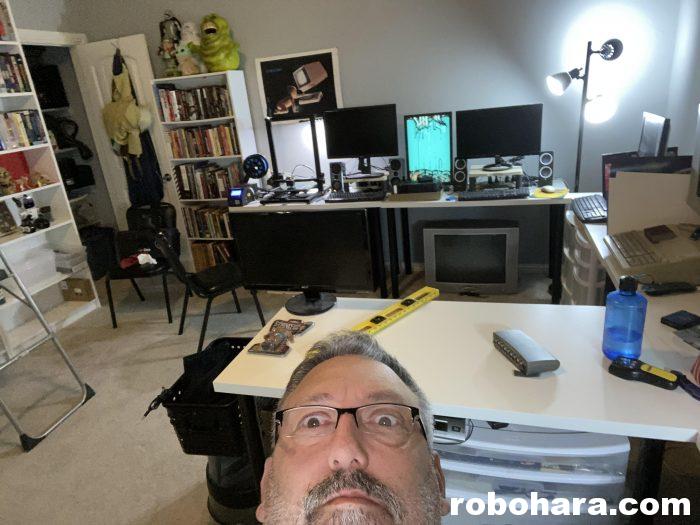
Slowly, one piece at a time, my home office is coming together.

When I first moved into my new office, I lined the walls with white plastic indoor/outdoor tables. It wasn’t what I wanted, but it’s what I had on hand at the time. Susan suggested I buy some white table tops and matching legs from Ikea, but I didn’t want to do that. I wanted to make my own tables out of plywood… and then didn’t do it. Two months later, Susan wanted to make a trip to Ikea for her own office needs, and while we were there she talked me into buying the white table tops. She suggested I buy the legs at the same time, but I didn’t want to do that, either. I told her I would build legs for the table tops when I got home… and then didn’t do it. After another month, I ended up ordering the legs online.

I could have been done with this project four months ago if I had just listened to Susan.

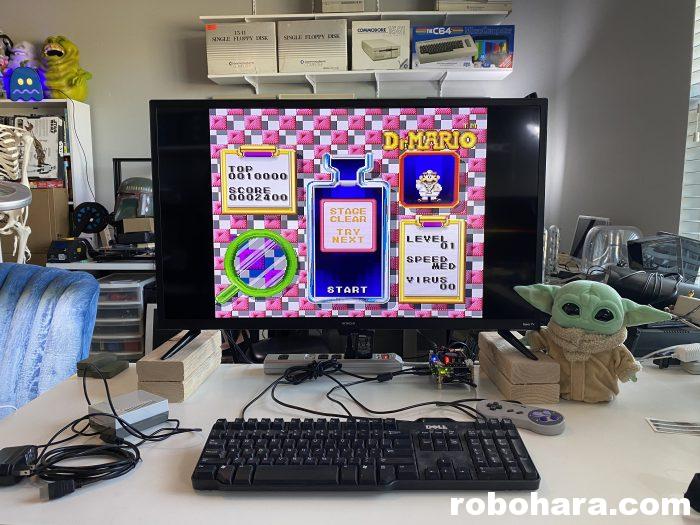
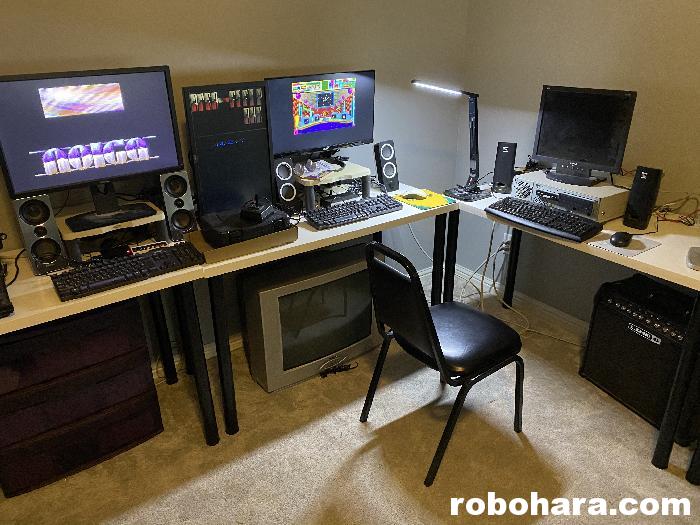
The tables are laid out like a letter “M”, and the left side of the room I’ll be dedicating to old computers. Right now I’ve got a Raspberry Pi acting as my Commodore 64, PyANS (another Raspberry Pi that displays ancient BBS ANSI artwork), my MiST FPGA machine (currently configured as an Amiga), and my old DOS machine (486 DX4/100). The last piece of the puzzle was a PS/2 keyboard, which my sister was able to provide after digging through some old piles of hardware.

The right hand side is a bit more serious, with my main workstation and my work laptop. I’m not 100% sure what I’ll put on the island that juts out. It would be nice to have a clean, flat surface for working on occasional projects, although I know I have a tendencies to turn clean, flat surfaces into piles of odds and ends very quickly.

The old computer display/selection is not complete. This weekend, I’ll be replacing the Raspberry Pi C64 setup with my original vintage C64. I also need to break out my Apple //e and get it set up. When we moved into this house I made a commitment to myself that whatever I didn’t have room for and/or wasn’t going to enjoy, I would get rid of. I will be putting that commitment to the test very soon.