Category Archives: Raspberry Pi

PosterPi (Raspberry Pi-based Digital Poster/Picture Display)

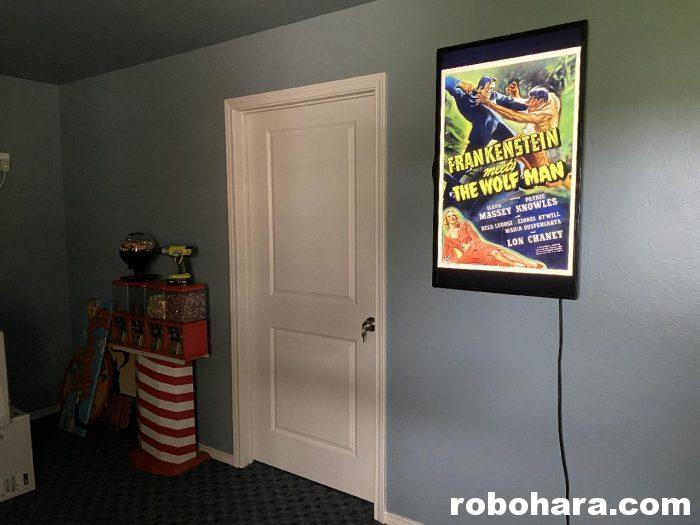
PosterPi is a solution I created for turning a flat screen television into a virtual poster display. The script was written in Bash for Linux and designed to run on a Raspberry Pi. Although I designed PosterPi to display pictures of movie posters, it could easily be modified to display digital pictures, digital signage, or just about anything else.

Once PosterPi is set up, it should automatically boot up, launch the script, read a list of posters (digital pictures) from a predetermined location, and begin displaying them in random order. My intention was for the entire process to begin without human interaction once the Raspberry Pi was powered on.

In this post, I will walk through how I created PosterPi. Feel free to use my solution exactly as it appears, or modify it any way you see fit. If you already have a Raspberry Pi loaded with Raspian Lite, you should be able to set up PosterPi in less than an hour.

01. WHY I CREATED POSTERPI
02. IT WOULD HAVE BEEN BETTER IF YOU HAD…
03. MATERIALS
04. RASPBERRY PI CONFIGURATION
05. CREATE A FOLDER FOR YOUR POSTERS
06. POSTERPI.SH
07. FINAL STEPS
08. RANDOM THOUGHTS

01. WHY I CREATED POSTERPI

When I began planning my home theater, I thought it would be neat to have movie posters hanging outside the room in a theater-quality poster frame. Some quick research revealed that theater-quality poster frames and authentic movie posters are pretty expensive. Additionally, the thought of buying, storing, and rotating physical posters in and out of the frame didn’t sound like much fun to me. Instead, I came up with the idea of using a flat screen television instead of a physical picture frame to display movie posters.

02. IT WOULD HAVE BEEN BETTER IF YOU HAD…

There are a bazillion different ways to display digital images on a television. In fact, most modern televisions have the ability to display pictures right from a USB stick, and some even have the ability to create slideshows from those pictures. Unfortunately not all televisions (and no computer monitors) have this feature built in, the features vary between models and manufacturers, and they usually aren’t very configurable. I wanted the ability to add and remove posters remotely from my desktop, control the speed at which the posters changed, and a solution that would work with any television. That is why I decided to use a Raspberry Pi to run PosterPi. I am not presenting this as the best solution or pretending that it is the only solution, merely as the solution I came up with.

03. MATERIALS

To get PosterPi up and running, all you need is a Raspberry Pi, a television, and some digital pictures.

— Raspberry Pi: I used a Raspberry Pi 3B for this project, because that was what I had available. PosterPi requires minimal processing power, and I’m sure older models or less expensive models like the Nano can handle running it.

— Television: The standard size of a poster is 24″ x 36″, which (according to Pythagoras) has a corner-to-corner measurement of 43.4″. One-Sheet movie posters are typically 27″ x 40″, with a diagonal stretch of 48.25″. If you are tying to display posters close to their actual size, you should use a 42″ to 50″ television. HD televisions in this range can be found new for $200 or less, and used models can be often be found for half that or less. Before purchasing a display, make sure that the model is designed to be mounted vertically (portrait mode). Some televisions, due to mounting holes and heating/venting issues, are not designed to be hung vertically. Additionally, make sure any wall television mount you purchase is designed to hold a television vertically, as not all are. I only wrote the code for PosterPi — safely mounting your television is your responsibility.

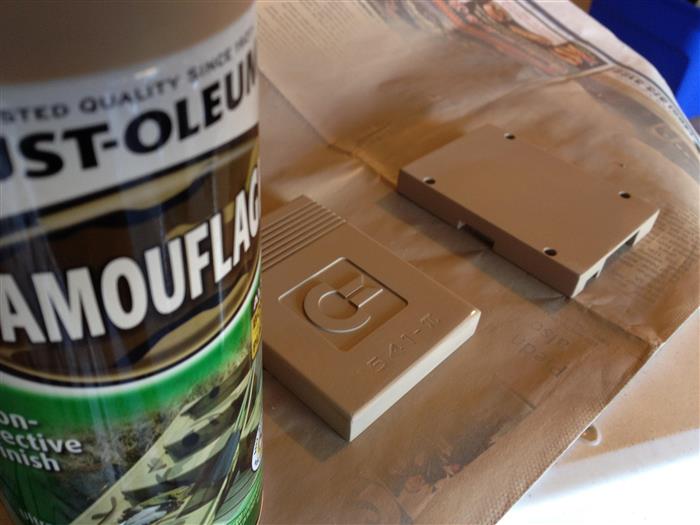
— Movie Posters: There are literally hundreds of websites where movie posters can be downloaded. The trick is finding poster images that aren’t watermarked and are large enough to display without distortion. I downloaded a lot of my posters from JoBlo.com and FFF Movie Posters, and found many others through Google Image Search by setting the desired image search to large. For those who torrent there are a few large collections of movie posters available in the usual places, although keep in mind that by downloading 50,000 movie posters in a single zip file, you’ll be spending several hours weeding out all the ones you don’t want.

04. RASPBERRY PI CONFIGURATION

01. Load Raspian (Lite). You do not need a GUI desktop environment for this project

02. Rename the password on the default Pi account (always a good idea)
— type sudo passwd pi to change the password for the default account named “pi”

03. Verify networking (either wired or wireless) is working

04. Enable auto login in raspi-config so PosterPi can automatically start
How to Enable Auto Login

05. To access the Pi remotely, enable SSH in raspi-config

06. Disable screen blanking so that the Raspberry Pi’s display doesn’t go to sleep
— type sudo nano /boot/cmdline.txt
— verify that the following line exists: consoleblank=0
— if the line does not exist, add it

07. Install FBI (a free command line picture viewer)
— type sudo apt-get install fbi

08. Rotate the display on the Raspberry Pi.
— type sudo nano /boot/config.txt
— Change display_rotate=0 to 1, 2, or 3 depending on which way your display is rotated
—- display_rotate=1 (this will rotate your display 90 degrees)
—- display_rotate=2 (this will rotate your display 180 degrees)
—- display_rotate=3 (this will rotate your display 270 degrees)
— If there is no entry for “display_rotate”, you can add it

05. CREATE A FOLDER FOR YOUR POSTERS

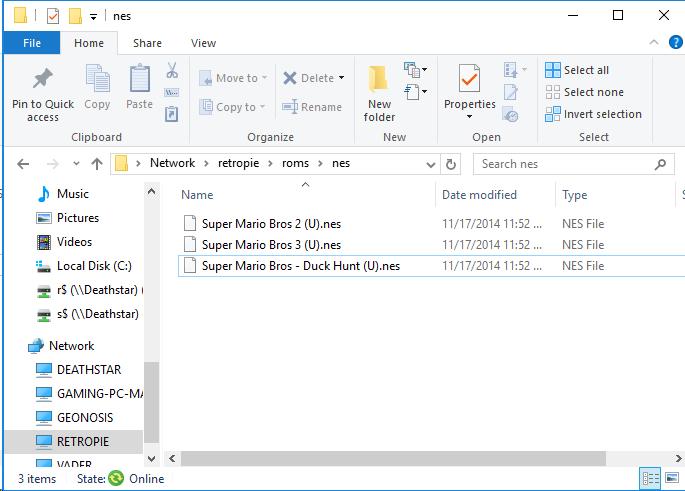
There are three location/sources I can think of for storing movie posters and/or images: locally (on the Raspberry Pi’s SD card), a network share, and on a USB stick. PosterPi is only designed to use one poster source, although it could be tweaked to support more than one.

01. Storing Images Locally on the Raspberry Pi’s SD card (easiest)

This is by far the simplest solution. Create a folder (mine is called Posters) in your home directory. Copy all your posters to this folder. The end. If you previously set up SSH, you should be able to use something like WinSCP to connect to your Raspberry Pi over the network and upload/update your posters remotely without having to remove the SD card. You can add or remove posters while the script is running. The list is updated each time the script runs.

02. Storing Images Remotely on a Windows Share (advanced)

If you want to stream your posters from a Windows server, you will need to create an account for the Raspberry Pi, share the folder, and grant the account permission to the share (I recommend read only permissions). The easiest way to connect to the share is by using your host’s IP address. This method assumes you have a working knowledge of your home network. After creating the share and account on your Windows machine:

— Install the necessary samba/smb tools
—- type sudo apt-get install samba-common smbclient samba-common-bin smbclient cifs-utils
— Create a mount point for your posters
—- type sudo mkdir /mnt/PosterPi
— Set up the mount point manually to make sure everything is working.
—- type sudo mount -t cifs -o username=USERNAME,password=PASSWORD //IP/SHARE /mnt/PosterPi
—— USERNAME is the name of the Windows account
—— PASSWORD is the password of the Windows account
—— IP is the IP address of the machine with the poster share
—— SHARE is the name of the share
— To mount the share automatically each time the Raspberry Pi boots
—- type sudo nano /etc/fstab and add the following line at the end:
—- //IP/SHARE /mnt/PosterPi cifs defaults,username=USERNAME,password=PASSWORD,domain=DOMAIN 0 0
—- As before, change IP, SHARE, USERNAME, PASSWORD, and DOMAIN to match your local network

03. Storing Images on a USB Stick

Images can also be stored on a USB stick. If the Raspberry Pi is not going to be connected to a network, this is a simple way to add and remove posters to PosterPi. I have not personally run PosterPi in this manner, but here is a general overview:
— Install usbmount (Instructions)
—- The link above includes instructions on creating a mount point that points to the USB stick. Create a mount point called PosterPi or Posters and remember what it is because you’ll need to point to it in PosterPi.sh

06. POSTERPI.SH

Here are the contents of the actual PosterPi.sh script. You can either cut and paste the contents of this script into a file on your workstation and copy the file over to your Raspberry Pi, or you can use NANO and either type or paste the contents of the script directly into the file and save it.

#!/bin/bash

#Start Loop Process
while true; do

#Delete old files
rm /home/pi/PosterPi.txt
rm /home/pi/PosterPi.tmp

#Find all files, inc subdirs, add to PosterPi.txt
find /home/pi/Posters -name "*.*" > /home/pi/PosterPi.txt

#Shuffle first 50k lines, write to PosterPi.tmp
shuf -n 50000 /home/pi/PosterPi.txt > PosterPi.tmp

#Launch FBI viewer, read from PosterPi.tmp
fbi -a -1 -t 5 --noverbose -l /home/pi/PosterPi.tmp

#When FBI reaches the end of the list, begin again.
clear
done

Walking through the script:
— PosterPi.sh begins with an infinite loop that reads through a text file full of images. When it reaches the end of the text file, the script restarts. Each time it restarts it regenerates and reshuffles the list of images
— The script removes two temporary files: PosterPi.txt and PosterPi.tmp
— The script uses FIND to search your poster folder for all files that contain a period (this is a cheap way to exclude lines that only folder names and no file names) and writes it to a file called PosterPi.txt
— The shuf command takes the first n amount of entries (I set it to 50,000) in PosterPi.txt, randomly shuffles them, and writes them to a temporary file (PosterPi.tmp). There are a lot of different ways to skin this cat; this is just the one I chose
— FBI reads the files from the temporary file (which should be all of your posters, now in random order) and displays them. FBI has a lot of different switches available so feel free to experiment. Note that in the above example I have set the time (-t) between pictures to be 5 seconds. This is a good setting to make sure the script is working and cycling through your pictures. Once you have everything working, you will probably want to increase this value.

Remember that the file list is built (and randomized) each time the script runs. If you want to add or remove images, just place them in your folder. The next time the script runs, it’ll add them to its list. If you want to force an update, reboot the Pi.

07. FINAL STEPS

With these final steps in place, every time your Raspberry Pi is turned on it should automatically log in and run PosterPi.

01. Make PosterPi.sh executable
— type sudo chmod 755 ./PosterPi.sh

02. Make PosterPi.sh run automatically
— Change to your home directory by typing cd ~
— type sudo nano .bashrc
— add a line to the end of the file that reads ./PosterPi.sh

08. RANDOM THOUGHTS

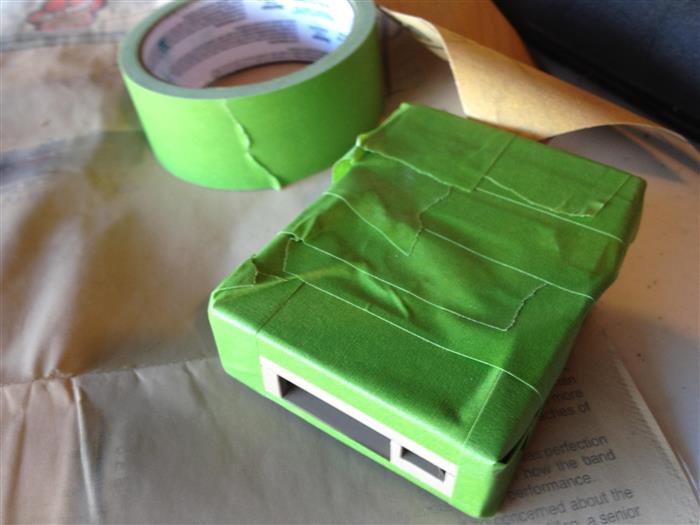
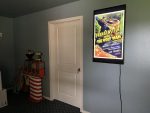
— There are lots of different ways to decorate your new digital poster frame. You could build a wooden frame to surround your television, or make one out of foam core. If you are going to add a frame, make sure that you cut holes for ventilation, especially in the top (heat rises). You could surround the frame with flashing lights, or add a strip of LED backlighting. I added LED backlights to mine, and plan to add a small “NOW PLAYING” sign mounted at the top.

— One thing I have considered doing is grouping my movie posters into different folders based on genre (sci-fi, horror, comedy) and then rotating them in and out as needed. You could store these in separate folders just above your media folder, and drop/drag then into the shared folder as desired.

— It is easier to mount a Raspberry Pi and sticky LED light strips when the television is off the wall. Just sayin’.

— On my first attempt, I added every poster I could find. Each time I walked past the television, I found myself waiting for “a good one.” I have since changed my approach. My personal setup now contains approximately 700 posters, and all of them are “good ones” to me, meaning every one is of a movie I enjoyed and have seen multiple times.

— Be sure to explore the settings on your television. I was able to greatly improve the overall effect by slightly turning down the brightness, for example. My television also contains setting to ensure pictures display in the proper aspect ratio, and centered in the screen.

— I played with the idea of changing the poster on the screen to whatever movie I was watching at the time. This was relatively easy to do when I was using Windows as my media player. (Find the matching movie poster, replace the list on PosterPi with only that picture, etc.) Kodi supports Python scripts and could potentially do this, but when I realized I would be inside the theater and never know if it worked or not, I gave up.

That’s it! If you set up your own PosterPi or have any feedback on this tutorial, please let me know!

Parting with Old Computers (It’s Dead, Jim)

Last weekend, I threw away a computer.

I threw away a computer that I’ve been hanging on to for at least a decade. And the funny thing is, I couldn’t even tell you why I kept it all this time.

From the outside, a Dell Dimension looks like a “modern” computer — and by modern I mean that if you passed by one sitting on a shelf, your first response probably wouldn’t be that it belonged in a museum. Instead, I’d expect you to say that you used to have a computer that looked just like it at work (or maybe still do). Even though the machine looked relatively modern sitting out in my garage, a closer inspection revealed its true age: hard to reach (and only two) USB ports, VGA video output, a CD-ROM drive (not DVD), and, perhaps most telling, a little silver sticker on the front declaring the computer “Windows XP Compatible.”

Ouch.

Back when I was building MAME arcade cabinets and dabbling in computer/networking projects, I picked up a few Dell Dimension and Optiplex computers through Craigslist. I like Dells because we’ve been using them at work for decades so I’m familiar with them, and my experience has been that they’re pretty solid for the price. At the time I bought them, these workstations seemed so modern and useful that I just couldn’t pass them up. Surely there was something I could do with them. I could stream movies with one, or build a retro gaming machine, or use one to play music on out in the garage, or… you know, something.

Whatever that ethereal “something” was never revealed itself. I might have used them once or twice over the years for testing purposes, but for the most part they’ve simply been collecting dust out in the garage for years and years. Whatever functionality those computers could have provided were replaced by Raspberry Pi computers — those mini $35 devices I talk about from time to time. A $35 Raspberry Pi can not only do all of those things I mentioned like streaming media and playing retro games, but frankly, they’ll outperform an old Dell while doing them. Windows machines and Raspberry Pis are so inherently different that it’s difficult to come up with a simple apples-to-apples speed comparison, but trust me, in any of those scenarios, a Raspberry Pi will run circles around a fifteen-year-old Dell computer — not to mention that the Pi is quieter, uses less power, has more storage, and has built in HDMI video and wireless networking.

I don’t like throwing things away, and I really hate throwing things away that work. A few years ago I listed one of the machines on Craigslist for $100. A guy offered me $50, and never showed up. About a month ago, I listed the same machine on Craigslist for $50. A guy offered me $20, and never showed up. My local Goodwill no longer accepts donated computers or monitors, so that was out. I asked my kids if either one wanted a computer older than they were and they both laughed at me. Eventually I set the machine next to the garage door and planned to recycle it at Best Buy. After two weeks of sitting on my garage floor, I said to hell with good intentions, and set the machine out by the curb on big trash day. Sorry, environment.

(The first person to say “I could have used that!” should keep in mind that I have another one. Be prepared to pick it up or pay shipping. Otherwise, to quote the Fonz, “sit on it.”)

There’a a fine line between throwing things away too quickly and hanging on to them far too long. Clearly, I err toward the latter. Someday I’ll master that sweet spot of getting rid of things after I’m done with them, but before all their value and usefulness has drained. In the meantime, if anyone’s interested in purchasing thousands of CDs and DVDs, holla.

Enabling the Aux HDMI Ports on an LG Hotel Television

I’m away from home this week, working in Texas and staying at a large hotel chain. I’ve been messing around with my Raspberry Pi a bunch lately, so I decided to bring one with me, assuming that the television in my room would have one or two unused HDMI ports that I could connect to. It did — it’s a 40″ LG television, with two HDMI ports available on the side.

When you press the “Aux” button on the remote…

…this is the menu that pops up.

And when you select the second HDMI port, this is what you get:

Nothing.

I rebooted the Raspberry Pi, but still could not get any video. To make sure everything was working, I disconnected the HDMI connection from the wall and plugged the Raspberry Pi into that port and it worked just fine. For some reason, the hotel chain had disabled the HDMI ports on the side of the television.

There’s another connection on the back of the television, an RJ-11 connection that looks like a phone cord. It connects to what looks like a small IR port on the front of the television. Once I disconnected the RJ-11 (phone jack) from the back of the television and hit the “Aux” bottom on the remote again, I got a different menu on the television.

From this menu, I was able to select and use the television’s other inputs.

Success!

The bad news is, with the cable disconnected, you can no longer change cable channels. The good news is, you can easily restore the television back to its prior state by reconnecting the RJ-11 cable. After doing it once I found I was able to easily reach up and disconnect the cable without moving the television or messing with any of the other cables.

Before leaving the room, be sure to reconnect the cable so the next person who stays there has a functional (but crippled) television. I’m not entirely sure what the rationale is in regards to locking customers out of the television’s additional HDMI ports, but if you need to enable them, now you know the trick.

Old Skool NES Raspberry Pi Case

Last year, Nintendo released the NES Classic Edition. It was a game console that looked like a tiny version of the original Nintendo Entertainment System (NES) from the 80s. It had 30 built-in games and cost $59.95. Nintendo woefully underestimated demand for the console. Stores couldn’t keep them in stock, and when they did hit shelves, scalpers scooped them up and resold them online for huge profits. And then, with thousands of potential customers begging Nintendo to ramp up production, the company confusingly cancelled the product instead.

This led lots of techie people to roll their own solutions, the most common of which was to install emulators on a Raspberry Pi (which made my list of NES Classic alternatives and which I wrote installation instructions for). It’s a nifty and inexpensive solution, but physically it’s missing the nostalgia form factor.

Enter the “NES inspired” Raspberry Pi case by Old Skool Entertainment System.

Not shaped exactly like an original NES, the Old Skool Entertainment System is the perfect shape for a Raspberry Pi. The case, which was designed to hold a Pi 3, 2 and B+, splits apart at the middle and includes four screws that goes up from the bottom into the top while holding the Pi in place.

Like any good case, there are openings that line up with all the Pi’s ports, so you won’t need to remove the case to access anything on the Pi. The front flips open to provide access to the Pi’s USB ports. While I appreciate the throwback to the original NES design, this does mean that all your USB cables will be routed out the front of the case. If you have an Ethernet cable running to your Pi, the lid will always be in the up position.

The case currently sells for $20 on Amazon and is available for Prime shipping, but there’s one thing on the packaging that worries me:

The absolute worst thing you can do when making a third-party product is mention Nintendo licenses by name. Claiming that your case was merely inspired by the original NES might be enough to skate past Nintendo’s lawyers, but mentioning characters by name and including instructions on how to download emulators and install ROMs is usually enough to draw the ire of suits. Hopefully when (not if) Nintendo’s lawyers come calling, all Old Skool will have to do is change their packaging, and not pull their case completely off the market.

So yeah, I like it. It’s no custom Commodore 1541 Raspberry Pi case, but it’s close.

Revisiting RetroPie

I’ve seen a lot of articles over the past month (most recently this one on Ars Technica) suggesting that people who can’t find one of those new NES Classic systems in stores should build their own using a Raspberry Pi. I even mentioned the Raspberry Pi as an alternative to a real NES back in September in my Guide to (Many) NES Alternatives article. Since then I’ve had several people ask me how difficult and time consuming it is to get a Raspberry Pi emulation system up and running from scratch.

Today, I decided to build one from scratch.

For my build I used a Raspberry Pi 3 Model B, the newest version of the Pi. A Raspberry Pi by itself costs $40, but that price is a bit of a misnomer. At a bare minimum you’ll need a power supply, an HDMI cable, and a micro SD card. There’s a nice package on Amazon that includes all of those things along with a case, but it’s $80, not $40. You’ll also need a USB keyboard to get things up and running, and eventually you’ll want a couple of joysticks. For my project, I used two wireless Xbox 360 controllers with USB wireless receivers.

With all the parts I needed sitting in a pile in front of me, I started the timer.

DOWNLOAD RETROPIE

The first step involved downloading RetroPie. The .IMG file is 580 MB, so if you have a slow internet connection, bring a book. My internet connection is pretty fast and the download took about five minutes.

EXTRACT RETROPIE ONTO MICRO-SD CARD

Once the download finished, I downloaded Win32 Disk Imager to extract the image onto an SD card. I had the micro-SD card in a USB adapter and this step took about 45 minutes.

PUT CARD IN RASPBERRY PI AND BOOT

With the image on the Raspberry Pi, I inserted the card into the Pi and turned it on. It booted right up.

The Pi recognized my wireless Xbox 360 controller and walked me through configuring it. This took about a minute.

From the main menu I also configured my Raspberry Pi to join my home wireless network. If you’re setting up RetroPie for the first time, here’s a good document to follow.

RetroPie comes with dozens of pre-configured emulators, but no games. For that, you’ll need to use Google. The RetroPie showed up on my network as RETROPIE. All I had to do was connect to the device (“\\RetroPie”) and all the folders I needed to access showed up. For testing purposes, I grabbed Super Mario Bros. 1, 2, and 3, and copied them over to the SD card.

RetroPie won’t recognize newly-added games until you reboot. After rebooting the Pi, the NES emulator magically appeared on the main menu.

The next step, called “scraping,” is optional, but nice. RetroPie has the ability to connect to an online database and automatically download information and screenshots about each game. After rebooting my Pi, I ran the scraping utility. This is what the menu looks like now.

From here I launched Super Mario Bros. 3 and…

…there you go. Tracking down ROMs for the other 27 games that appear on the NES Classic took about 10 seconds with Google.

I’ll pause here to say I started this project at 11:00 am. It took approximately 5 minutes to download RetroPie, 45 minutes to extract the image, and another 10-15 minutes to configure the menu. For intermediete computer users, I’d set aside 60-90 minutes to get RetroPie to this point.

I decided to expand mine a bit by adding every NES, SNES, Sega Genesis, and Atari 2600 ROM to mine. I could have sped this part up by switching to an ethernet connection or by copying the ROMs directly to the micro-SD card, but I’m pretty lazy, so wireless connection it was. The “scraping” feature makes the menus look nice, but it’s not particularly quick. If you’re going to build menus for hundreds of games at a time, you might want to let it run overnight.

The next to last step for my little emulation experiment was to get MAME up and running. This was slightly more involved and exceeds the scope of this article, but I decided to go with Libretro (LR-MAME2003), which unfortunately uses a ROM set (0.78) I didn’t have. 7GB of ROMs later, I got MAME up and running. Once I get the ROM samples working on RetroPie, I’ll write another article.

The last step of my project was taking a break and taking the Chicago Bears to the Super Bowl!

A Guide to (Many) NES Alternatives

Big Lots is already consolidating their Halloween shelves to make room for incoming Christmas-themed items. (Yes, in September.) One hot item for retrogamers this holiday season will be Nintendo’s official NES Classic Edition, a miniature version of the classic Nintendo Entertainment System (NES) that comes with 30 games built-in and goes on sale on November 11, 2016.. If the last video game system you owned was an original NES, you may not be familiar with all the ways you can play those old NES games, which vary greatly in both quality and price.

In this post I’ll be discussing all of the methods I’m familiar with when it comes to playing old NES games: original hardware, emulation, Famiclones, FPGAs, plus a couple of systems that don’t fall into any of those categories. For many of you, you are excused — come back tomorrow!

ORIGINAL HARDWARE

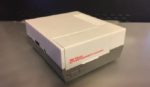
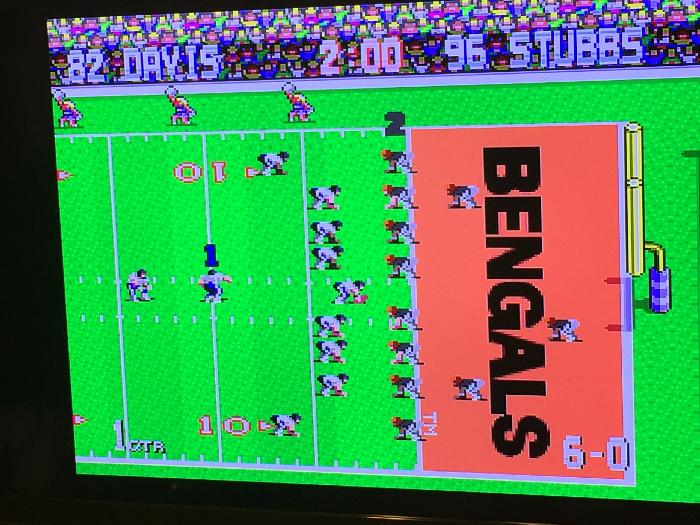
Nintendo originally introduced the NES to North Americans in October of 1985. It was the holiday hit of the season, and if you are still reading, it’s possible you spent the following year (along with millions of other people) playing Super Mario Bros., Duck Hunt, and other classic early Nintendo titles.

Millions of NES units have survived the test of time, and it is still possible to pick them up today in video game stores and on Craigslist. The one part most prone to fail are the internal pins where cartridges connect. If the cartridge doesn’t make a good connection, the screen will simply flash when the system is powered on. Replacement pins are available and sometimes they can be bent back into place, but just know if you are seeing these symptoms, the NES most likely needs some minor repair.

Additionally, the NES uses old school A/V (composite) video cables and only provides mono sound. The video signal looks great on old CRT (tube) televisions, but not so much on modern flat screen HDTVs. A later hardware revision solves the cartridge loading problem by moving the slot to the top, but only provides coax (cable) video output. Unfortunately, these “top loaders” are even more coveted by collectors, and the price reflects it.

Summary: While the original hardware provides a 100% accurate experience, expect to buy a few adapters to get this old system to connect to your modern television.

EMULATION

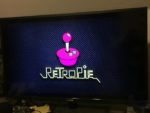
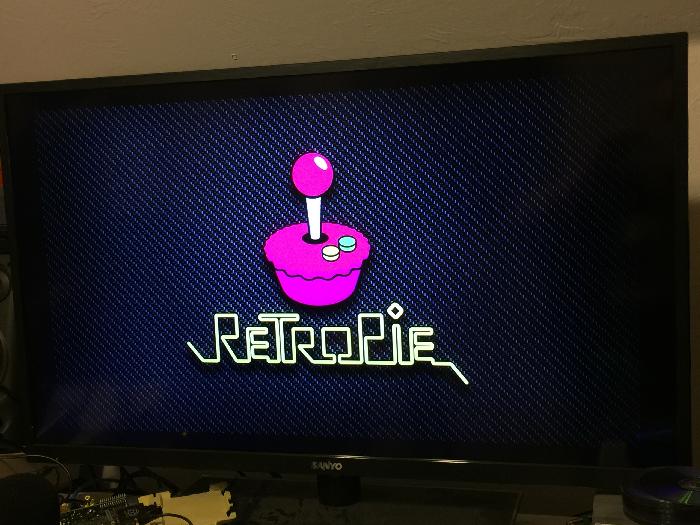
Emulators are programs that run on a computer (or tablet, or phone) that emulate the experience of playing old games. The key is “emulate” and not “simulate” — emulators are often very good if not great at emulating old games, however those looking for a pixel-perfect experience may find minor imperfections to squabble about.

The best thing about emulation is that it’s free. Emulators like FCEUX and NEStopia are free to download. Obtaining ROMs (software dumps of the original games) to play on the emulators is a gray area at best, although archives containing every known NES ROM are not difficult to find.

If emulation is free, why isn’t it the only (or preferred) solution? For starters, setting up most emulators takes more technical know-how than connecting a gaming system to a television. Some people prefer what I call the “living room experience” of inserting physical cartridges into a console and playing the games from their couch. You can simulate this experience by connecting a computer to your living room television. They even sell USB adapters that allow you to connect vintage NES controllers to your computer! These are obviously the exception to the norm. Most people play emulated NES games while sitting in from of their computer.

I would be remiss if I didn’t at least mention the Raspberry Pi, a $35 mini-computer that does a tremendous job of playing NES games through emulation. With HDMI output adding a USB joystick, you can be up and running in no time by following any of the easy-to-follow installation guides available through Google.

Summary: Not the most authentic NES experience, but definitely the free’est.

FAMICLONES

In Japan, the NES was known as the Famicom (short for “family computer”). Any unofficial system that plays NES games is called a Famiclone. There are three major categories of Famiclones and literally hundreds of different clones on the market, all of which have different games, features, and quality. The three major categories of Famiclones include the “All-in-One,” the cartridge-based Famiclone, and the Multi-system Famiclone.

The “All-in-One” Famiclones do not include a cartridge slot. These were really popular in flea markets about five years ago, advertising “10,000 games in 1” (and sometimes more). According to Wikipedia there were a total of 713 licensed NES games (826 if you include unlicensed games), To get 10,000 games, these developers cheat in many ways; some of the “games” are simply levels from other games, some of them are games with the graphics modified, and in the cheapest of these units, the menu simply repeats after 100 or so games. The build quality on these all-in-one systems are often shoddy (at best) and the emulation quality isn’t much better. Kids who have never seen an original NES game in their life may still complain about the quality.

Summary: Toys for kids. Fun until they break, which will be soon.

Cartridge-based Famiclone systems allow gamers to use original NES cartridges, but run their emulation from what has been dubbed a “Nintendo on a Chip” (NOAC). The problem with these systems is that they are a dime a dozen, and quality (both build and emulation) varies greatly. The NEX (released in 2005 by Messiah) drew great ire from classic gamers when they learned it played most games pretty well and a few poorly or not at all. Famiclones have mostly been replaced by multi game system Famiclones.

Summary: Tough to know what you’re getting until you get it.

Multi-systems, like the RetroN 5, have largely replaced the original Famiclones. The RetroN 5 has 5 cartridge slots that allow it to accept not only NES but Super Nintendo (SNES), Sega Genesis, and all the Gameboy (original, Color, and Advance) cartridges. The RetroN 5 includes HDMI video, supports cheat codes, and allows vintage controllers to be used. All of these features don’t come cheap, as the RetroN 5 currently sells for $180 on Amazon. It’s a little tough to categorize the RetroN 5 as technically under the hood it’s running an Android emulator, but without removing the case, it’s hard to tell. The older model (RetroN 3) along with other competitors like the Super Retro Trio and FC3 are also still available and cost much less. These systems are all better than generic Famiclones (and leaps and bounds beyond those cheap All-in-One alternatives), but they’re definitely not perfect.

Summary: The best of the Famiclones. It’s still emulation, but it’s better than older models.

FPGA

FPGA stands for Field Programmable Gate Array, and explaining how it’s different from emulation (and why that’s important) can be difficult. Here’s how someone explained it to me, and while it’s not 100% technically accurate, it helps clarify the difference.

Pretend the original NES was an abacus — one of those ancient devices that allowed you to perform math by sliding beads back and forth on a series of rails. An emulator would be like a series of memorized math facts — let’s say the single-digital multiplication table. We know 3×4 is 12 and 6×9 is 54 because we memorized those answers. Note that we don’t need any understanding of multiplication properties to provide these answers; we simply memorized them. If someone asks us what 12×13 is, we don’t know, because that wasn’t on our memorized chart. An FPGA is a chip that has been reprogrammed to perform like an abacus. It doesn’t just provide math facts it has memorized. Because it is acting as an abacus, it acts exactly how an abacus does.

If this doesn’t sound cheap, you’re right. My MiST FPGA computer cost roughly $250 (US). The cool thing about it is it can be programmed with cores to simulate lots of different 8-bit and 16-bit systems. It is also very accurate in the way it does this. The bad thing is, emulators are also pretty good at doing the same thing, and they are free. Lengthy, vitriolic arguments have taken place over which solution is better, and why.

For $250 you can do what I did; purchase a MiST FPGA and play all those old NES games in pure VGA glory. But wait; there’s more.

Last week, RetroUSB announced their all new AVS, an FPGA-based NES console. With FPGA guts, the company is promising 100% compatibility and accuracy. The HDMI connector outputs 720p video (perfect for modern televisions) and it uses the original NES controllers. It uses vintage NES cartridges, supports Game Genie and Pro Action Replay cheat codes, can simulate scan lines, and even connects to some sort of proprietary online scoreboard for tracking high scores. MSRP is $185, cheaper than a MiST and, is probably the best modern hardware implementation of an NES we’re likely to see (at least this week).

Summary: That person in your life who has a hundred NES cartridges and balks at watching movies on a non-HD television will own one of these.

MISCELLANEOUS

For completion’s sake I’ll mention the Analogue NT, a yet-to-be released NES console that combines original vintage NES chips with a new case, multiple video outputs, and some options for configuring and tweaking games. I won’t go into details because, with HDMI output, this unit will cost more than $600 including shipping.

Summary: A unique and expensive solution to playing NES games that nobody you know will ever own.

Finally, to bring things around full circle, there’s Nintendo’s own addition to this already huge market: the NES Classic Edition. Unlike most of the consoles mentioned above, the NES Classic Edition does not use cartridges, nor can it be expanded. It comes with 30 built-in games. The final list of games to be included is:

Balloon Fight, Bubble Bobble, Castlevania 1 and 2, Donkey Kong, Donkey Kong Jr., Double Dragon II: The Revenge, Dr. Mario, Excitebike, Final Fantasy, Galaga, Ghosts’N Goblins, Gradius, Ice Climber, Kid Icarus, Kirby’s Adventure, Mario Bros., Mega Man 2, Metroid, Ninja Gaiden, Pac-Man, Punch-Out!!, StarTropics, Super C, Super Mario Bros. 1-3, Tecmo Bowl, The Legend of Zelda, and Zelda II: The Adventure of Link.

Many of these games are classics. If these are the only 30 games you want to play, you’re in luck! If there’s one NES game you want to play that’s not on this list, you’re out of luck.

Summary: Great solution for casual NES fans who want a taste of nostalgia.

SUMMARY AND RECOMMENDATIONS

I’ve presented a ton of options, solutions and choices in this article for playing NES games. Which one is right for you?

– Emulation ($0): If you’re technically minded and haven’t done so already, give emulation a chance. Along with the NES, almost every 32-bit and earlier video game console (and computer) has been emulated. A $35 Raspberry Pi combined with a USB joystick and an afternoon’s worth of configuration is worth the investment!

– NES Classic Edition ($59.95): If you’re looking for a living room solution that plays some common NES games and you don’t own any NES cartridges (nor do you plan on buying any), the NES Classic Edition would be a nice solution, especially for those with little kids.

– RetroUSB AVS ($185): If you’re looking for a modern replacement for the original NES, based on what I have read, I believe this is the best solution. Keep in mind that $185 doesn’t include any game cartridges, but if you’re willing to drop almost $200 on one of these, I suspect you may already own some.

– RetroN 5 ($180): Inside this is running an Android emulator, so as far as quality goes you would get the same from a $35 Raspberry Pi. What you do get is the ability to use vintage joysticks and vintage cartridges. If I were only interested in playing NES games I would go with the RetroUSB AVS listed above; if I also wanted to play Super Nintendo, Sega Genesis, and Gameboy games and had limited space to dedicated to consoles in my game room, I’d consider the RetroN 5.

– Original NES ($100+): Prices go up around the holidays, and based on what I’ve seen on my local Craigslist, are already beginning to do so. An original NES won’t look great on a modern flatscreen television, and may require some minor repairs if someone hasn’t already refurbished it. If you’re not dying to own an original piece of history, there are better options.

– Cheap Famiclones ($20-?): You get what you pay for.
– Analogue NT ($500-$600): I like the $400-cheaper Retro AVS better.

Whatever solution you pick, I hope your children (or you) look like this.

The new Raspberry Pi Zero!

I’ve been a fan of the Raspberry Pi computer for some time now, although to be honest, I’m as big of a fan of the concept as I am of the actual computer itself. The Raspberry Pi is a small computer designed to run Linux that costs $35. On top of that price you’ll have to provide your own keyboard, mouse, and monitor, but chances are if you’re the type of person who is interested in a $35 computer that runs Linux, you probably have at least one spare keyboard, mouse, and monitor somewhere out in the garage.

The original Raspberry Pi (the model A) had two USB ports and a single core ARM processor clocked at 700MHz. The modern version of the board, the Raspberry Pi B+, has four USB ports, a quad-core, 1GHz processor, and a gigabyte of RAM.

Last week, Raspberry Pi announced a new, compact version of the Raspberry Pi computer: the Raspberry Pi Zero. It’s similar to the original model A with a slightly faster (1GHz) processor. Physically it’s roughly 1/3 the size of a credit card. It costs $5.

When I was a kid, home computers were an exotic luxury. For the TRS-80 Model III, Tandy was charging $200 to double the machine’s RAM from 8k to 16k. (My dad upgraded ours himself.) Adding a single floppy drive was an $849 option. The thought of a $5 computer was inconceivable, as was a computer the size of the Pi Zero. The Commodore SX-64, the world’s first portable color computer, weighed 23 pounds. The current issue of MagPi magazine comes with a Raspberry Pi Zero computer, attached to the cover. I don’t know how much it weighs, but it can easily be mounted to the rear of a flat screen television with a small square of Velcro. If you want to take it with you on a trip, you can stow it inside your wallet.

The guys over at Element 14 literally installed their Raspberry Pi Zero inside a tube television, configured it to run RetroPi, and built a self-contained emulation television.

For any adult or kid with $5 and an imagination, the sky’s the limit.

Painting the Commodore Raspberry Pi Case

When we last saw it, the custom Commodore Raspberry Pi case my friend Aardvark made for me looked like this:

Despite a few people’s suggestion to leave it as is, I always envisioned the case being painted the same color as a real Commodore 1541 disk drive.

To chose the paint color I used the rather unscientific method of strolling through Walmart’s spray paint aisle and picking one by memory that looked close. Commodore 1541 disk drives tended to change color over time, which actually worked to my advantage. I gave the case a light hand sanding with some 200 grit sand paper and shot it with a couple of coats.

After that dried, I taped up the case…

…and shot the front, darker brown square. On a real drive this is the face plate of the drive.

After that dried, I removed the tape and this is what the case looks like.

And, on top of a real drive.

I don’t have the skill set required to add functioning LEDs to the outside of the case (and wouldn’t want chance screwing it up by drilling holes in it) so I may add non-functioning red and green “dots” to the outside of the case (I was thinking “small, flat, round, clear LEGOs” possibly?). I also plan on printing out the small badge that goes on the front soon as well.

Custom Commodore 64/1541 Raspberry Pi Case!

I currently own two cases for my Raspberry Pi. One is the gigantic red plastic case that came with it. The other is one I made out of a plastic Pop-Tart I bought at Big Lots. You can see both of those cases here.

Enter my friend Aardvark. Aardvark is a very talented guy who plays guitar and once made a remote controlled phone. Aardvark also does CNC milling, and when he saw my terrible attempt at making my own Raspberry Pi case, he decided to take a stab at making one for me. The day after we had this conversation, Aardvark sent me the following picture:

Now truth be told, I would have been the happiest nerd to simply receive an aluminum box with the Commodore logo on it and use that as a case, but Aardvark had bigger plans. “I need a few pictures of a Commodore 1541 disk drive,” he said, and so that night I took a few and mailed them to me. The next day, I received the following:

With those rough designs, Aardvark went to work and did his thing. The next picture I received was of a rough Raspberry Pi case without any access holes cut out.

To cut the holes, Aardvark said he needed an actual Pi — and so I mailed him one. Paid for it with Paypal and had it shipped directly to him. With the Pi in hand, ‘Vark was able to make the necessary cuts for all of the Pi’s ports. I don’t presume to know how any of this is done. I’m pretty sure black magic is involved.

Thursday when I arrived home from work there was a package waiting for me from Aardvark. Could it be? It was! The case is held together with four tiny flat-head screws. I opened the case and dropped a Raspberry Pi into it. Perfect fit!

I was surprised at how small the case was, but the Pi fits perfectly inside. Here’s the 1541-Pi case assembled, sitting on top of a real Commodore 1541 disk drive.

Food for though: Commodore 1541 floppy disks hold roughly 180k of information. The SD card hanging out of the front of the Raspberry Pi in this picture is an 8gb card which can hold approximately 48,000 Commodore 64 disks.

This weekend I hope to slap a coat of traditional “breadbox brown” paint on the 1541 Pi case, finishing it off. There’s just enough room on the front to add a couple of small red and green lights as well. Old habits die hard. :)

Thank you, thank you, thank you to Aardvark for this awesome case. I feel compelled to tell you that Aardvark would not accept any money for the case. He only made two of them, and I own half of them. Personally I think ‘Vark should start a Kickstarter to get his own CNC mill for the house. If he does, I will keep him in business for many years to come!

New Custom $2 Raspberry Pi Case

In a previous post I shared what the case my Raspberry Pi came with:

It’s big and dumb. The other day while shopping in Big Lots, I ran across the following item:

(To be honest, I’m not even sure what this thing is meant to do. It looks like it’s a thing that you could put Poptarts in to put them in a kid’s lunch or something. Huh.)

The wheels began turning, and for $2, I had to find out.

Pretty much everything I know about using a Dremmel, I learned from watching television. I know it spins really fast and can cut and grind things. I’m sure this is the part of the project where I’m supposed to provide blueprints and explain my thought process, but… c’mon, $2. Also I bought two of these cases so consider this a rough dry run.

My only real goal was to provide access to all the ports while maintaining the case’s original structure, which consisted of small hinges on one side and a clasp on the other.

Wow, using a Dremmel is kind of hard. I mean, using one is really easy, but making straight cuts is really hard. Once I was done cutting I used a grinding wheel to even up the sides, and a piece of sandpaper to smooth off the edges.

The cuts look pretty amateurish, but the case is completely functional. The last step involved running two small screws through the Pi’s screw holes to anchor the thing in place. Most of the ports are accessible without having to open the case, so that’s a plus. Now that I’m sure everything fits I’m going to take it back downstairs and do a bit more sanding.

This will work until something better comes along. Although it looks pretty terrible it’s so funny that it makes me laugh every time I look at it.