Category Archives: 3D Printing

Our Library has 3D Printers (and more!)

Last weekend, Susan and I visited one of our local metro libraries. You already know libraries lend books, and probably knew they also have CDs, DVDs, and audiobooks, but did you know they have an entire makerspace full of tools available free for public use?

Susan wanted to visit the Bethany Library (part of Oklahoma City’s Metropolitan Library System) to look into reserving a room, and while there we got a quick tour of the library’s makerspace. We had seen the space once before when the library was remodeled a couple of years ago, but we wanted to see what it looked like and how it has evolved now that it’s open for business.

The first thing I noticed when entering the makerspace were the library’s three 3D printers. The tubs underneath the table are filled with filament of different colors. Using the 3D printers is completely free — you don’t even have to pay for the filament, although I can’t imagine not leaving a few bucks if I printed something gigantic. To the right and behind the 3D printers is a Cricut Maker and another Cricut device for making iron-on t-shirts. Use of the Cricut is free, but I think you have to bring your own material. To the left of the 3D printers are two computers with the entire Adobe suite installed. There is also a ton of recording gear to record audio and video. There are iPads, cameras, microphones, lighting equipment, green screens… you name it. All free to use.

If all that equipment sounds intimidating, here’s some good news. When you reserve the room, you also reserve a library employee who is trained on all the equipment! With zero knowledge of 3D printing, you can reserve the room and an employee will help you download 3D models from places like Thingiverse and print them out for free. Kids wanting to make their own videos will be shown how to use the cameras and green screen and will learn how to do it, too. The entry bar for creating cool stuff has never been lower.

Susan plans to start occasionally reserving rooms at the library for meetings as she continues to grow her business (a change of environment is always a good way to refresh your brain and approach things from a different angle). Maybe the next time she does I’ll tag along and do some 3D printing or podcast recording at the library at the same time!

Breaking Even on 3D Prints!

There’s a running joke I make every time I 3D print something new. After figuring the cost of the the filament I used (which is usually just a few pennies) I announce the item’s cost and follow it with, “or as Susan would say,” and then I add $600 (the price of the printer) to the total amount. It’s actually kind of a dual-layer joke because Susan never actually says that. I just pretend that she does.

Because most of the items I print are relatively small, the cost of the filament I use per print is pretty inconsequential. The iPhone stand I printed for my desk contains about six pennies worth of filament. The paper towel holder I just printed for my workshop cost about seventeen cents. This makes the items incredibly cheap to print (must cheaper than buying them), as long as you don’t figure in the price of the actual printer.

But something I forgot was that you shouldn’t add the entire cost of the printer to each item; technically, it’s the price of the printer divided by how many items I’ve printed. By the time I had printed two things, technically each one cost $300 plus filament.

I haven’t kept an exact list of every single thing I’ve printed since buying my 3D printer five years ago, but I’ve saved most of the 3D models I’ve downloaded and taken pictures of most of my prints, and after entering all of those things into a spreadsheet I realized I’ve printed roughly 100 things. All the phone holders, hat hooks, and eyeglass hangers eventually added up…

…which means the price is no longer $600 plus filament — it’s $6 plus filament! That brings the cost of my most recent print, that paper towel holder, to about $6.17. I found a similar one on Amazon selling for $9.99. Finally! I’m breaking even!

For what it’s worth, I would not recommend buying a 3D printer if your goal is to save money. I once watched a woodworker on YouTube who said the point wasn’t to save money, but to enjoy the process. 3D printing is a lot like that. You really have to enjoy tinkering with things to enjoy the process. But breaking even doesn’t hurt!

3D Printed Phone Holder

Earlier this year, I replaced my computer monitors with slightly larger ones. The new monitors came with stands that don’t adjust vertically, so I bought some small shelves from Amazon to raise the monitors. The shelves had little cut outs to hold my phone and allow the charging cable to remain connected — super useful! After months of neck pain I realized the shelves make the monitors too tall. Instead of hacking them up with a jigsaw I flipped them upside-down, which lowers the top shelf by about two inches. Now they’re the perfect height… but I can no longer use the built-in phone holder.

So, I decided to print one.

Thingiverse has hundreds of free phone holder models available to download and print, but I quickly found and settled on this one. It’s super simple and super small. It has no moving parts, so there’s nothing to break. The two notches hold the phone at slightly different angles, and because it holds the phone horizontally it doesn’t block my phone’s charging port. Best of all, the print uses 6g of filament. I’ve been printing with a roll I paid $20 for which means this holder costs 12 cents to make.

Using “down and dirty” print quality, the stand takes about 45 minutes to print… which is good as I ended up printing four of them — one for Susan, one for Morgan, and two for me. One will live on my desk and the other ended up in my backpack. It’s super annoying to have to continually pick up my phone in meetings or at work to check notifications. This little stand will alleviate that.

This is not my current phone. This is a ten-year-old iPhone 4 that lives in my desk drawer. I keep it as a backup in case my current phone breaks. In reality I would never in a million years use this iPhone 4 for anything, except as a phone model in a picture. Thank goodness I held onto it for a decade for that!

BONUS

I was so happy with how the stand turned out that I went back to Thingiverse and found a stand for my tablet. The tablet stand is larger and used 15g (30 cents) of filament.

My buddy Jeff recently printed a Halloween prop that took multiple days to complete. I have never attempted anything remotely that complicated. What I do enjoy is printing these little items that before I would either go without, or spend $10 on at a discount store or online to order. I have lots of 3D-printed headphone hangers, mask holders, and other odds and ends all around my office.

Pushing Projects Forward

I can’t remember if I mentioned this or not — I can’t remember anything, anymore — but my 3D printer wasn’t working properly for a while. It was working okay, but not great. Everything I printed was coming out with a weird, rough finish. For the longest time I thought there was something wrong with my printer, but after doing a bunch of online research I narrowed the issue down to a single software setting. Literally, checking a single box in the software fixed the issue.

I bought an Ultimate 64 over a year ago. The Ultimate 64 is a modern replacement motheboard for the old Commodore 64 computer. I bought a new case to install the new motherboard in, and discovered that it required some additional plastic brackets for everything to fit together. The brackets can be purchased, or 3D printed… if you have a working 3D printer. For a while, I didn’t have a working 3D printer. By the time the printer was working, I had torn down my office to install new tables. The takeaway here is that I spent a lot of money on a project that’s been collecting dust for over a year.

it’s ironic how during the pandemic I have nothing but time and yet seem to get very little done. Setting up my office should have taken a weekend; it’s taken me a month. Lately it seems like nothing is a priority. I’m spending a lot of my spare time working on podcasts and videos, and not wanting to work on much else.

Susan is participating in an online Girl Scout meeting this weekend. Saturday, she was online for twelve hours, from 10 a.m. until 10 p.m. That gave me some guilt-free time to organize, clean, and do some 3D printing. I know I’ll feel better and enjoy these projects after they are finished, so I’ll keep pushing forward until they are done.

A Place to Hang My Hat

Last week while pulling into my driveway, I happened to notice my neighbor outside working in his yard. It wasn’t what he was doing that caught my attention, but rather what he was wearing: a big, wide-brimmed sun hat. I decided then and there that I too would own a large hat to protect my head from the sun. Four minutes later, I had ordered a bucket hat from Amazon. I mostly associate bucket hats with fishing and I’ve always secretly wanted one, which is kind of stupid, because I hate fishing (and the sun). Then again I own a golf cart, and have never been golfing. It also seems disingenuous to say, “I’ve always wanted a bucket hat.” This one cost $10.95. If I had always wanted one, I would have bought one a long time ago. It’s more accurate to say that last Wednesday I really wanted one, and two days later, an Amazon Prime delivery driver dropped one off on my front porch.

The moment I placed it upon my head, I decided this hat would become my official workshop hat. It’s just tight enough to stay on without falling off, and is the perfect color. (Amazon offers the “300N Unisex 100% Cotton Packable Summer Travel Bucket Beach Sun Hat” in 36 different colors; I chose “gray.”) I’ve also already used it one to cover my face while taking a nap in my hammock, and it worked well for that, to.

But a problem arose — where in my workshop would I hang my hat? My workbench is covered in sawdust and tools. I needed a hook, and a place to attach it. I’ve been meaning to build some new shelves for the workshop, which I decided would be a great place to attach a hat hook.

45 minutes later, I had made it to Home Depot and back with $70 worth of 2x4s in the back of my truck. If you’re wondering if I made it home before that storm rolled in and dumped buckets of rain on me, the answer is, “no I did not.”

Using 16 of the 20 2x4s, I built my new shelves. The shelves are 8′ wide and a little more than 6′ tall. I spaced the shelves so that each one will hold a milk crate with about half an inch of clearance. For the tops of the shelves I cut up the two sheets of particle wood the building contractors left behind and attached them to the 2x4s using my nail gun.

I have to say, I absolutely love having a workshop where every tool has its place. I know where my saws are. I know where my drills are. I know where my screws and nails are. I’ve spent the vast majority of my life searching for things I was just holding two minutes ago. Being able to find the tools I need when I need them is so, so nice.

Yesterday, I went to Dollar General after work and picked up ten shoebox-sized plastic containers for a dollar each. I put my sanding discs in one, and my shop rags in another.

With the shelves assembled, I still needed a hook to attach to them. I could have ordered one off of Amazon (or simply used a protruding screw), but instead I decided to 3D print one.

It is moments like this — moments where I go, “I wish I had one of these,” and then I print one — that 3D printing seems like the future. Most of the time, 3D printers are solutions looking for a problem to solve. But when there’s something you want or need, and you’re able to to just print one out in a matter of minutes, it does seem pretty magical.

On the top-most crossbar of the shelves, I attached the hook using a couple of screws. The hook I printed had two holes in it, and fortunately from owning several homes, I have a couple of plastic jugs that contain approximately 8 zillion spare screws.

With the shelves done and the hook printed and attached, it was finally time for me to hang my hat, turn out the lights, and head back to the house. The next time I go out to the workshop, the ol’ bucket hat will be out there waiting for me.

3D Printing Useful Things

I’ve owned my 3D printer for eight months now. I spent the first six months printing “decorative” items that ended up sitting on shelves — and while those things are fun to print, it’s tough to justify the money I spent on the printer ($600) when only printing cookie cutters and action figure stands.

Over the past couple of months, things started to change. It all started roughly two months ago, when I realized I needed some bookends for my DVD shelves. Thinking they would only cost a dollar or two, I went to Amazon in search of some cheap plastic L-shaped bookends and was surprised to learn they cost $10/pair! As my cursor hovered over “buy it now,” an idea hit me — why not print some? Within an hour or two (faster than Amazon could deliver them!), I had downloaded a simple 3D model and printed out my own bookends. They’re exactly the shape I wanted, and (excluding the cost of the printer) the pair cost me a nickle’s worth of filament to print. The idea of printing something actually useful for a change piqued my interest.

Last night while decluttering my work area, I discovered just how many pairs of sunglasses I own (five). I don’t have a good place to keep them, and I decided to check Amazon to see if they sold stands for sunglasses. They do, but deju vu quickly kicked in, and I decided to check online for any similar 3D-printable models. I found one in less than a minute, and in less than an hour, I had printed one!

The design is simple but effective. After affixing the rack to a flat surface with a couple of screws, sunglasses can be easily hung by slipping one of the arms through the plastic hoop. After popping the holder off the print bed, I ran a block of fine grit sandpaper over the whole thing just to smooth everything out.

I already had the perfect spot picked out downstairs for the rack. Since my sunglasses always end up on my desk, I decided the side of my desk would make a great mounting spot. I found a couple of shallow screws out in the garage and colored the heads black with a Sharpie to color the heads black (probably not a professionally recommended technique).

Is printing things cheaper than buying them? If you figure in the price of the printer, probably not, but it’s getting close. Again, the cost of the printing filament is almost negligible. I estimate that the sunglasses rack cost around 20 cents to print. According to my records, I’ve printed about 30 things I’ve kept over the past eight months. $600 / 30 = $20 per item, plus the 20 cents worth of plastic. Of course the more things I print the more the price per item will decrease.

Even if it weren’t, I’d still do it. We are still in the early dawn of 3D printing. The future’s so bright… I gotta wear shades.

3D Printer Back Up and Running

My foray into 3D printing got off to a rocky start. I originally unboxed and assembled my printer on the dining room table. Everything worked great until I moved the printer upstairs. During that process, a wire that controlled a critical cooling fan failed. When the fan failed, a pretty important part of the printer cooked itself. Fortunately, instead of buying the printer directly from China, I purchased it from TinyMachines3D, who priority shipped me a replacement part. When that didn’t fix the issue, Chris, the owner of the company, worked with me over the phone until we got the printer up and running.

With my printer offline, I had some time to play around in Tinkercad. One of the first things I designed was this robot from the 1980 Stern arcade game, Berserk.

With the printer finally back up and running, I decided to see how it handled this model.

Not bad! I also printed the stand that Greedo is standing on. It worked so well that I printed half a dozen more.

While I was printing, Morgan told me she wanted a “sweater-shaped cookie cutter” for Christmas cookies this year. One sweater-shaped cookie cutter, coming right up!

The other thing I wanted to print, something I have wanted for a long time, was a tiny set of risers for these little Diener figures I collect. I love the way the different colors display, but it’s hard to see the ones in the back. Not any more!

If you look closely at the risers I printed you’ll see that the top section is black. That’s because I ran out of the 200g of white filament that came with my printer and had to switch to the 1kg spool of black.

So, how much can you print with 200g of PLA filament? Two dice, one headless cat, a 4″ robot from Berserk, 7 stands for Star Wars figures, one sweater-shaped cookie cutter, one set of mini-risers 40mm wide, one set of mini-risers 140mm wide, and half a dozen aborted screw-ups.

The Wonderful World of 3D Printing

Last month I didn’t know anything about 3D printers, but the universe has a unique way of telling me when it’s time for a new toy. My friend Justin mentioned he could use something 3D printed. Then my friend Jeff also mentioned 3D printing. A blogger I follow, Rob Cockerham, bought a 3D printer. Then I bought a couple of 3D-printed Star Wars-related items online (you’ll have to wait until Wednesday to see those.) After recently selling my car I ended up with some spare money sitting in my bank account, and decided to take the hint from the cosmos and spend some of it on a new 3D printer.

What follows are a few questions I had about 3D printers, and the answers I have learned.

What exactly is a 3D printer?

A 3D printer is a device that prints objects in three dimensions. Instead of ink, it uses filament. The filament melts and turns into itsy-bitsy dots that stick together. In a way, it’s almost like a super accurate, computer-controlled hot glue gun.

Are the printers expensive?

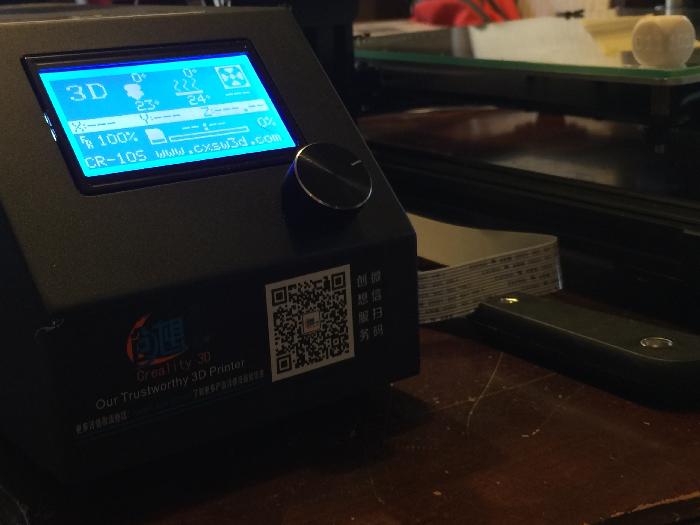
My printer, the Creality CR10s, sells for $599. There are cheaper ones and ones that are a lot more expensive. (The first one I looked at was $4k.) Prices vary based on quality, size, and speed. Some printers can print two colors at once (most can only print one). Some printers have huge online support groups while others do not. I’m not advocating Creality printers one way or the other yet, as I haven’t had mine long enough to form an opinion yet.

Is the filament expensive? How much do things cost to print?

The first part of this question is simple. Rolls of PLA filament cost around $20 per kilogram. They come in a rainbow of colors. The answer to the second question is, “it depends.” Small things that are hollow obviously take less filament than big things that are solid. Before printing, the software gives you an estimate of how much filament your print will require.

How big is the printer? How big can it print?

The Creality CR10s has a print area of 300mm x 300mm x 400mm. That’s slightly less than 12″x12″x18″. (I should warn you that everything related to this printer is done in the metric system.) The printer itself is roughly 2′ tall and, including the controller box, about 2′ wide.

Is it fast?.

No. Printing something the size of a regular die took 15 minutes. Printing something the size of your fist might take 2-3 hours. Based on what I’ve read, it is not unusual for large prints to take 24 hours or more. Unless you like hearing internal fans blowing and tiny motors going “weee-weee-whirr-whirr” all night long, you might want to put your printer in another room. Because it has a MicroSD slot, the printer doesn’t need to be connected to a computer to print.

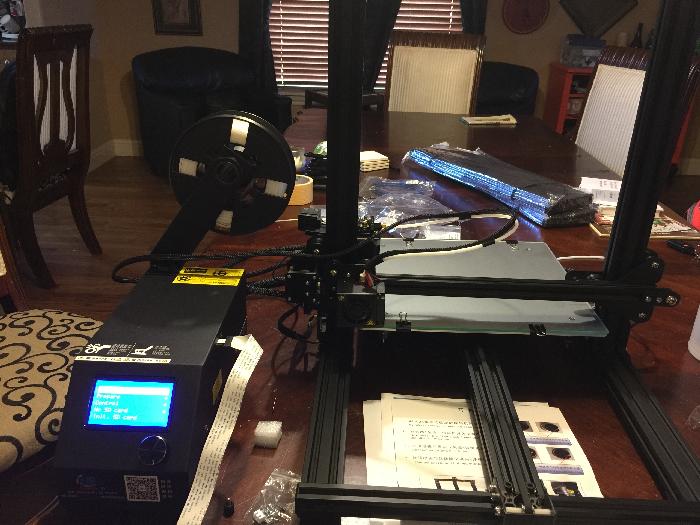
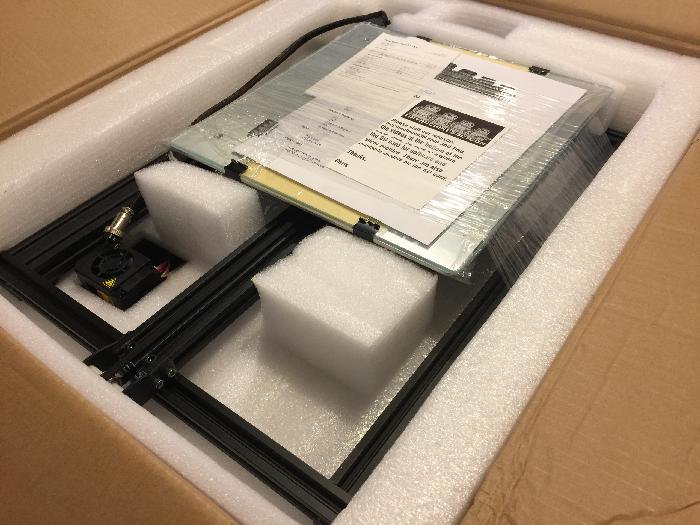
Was the printer easy to assemble?

No. The printer came “85% assembled” according to the seller. I watched a video on YouTube where a young lady assembled this same model in 10 minutes. It took me almost 8 hours. I could probably do the next one in 2 hours.

Is it easy to use?

Hmm. Define “easy?” To print something, at a minimum you are going to have to obtain a 3D model of the object somewhere, load it into another program, save that file to a MicroSD card, insert it into the printer, and then hope nothing goes wrong.

What could possibly go wrong?

The temperature of the bed could be too hot. Or too cold. Same goes for the extruder temperature. You could have cheap filament. The print bed might not be sticky enough. The bed might not be level. It might be too high. Or too low. There’s a ton of variables and options that have to be figured out through trial and error.

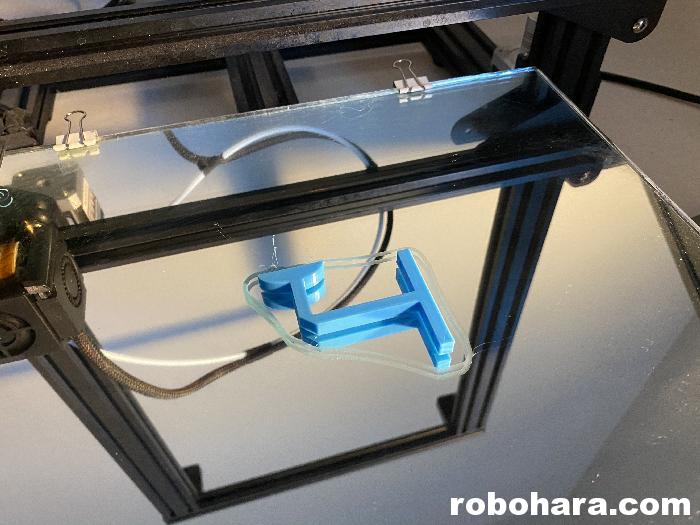
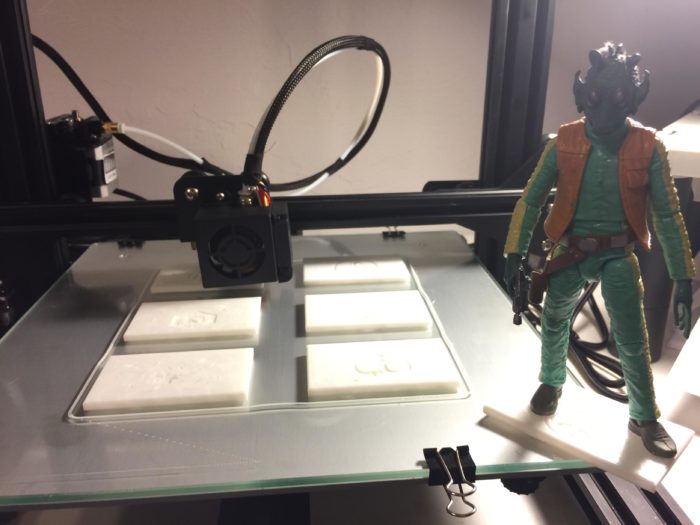
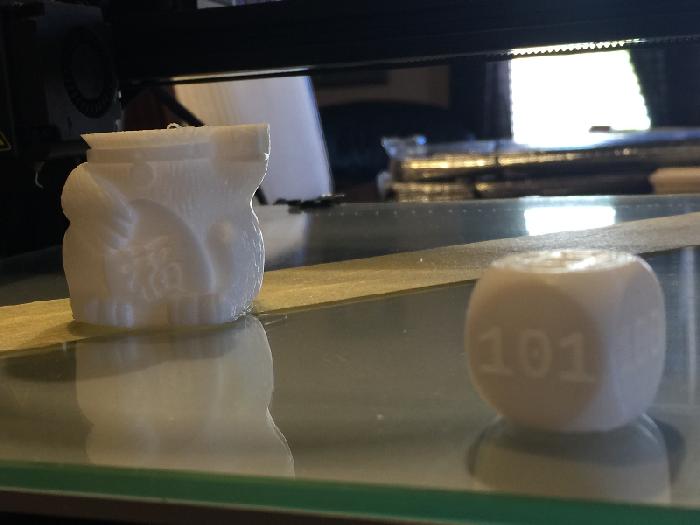
Here are the first two things I printed.

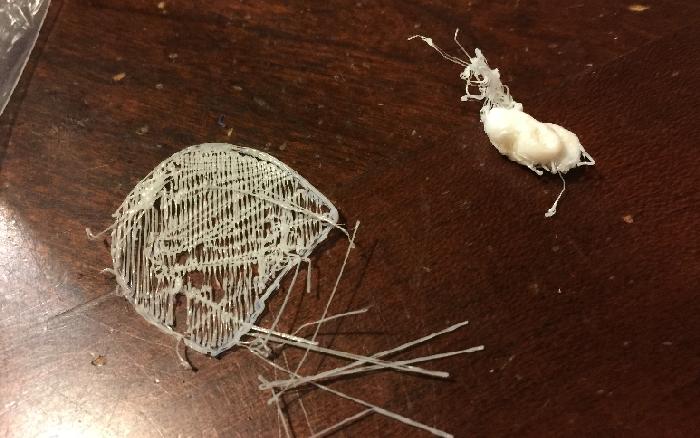
Come on, it can’t be that hard, can it?

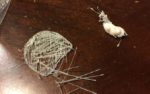
Say hello to my new cat on the left, “Headless Harry.”

What software is required?

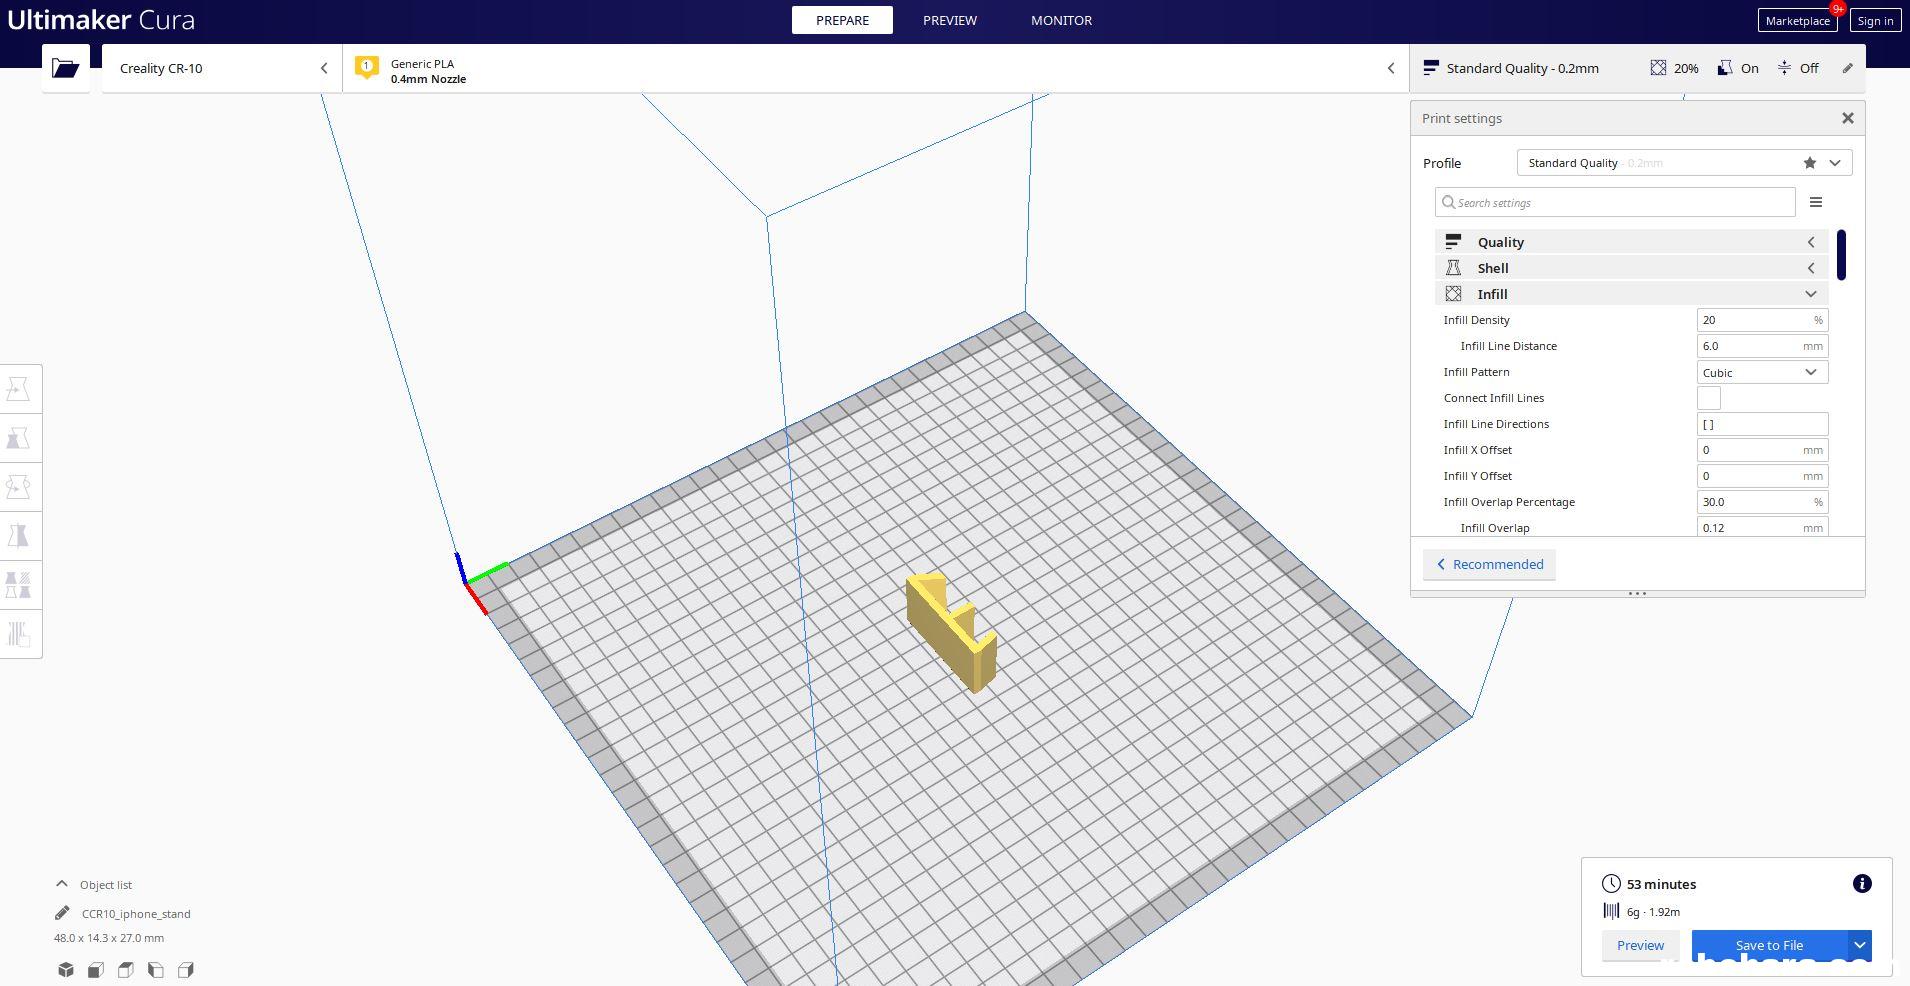
If you want to create your own designs, you can either build them in a CAD program (I’ve been using TinkerCAD) or a 3D sculpting program (haven’t tried that yet). You’ll also need a slicing program, which takes your 3D model and slices it into printable layers that the printer can understand. All of these programs I have used so far are free, and I’ve spent quite a bit of time over the past couple of days learning how to use them.

And finally…

What can I print?

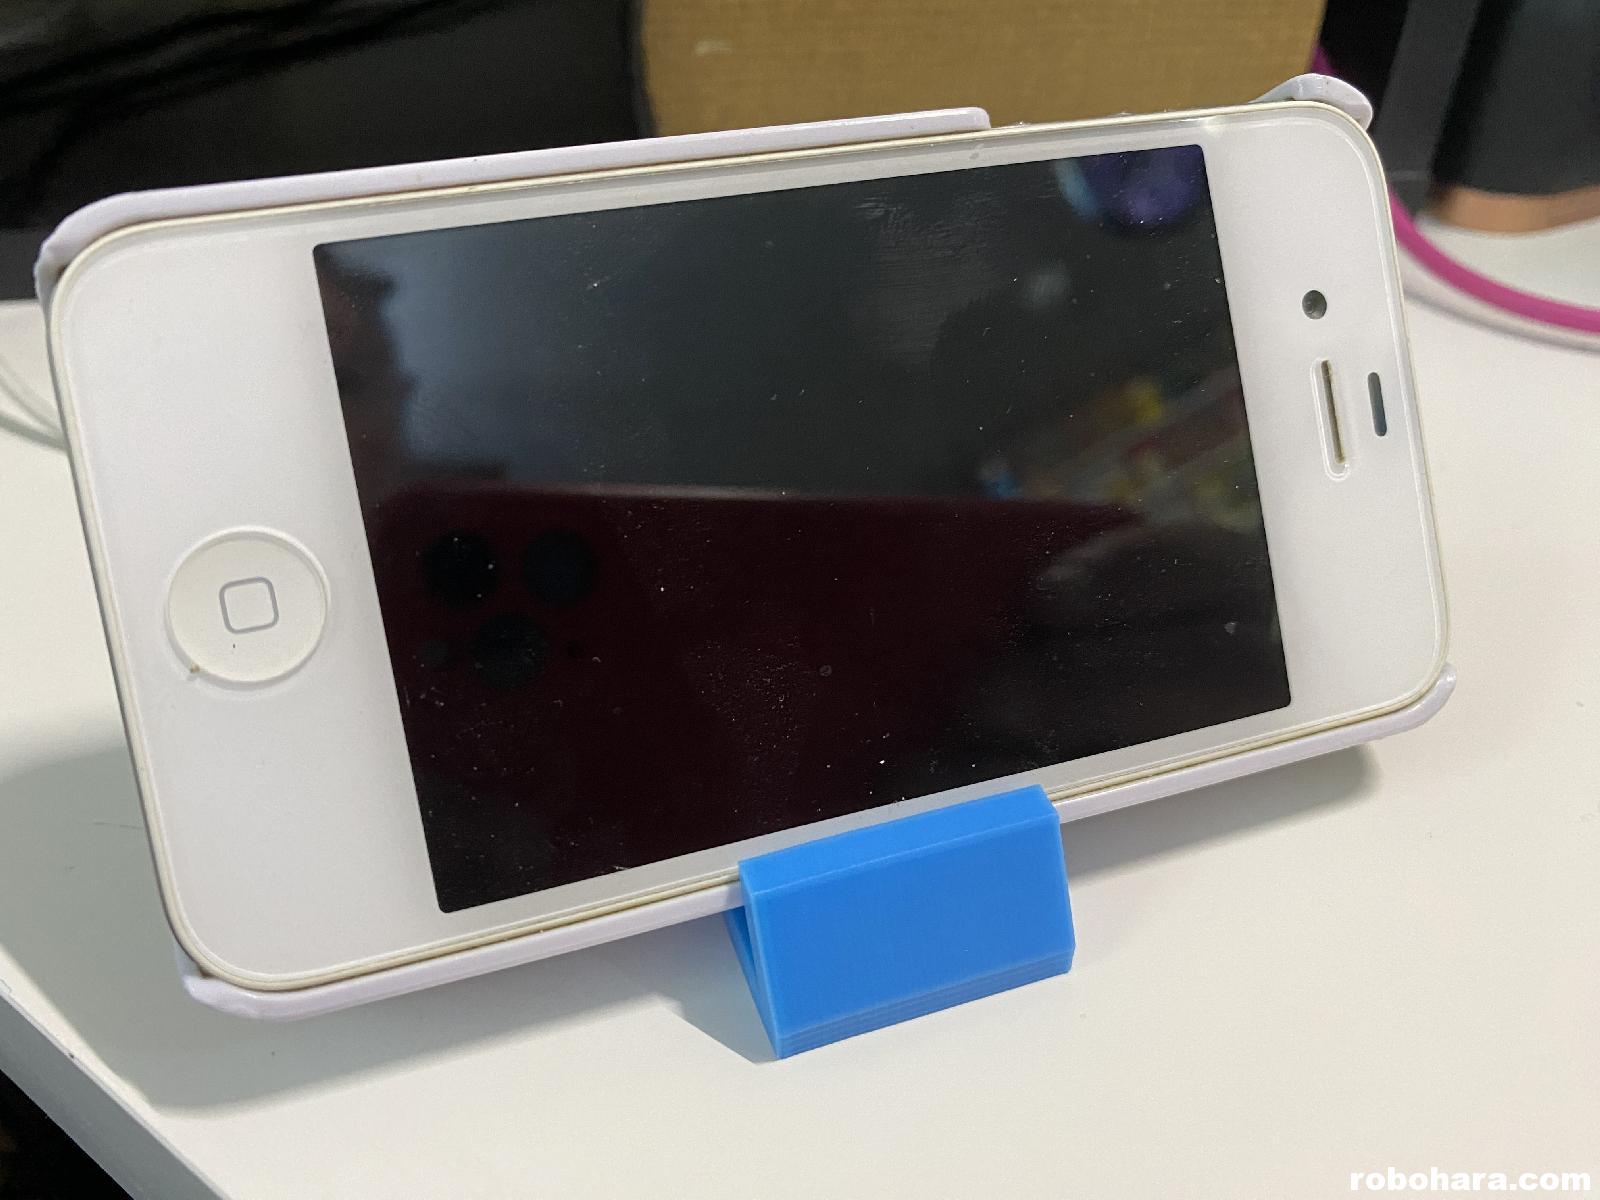
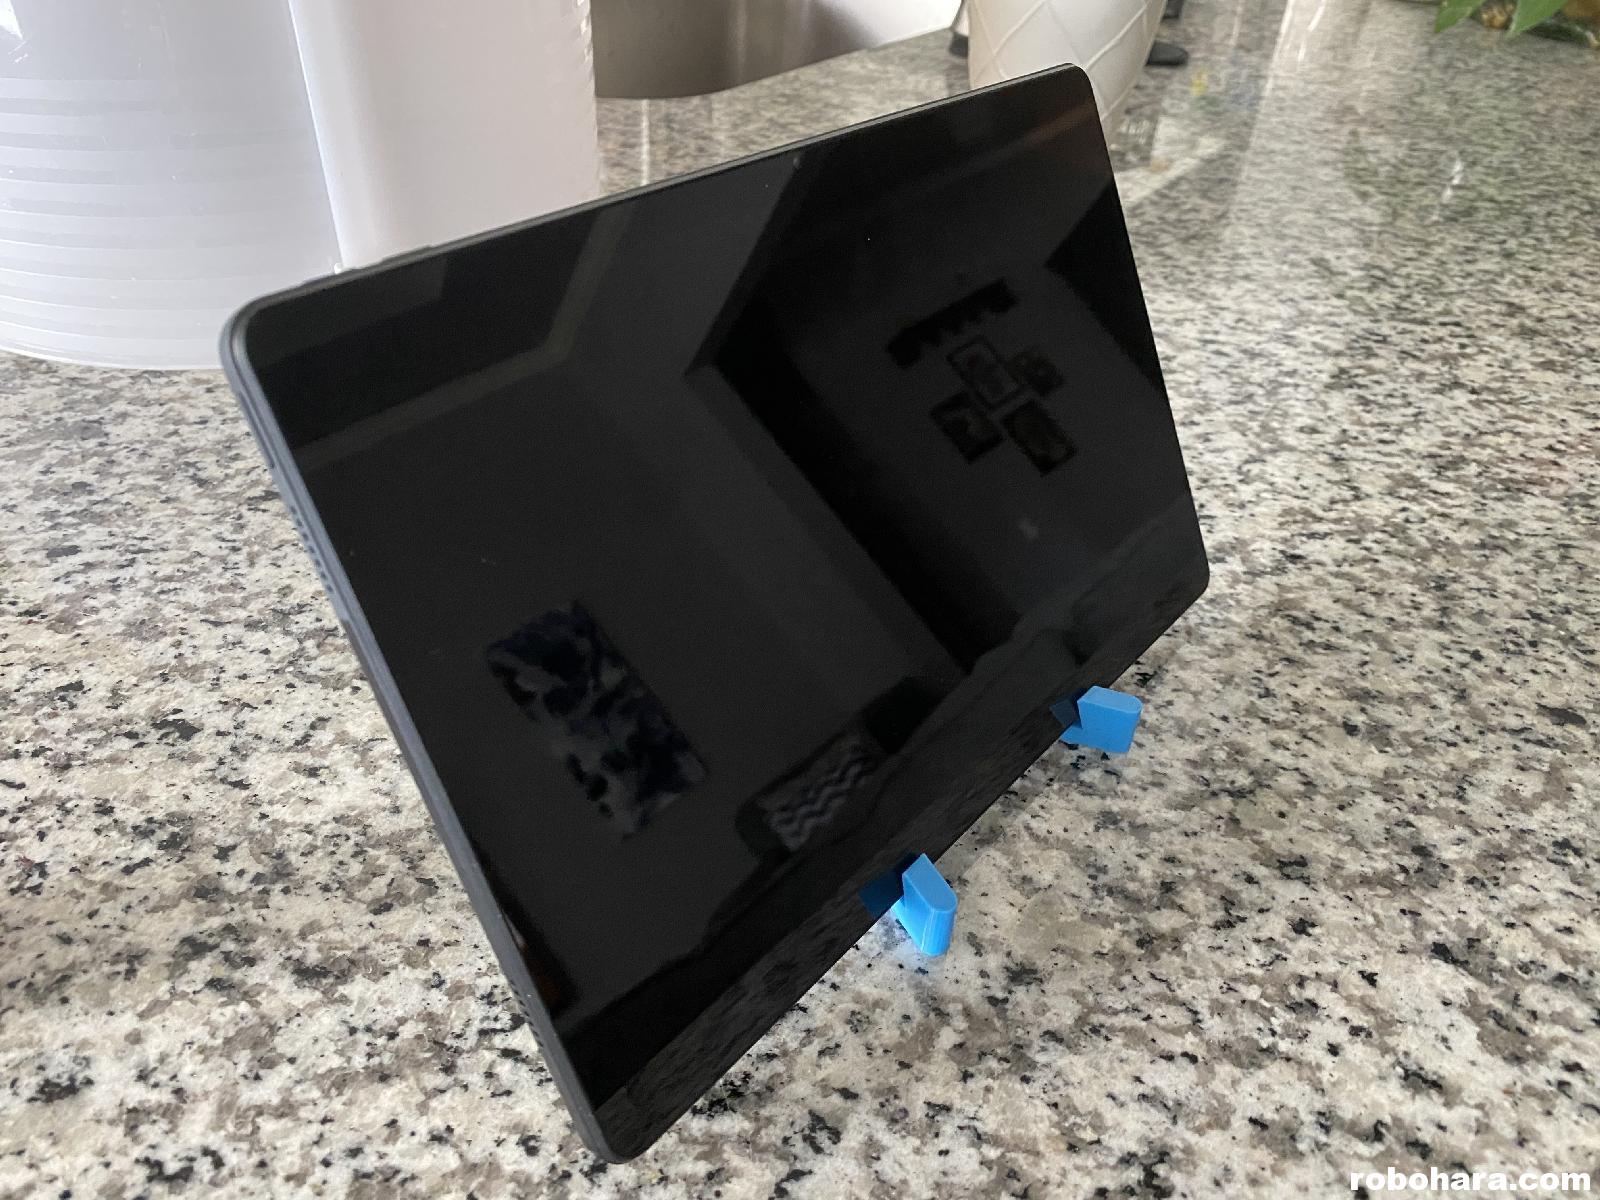
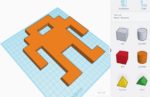
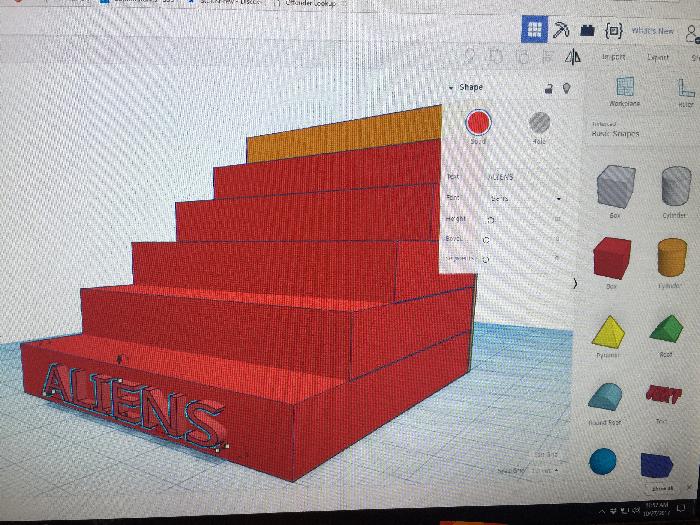
As I mentioned, with a program like TinkerCAD, you can build virtual 3D objects and then print them out. I haven’t actually printed this out yet, but here are some tiny risers I created for some of my collectible figures.

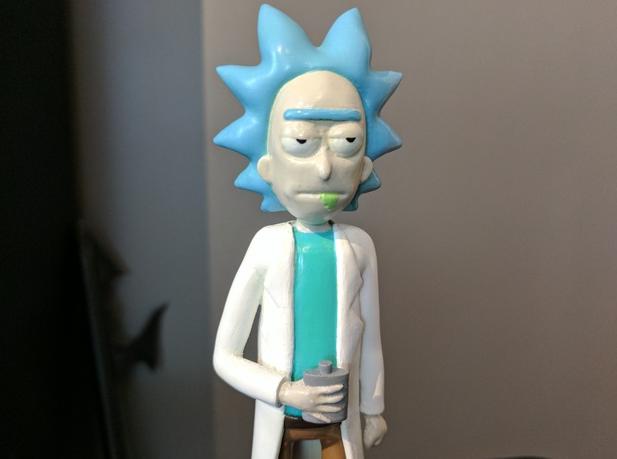
If you don’t feel like learning a CAD program, you’ll want to check out Thingiverse.com, a website with hundreds of thousands of free models available for downloading. Trust me, the people building those models are way better than me. This is a 3D printed version of Rick from Rick and Morty. Note that it didn’t print in color — the person who printed the model also hand-painted it.

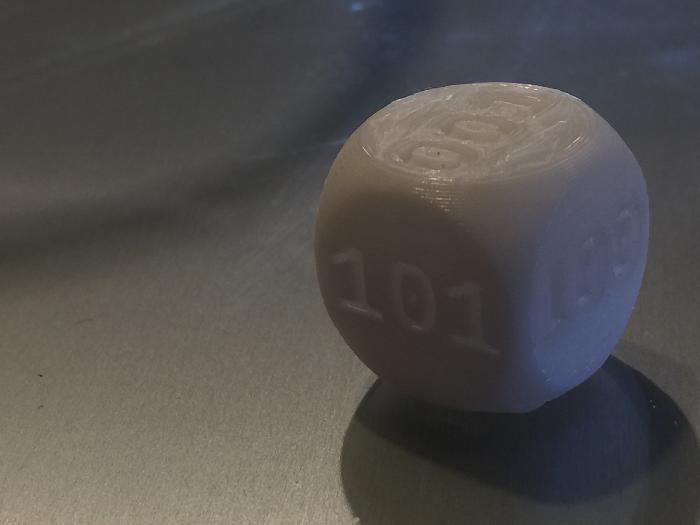
Here’s the first thing I got to print correctly. It’s the Programmer’s Dice from Thingiverse. It’s a six-sided die with binary numbers on the sides. So far I have printed two of them — one for me (which had minor issues), and one for my dad. It’s no headless cat, but eh. I printed this with the white filament that came free with the printer. It would probably look better in a different color.

That’s about it for now. Between work, school, and home life, I know I won’t have as much time to play with it as I would like, but little by little I plan to explore and learn more about it works. I have a few real-life objects I plan to design and print as parts replacements in the future. Maslow said “if all you have is a hammer, everything looks like a nail.” Right now, everything looks like it needs something printed to me!