Category Archives: LoveThyShelf

Posts that have to do with shelves.

The Best Garage Shelves I Ever Built Using Only 2x4s

I recently built a large shelving system for tubs in my garage using only 2x4s. Here is a link to my YouTube video showing exactly how it’s done, followed by a written summary of the process. This is the sturdiest and simplest method I have come up with for adding storage to your garage. If you can cut a 2×4 and use a drill, you can build these.

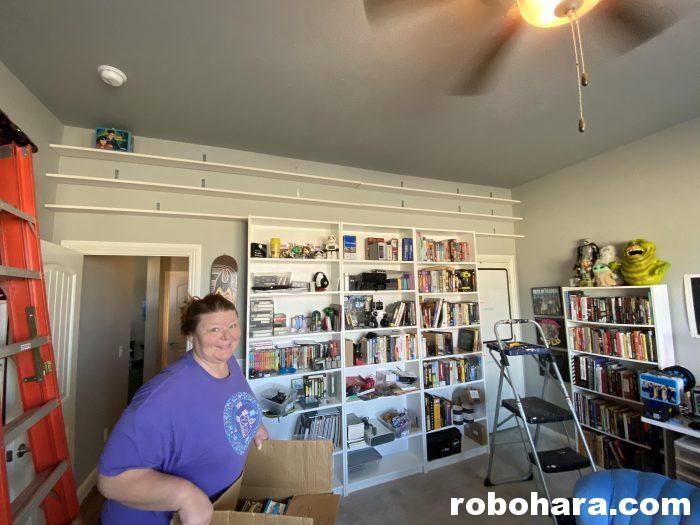
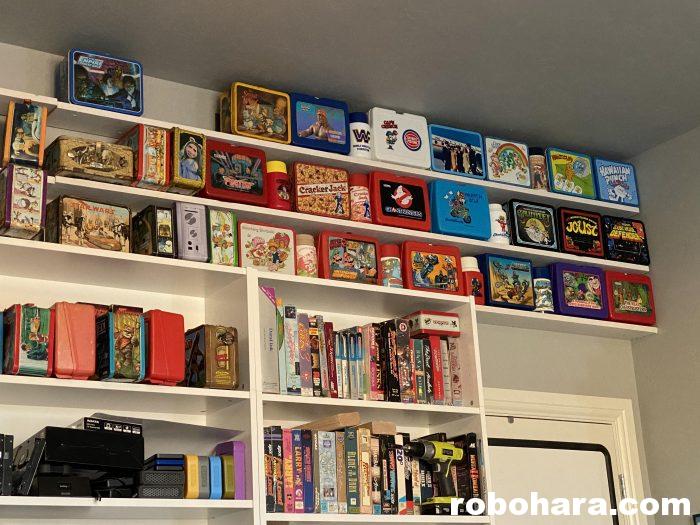
It’s no secret that I love shelves. I love building them and I love putting stuff on them.

When we moved into this house six years ago, I purchased a large amount of Rubbermaid storage tubs to transport and store my large collection of (mostly Star Wars) toys. In our last house I had a dedicated room for my toy display and in this house, I don’t. A lot of the tubs remain in the garage, unopened. I have been slowly parting with some of the toys I only like which is freeing up space in my office for the things I love, but the process is so low on my list of priorities that I fear it may not happen in my lifetime.

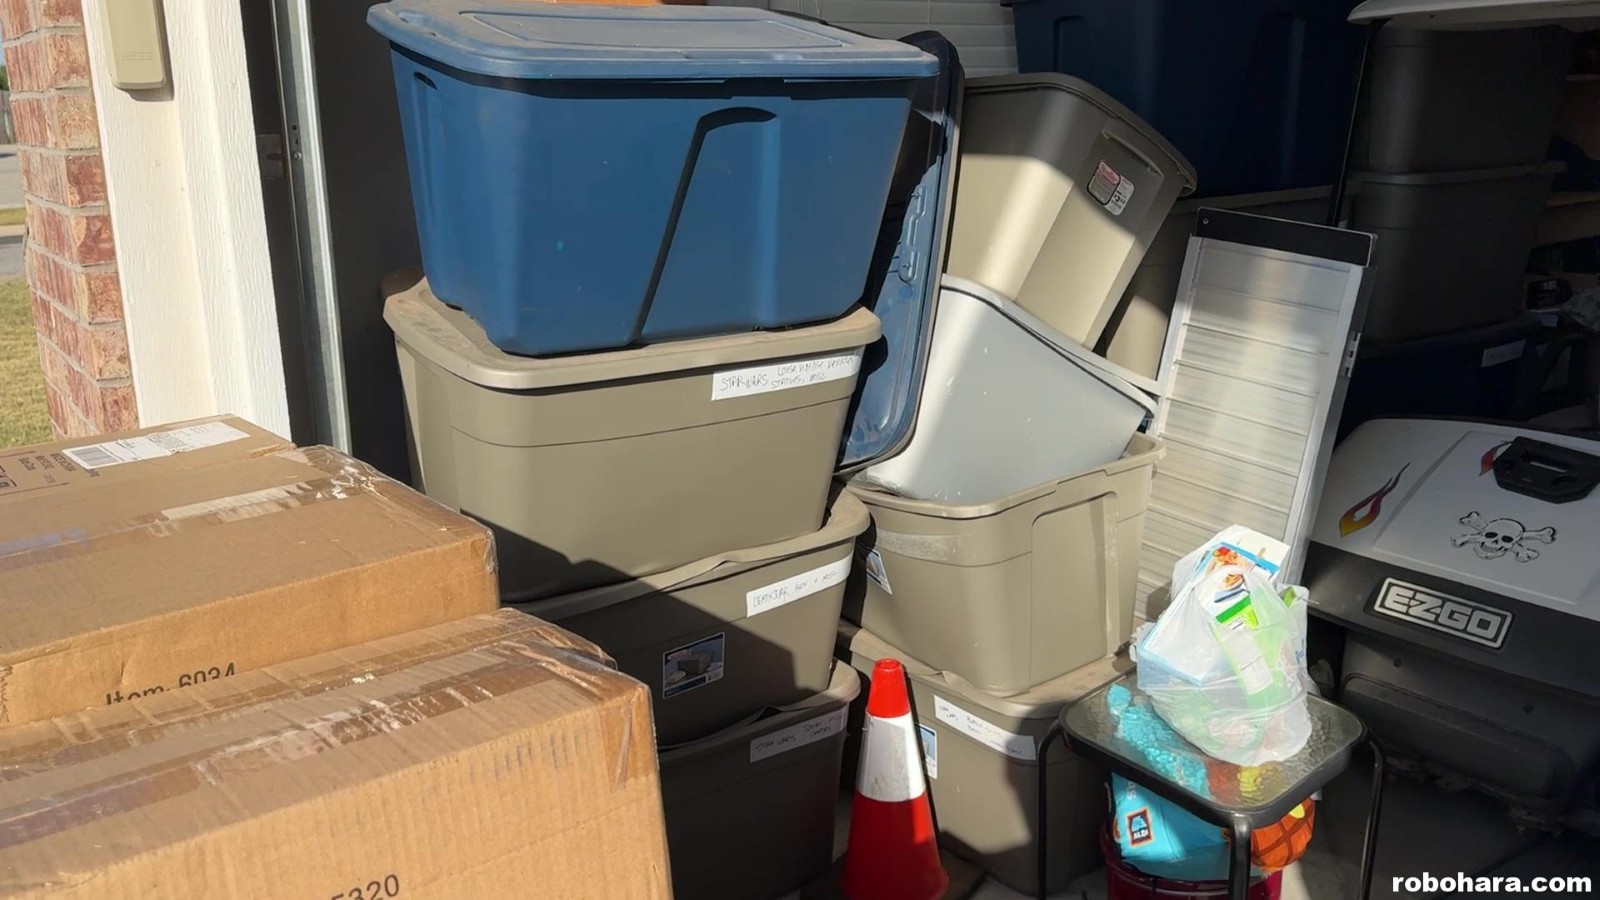
The problem with the tubs I purchased is that they don’t hold up to stacking heavier tubs on top. Many of the tubs are starting to cave in, causing the stacks to lean and occasionally topple over. Combine this with all the sourcing Susan has been doing for our toy booth and online sales and I decided a new massive set of garage shelves were in order.

Many years ago I came up with a simple system for building garage shelves that are perfect for storing tubs. My method is super simple. The shelves are made completely from 2x4s and only feature 90-degree cuts. If you can cut a 2×4 and work a drill, you can build these.

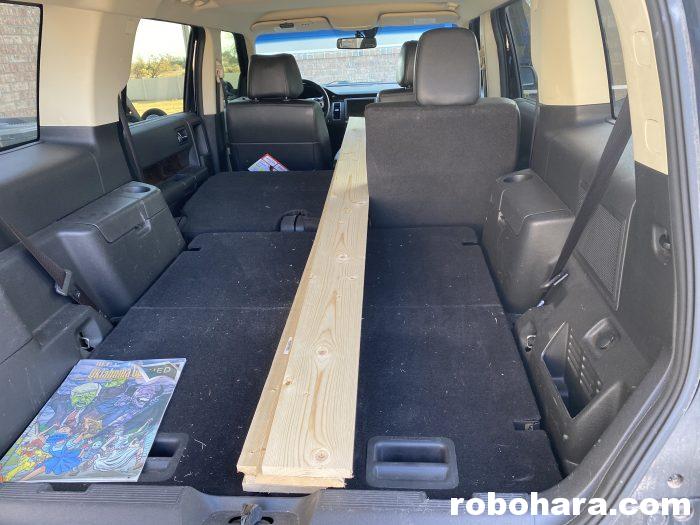
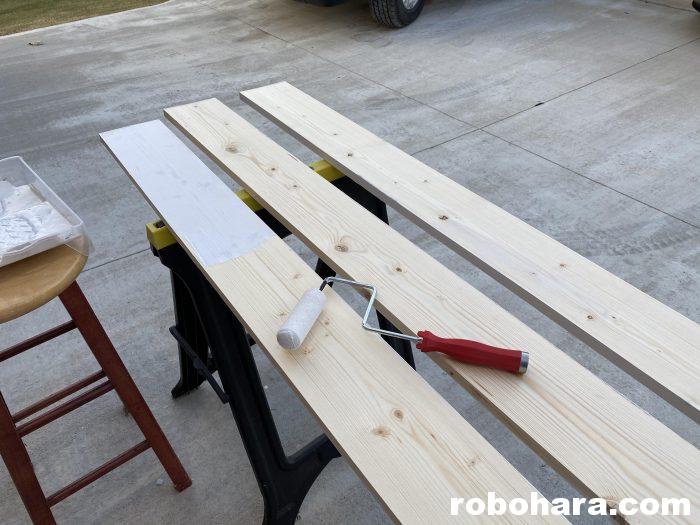
Again, I only use 2x4s to build these shelves. Believe it or not, you can easily fit 2x4s in a Ford Flex with the middle seat folded down (and the passenger seat leaned forward just a tad bit…). I am not good at “lumber math” so I bought 24 2x4s which I knew would not be enough, but would be enough to get me started. I built a very similar set of these shelves in a previous home and noted in that article that the 2x4s cost $2/each in 2004. In 2024, I paid $3.50.

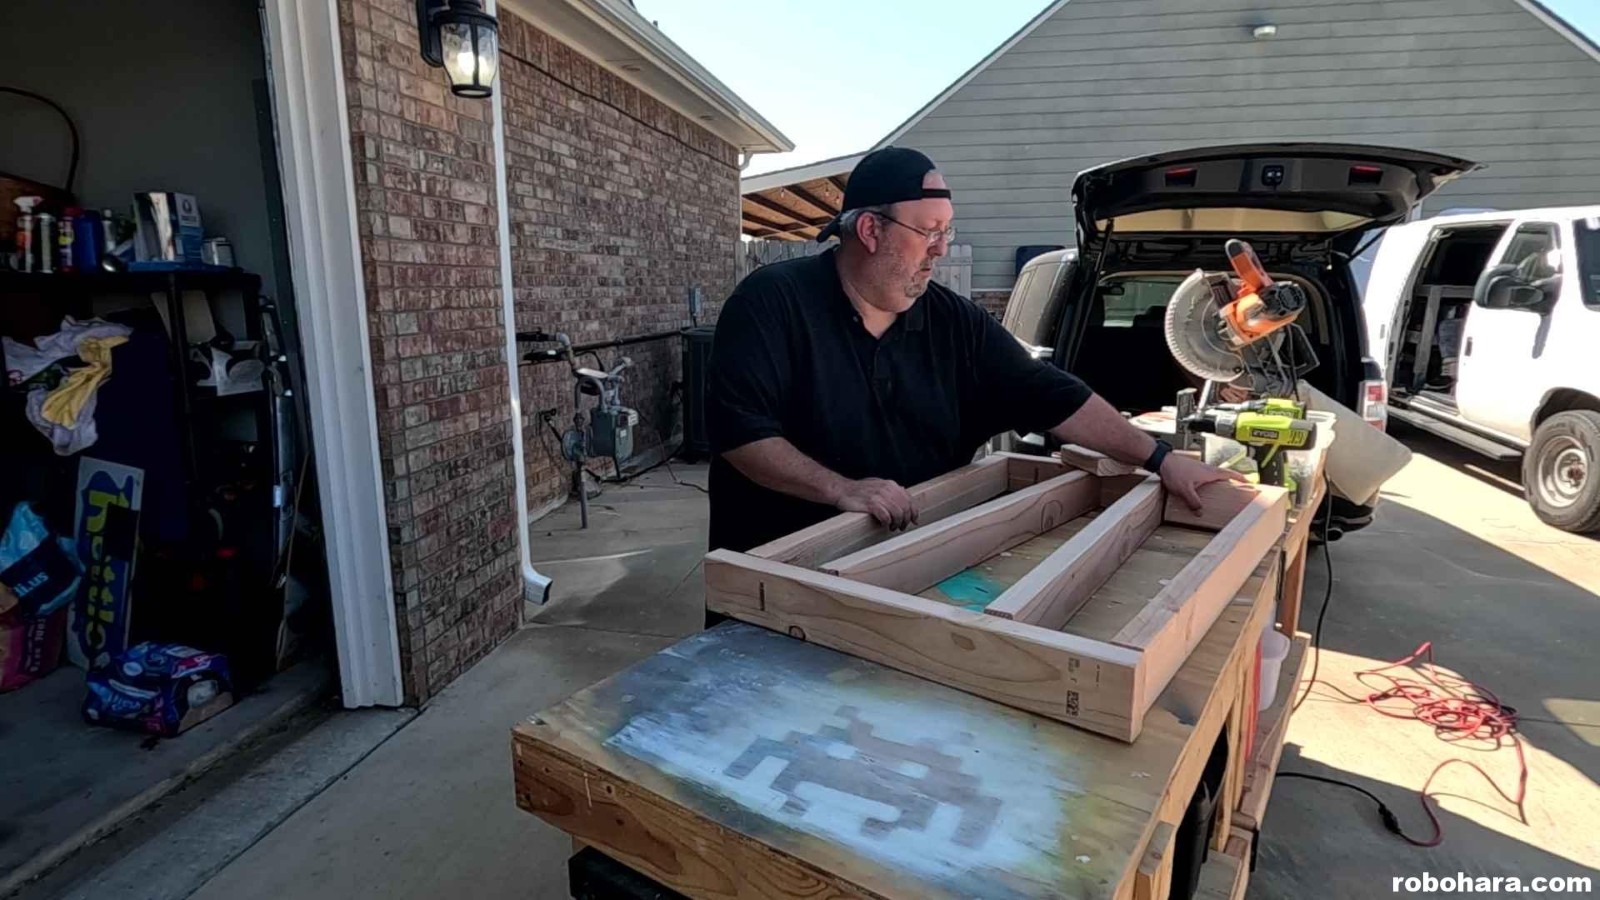
Here is how I construct each individual shelf. Every shelf is a rectangular box with one 2×4 on each side and two additional 2x4s in the middle. This shelf is 2′ deep and 3′ side. This is a very cost-effective size because 2x4s are 8′ long, which means you can cut each one into three pieces (two 3′ pieces and one 2′ piece) and build the entire shelf out of two 2x4s. If you’re doing the math, that means each shelf this size costs $7.

The way I build these is very simple. Before starting, I cut a small block of wood that is exactly 6″ wide. That piece of wood is going to be my spacer. After cutting all the other 2x4s to lenghth, I laid the four 3′ pieces parallel and put one 2′ piece on the end. I then drove two 3″ screws into the end of each 2×4. Instead of using a measuring tape I used the 6″ block of wood to keep everything spaced evenly. In other words I screwed the first one onto the end, then put the block in place to line up the second one, screwed that one in place, and worked my way all the way down to the last 2×4. When one side was finished I flipped the whole thing over and did the other side, making sure to start on the same end as before just to make sure all the 2x4s were lined up.

If you watch the video you’ll notice that I started with 2″ long drywall screws, which I quickly determined were not long enough. Driving them through a 2×4 only leaves you 1/2″ of “grip” into the second 2×4, which just isn’t enough. I quickly changed to 3″ screws, and doubled back and drove 3″ screws into all the other joints just to make sure everything was strong.

Once you have a few of these shelves built it’s time to start assembling them.

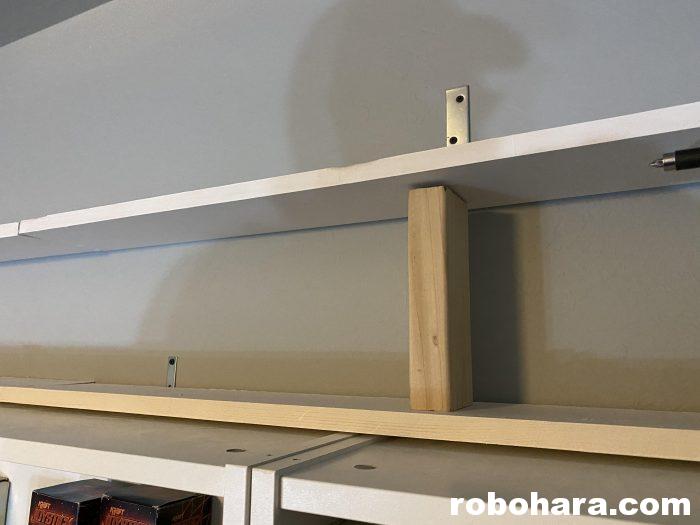
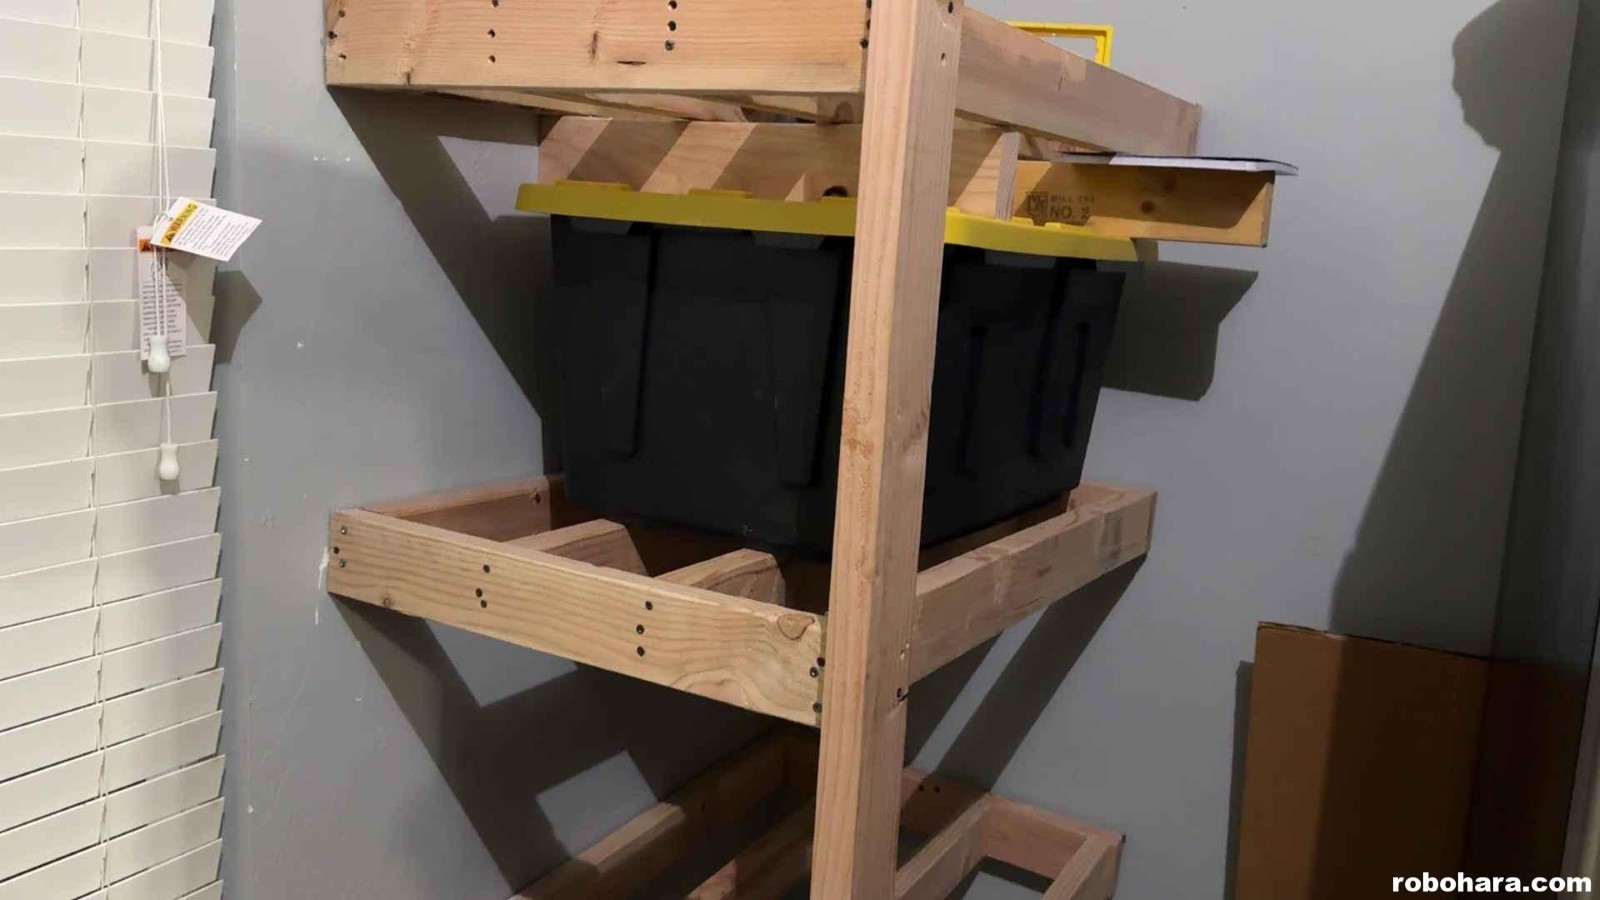
Again, the key to my system is using spacers. I don’t want to be using a tape measure for every single shelf and even if I did none of them would turn out level. Instead, here is what I do. First, find the biggest “whatever” that you’re going to be putting on your shelves. For these I’ll be putting storage tubs, but I’ve used this same technique to make shelves for CDs and DVDs, too. With your spacer (in this case, a tub) in place, put something on top of the spacer to ensure there’s a gap above it to make things easier to remove. In my case, I used two 2x4s standing on end, one on each end of the tub. With that set up, I then place a shelf on top of that, make sure that it is level, and start screwing the shelf into place. In the above picture (in which I’m installing the second shelf from the ground), I screwed both sides touching the wall into studs. On the outside corner of the shelf I’ve attached a vertical 2×4 and overlapped it so that one half of it is covering the front of the shelf. (We’ll use the other half for the next set of shelves.)

Phone cameras and lenses can be weird so trust me when I say these are more level than they look. Here I’ve added a third shelf. Note I’m using the same technique over and over. Put the tub on the previous shelf, put a couple of spacers on top of the tub, place the next shelf on top of that and then attach it to the studs in the wall and finally the 2×4 in the front corner.

This wall presented some unique challenges, the biggest one being two windows. Had I built another 3′ wide shelf, the end would have landed right in the middle of the window and not given me any place along the wall to anchor it — so I built the next set of shelves to be 6′ wide instead of 3′. This allowed me to attach them to studs on both sides of the window, assuring their strength.

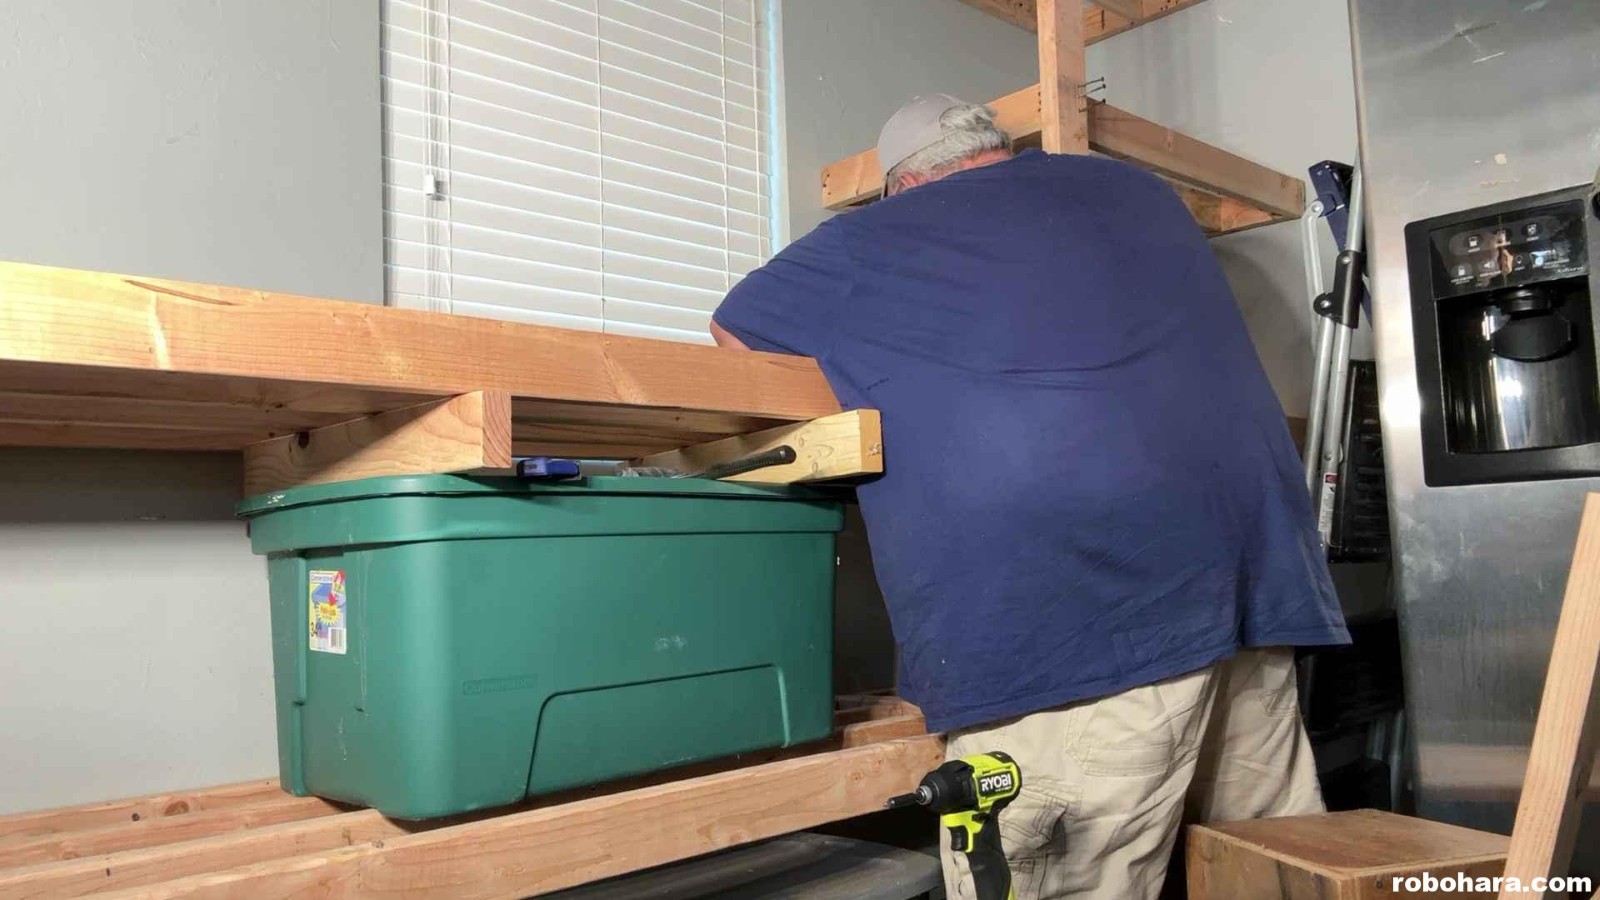
Eagle-eyed readers may noticed I switched tubs. Halfway through the first set of shelves I realized that this green tub was taller than the other one I was using and I wanted to make sure every shelf could hold any tub, so I readjusted the other shelves and switched to this green tub.

Again it really is this simple. Here I’m putting the third (counting up from the bottom) 6′ shelf into place. After building a few out in the driveway I would drag them inside and install a few.

That’s all there is to it! Rinse and repeat until you run out of lumber or run out of wall!

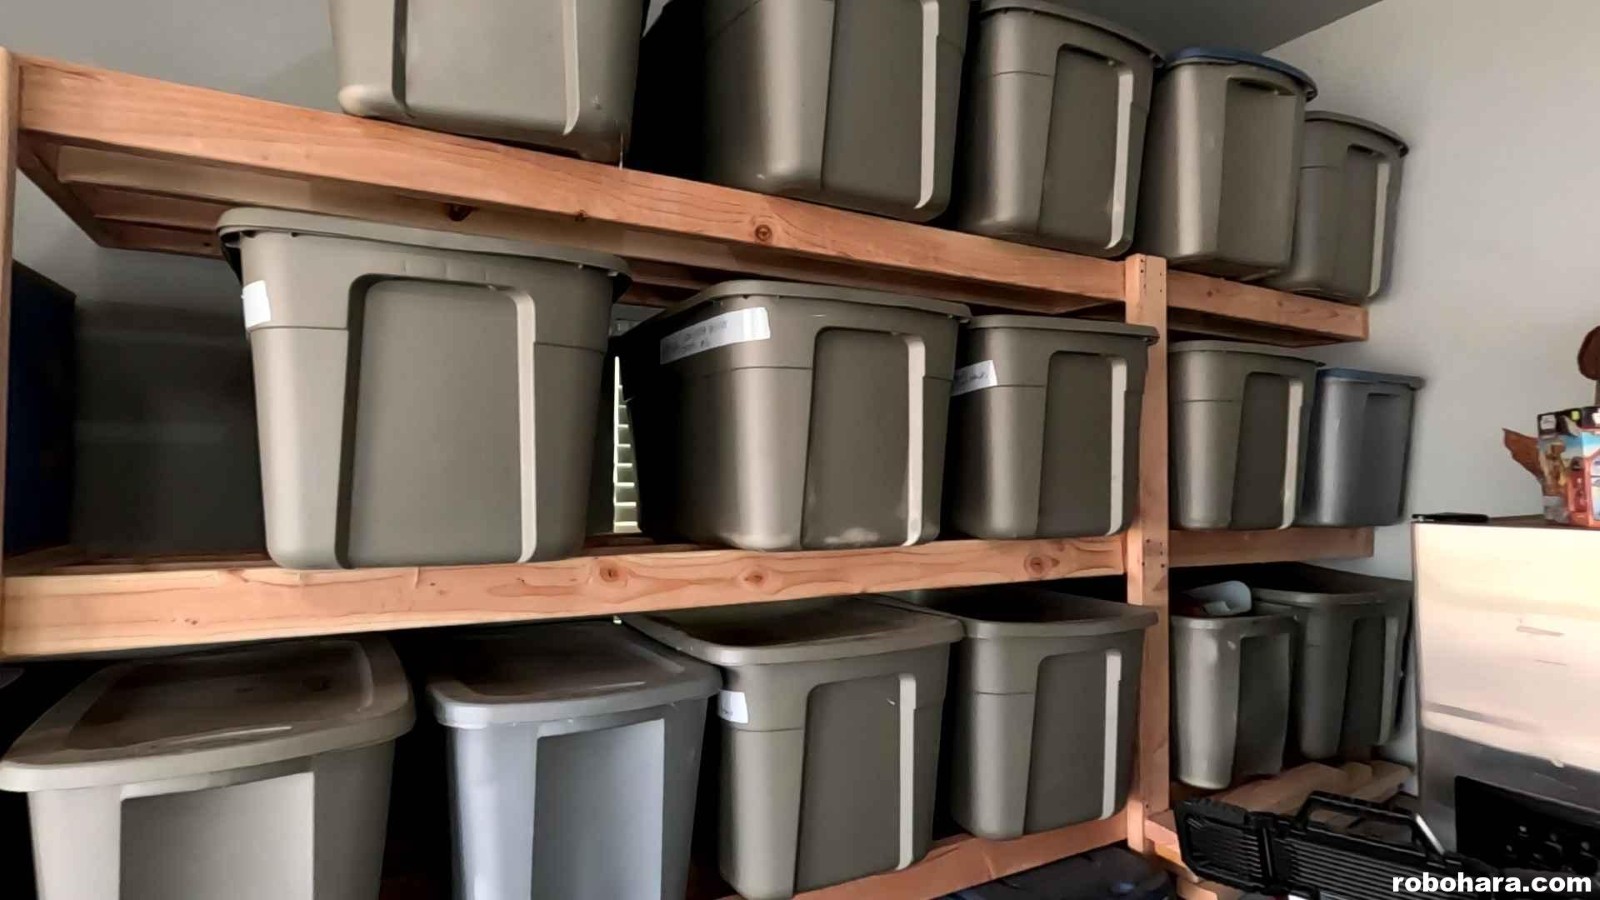
I read on the internet (so it must be true!) that a 2×4 laying flat lenghwise can support 100 pounds, when turned on its side can support 1,000 pounds, and vertically can hold 10,000 pounds. None of these tubs come anywhere near 100 pounds in weight and as you can see, on the 6′ section I am only able to get 4 tubs so there is no way these 2x4s will ever bend from the weight. Not only do the additional 2x4s down the middle of each shelf section add additional weight support, but doing it this way is much less expensive and time consuming than buying a sheet of plywood and cutting it to fit on top of each shelf.

Pro-tip: I didn’t pre-measure how high to make the vertical 2x4s. After the top shelves went on I used a circular saw and chopped them off to be level with the highest shelf.

If you want to turn one of the bays into a temporary shelf, you can easily do it with just a cardboard box folded flat. With all the 2x4s the cardboard won’t sag. I like doing this because I can always pull it back out and make room for more tubs if needed.

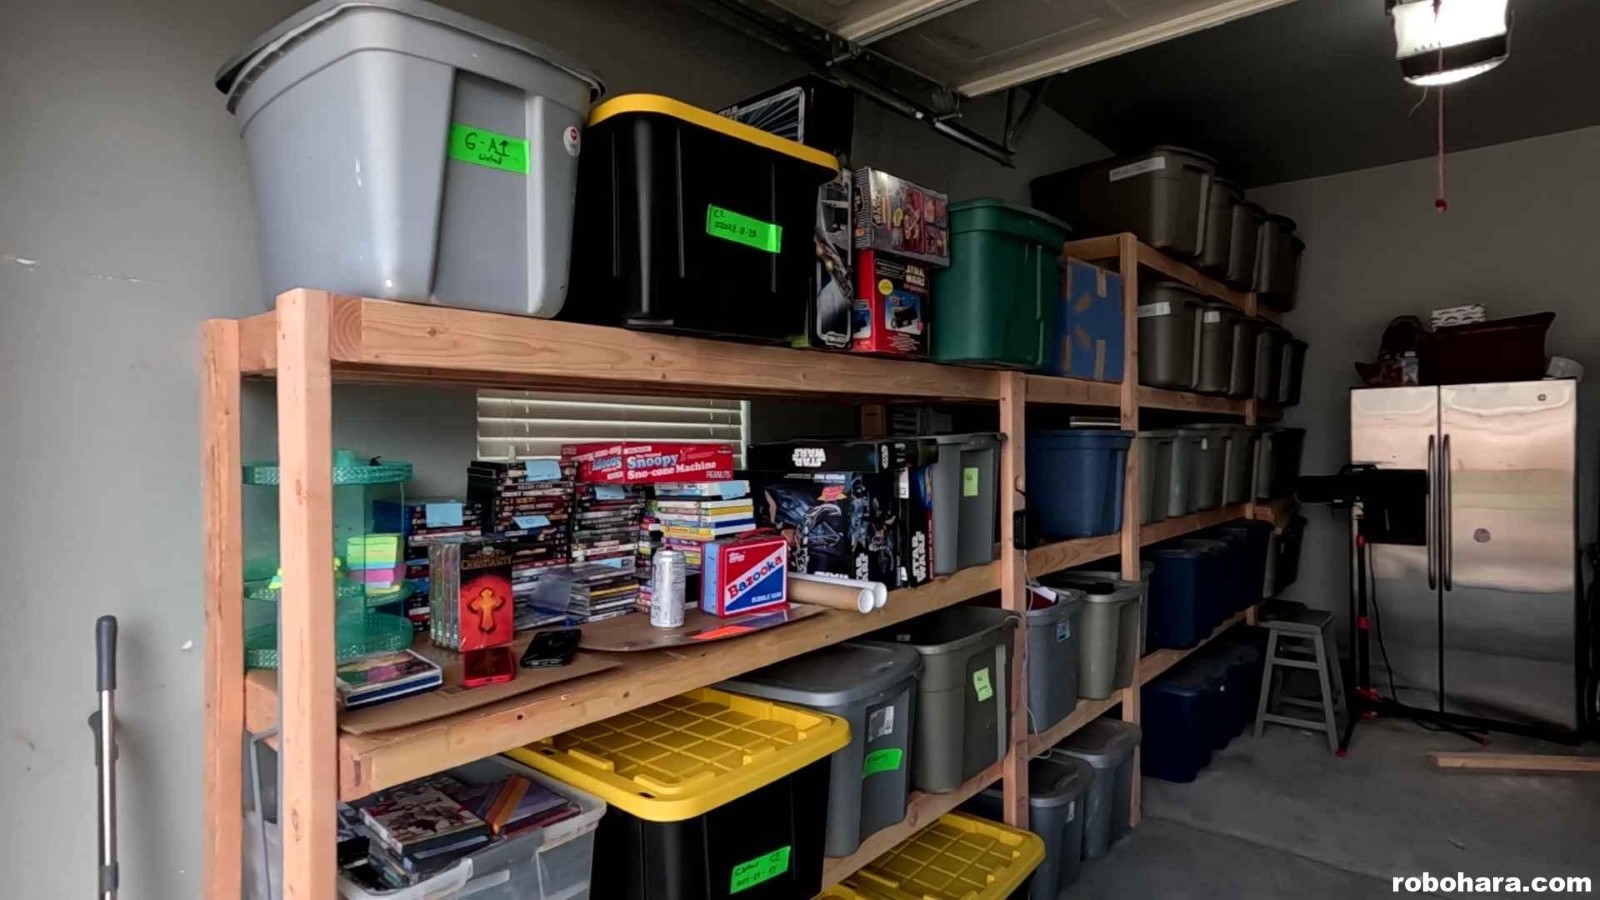
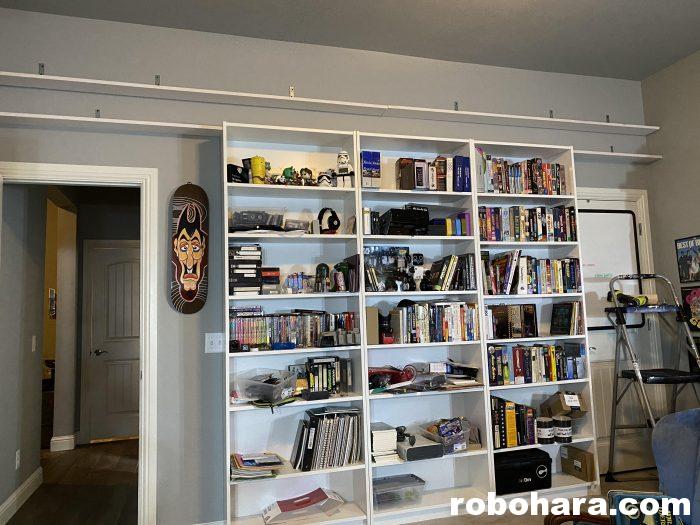
Here is the finished product. The spacing worked out so that I repeated everything twice. Starting at the back corner there’s a 3′ wide section, a 6′ section, another 3′, and another 6′. That’s 18′ in all, plus a 2×4 sideways on the end of each one that adds 3″ (1 1/2″ on each side) for a total length of 19′. My garage is just over 20′ deep, which gives me some space on the end for shovels, brooms and rakes.

You may notice in the above picture that the shelves “stairstep” down a bit — that was to make room for the garage door rails. Again there is not hard set rule as to how high you can make these or how long each section can be.

I hadn’t actually put a pencil to the project to see what it actually cost me, so let’s do that. If a 2×4 currently costs $3.50, that calculates to 43.75 cents a foot — we’ll round up to 45 cents to include tax. After looking at the pictures, here’s what I count:

Seven 6′ shelves with four 2x4s each: (7*6*4 * .45 = $75)
Seven 3′ shelves with four 2x4s each: (7*3*4 * .45 = $38)
Fourteen 2′ end pieces: (14*2 * .45 = $13)

That puts us at $126, so with a few bucks worth of wood screws let’s call it $130. I’m not counting the tools I used.

The closest thing I can find on Home Depot’s website are their yellow steel garage storage shelves, which come with four shelves (one on the ground level) and are 2′ deep (like these), 6′ tall (shorter than these, and provide four shelves. They cost $319 right now (on sale), and you could need at least three sets of them. And if you want to really compare apples to apples, my shelves give me approximately 86′ of shelf storage space for $130. Those Home Depot shelves cost roughly $8.50/foot, so to get the same amount of storage space it would cost you nearly $750. Clearly the shelves I built took a little more effort, but I was able to build them over a weekend, customize the shape and size to take advantage of the space I had available, and save a ton of money in the process.

I am super happy with how these turned out. They cleaned up this entire half of the garage and allow me access to all my tubs!

Twisty Little Shelves

Several years ago, my friend Guy Hutchinson mentioned that he had a small set of shelves near the entrance of his mancave. The shelves weren’t large enough to display a large collection of items, and so he used it to display small collections or subsets of collections. He said he had a lot of fun rotating the items he displayed on the shelf. That sounded like a really fun idea to me.

I found these fun looking shelves on Amazon and bought them about three years ago. For three years they’ve sat in my closet in the Amazon box they arrived in. I don’t know why I never bothered assembling or installing them. I guess I was just waiting for the right day. I took the week off between Christmas and New Year’s, and somewhere during that break was the right day.

According to Amazon the shelves should take about 10 minutes to assemble, although I think it was closer to 30 minutes for me. Those estimates never take into consideration things like finding the right tools, stopping halfway through to make a sandwich, or crawling around on your hands and knees collecting all the screws you knocked off the counter.

I installed the shelves in the corner between my office door and the guest bathroom. The shelves came with 3 screws to mount to the wall, two on one side and one on the other, so they’re nice and sturdy.

In honor of the holidays, I loaded up the shelves with some Christmas-themed Star Wars figurines. There are five shelves and I only had four figures so I added a couple of Bumbles to the top shelf. I suppose if you squint a little he kind of looks like a Wampa.

The shelves have already been up for a couple of weeks and Christmas is over, so I suppose it’s already time to swap these figures out for the next collection.

Lunchbox Shelves

Since moving into my new home office, Susan has been nudging me to unpack my lunchbox collection and put them back out on display. I enjoy looking at my old lunchboxes, and we agree that having them stowed out in the garage inside moving boxes (where they’ve been for two years now) isn’t bringing anyone any joy. A few weekends ago, I decided to spend a day building new shelves for my old lunchboxes.

After doing a bit of measuring I determined I could fit three shelves between the top of my bookshelves and the ceiling. The wall is 15′ long, and using a bit of loose math I estimated three shelves would give me enough space (or close enough to it) for all my lunchboxes.

I went to Home Depot with the intention of buying pre-laminated white shelves to use, but no matter how I sliced or modified my plans, they didn’t have enough pieces of wood of the same depth for me to make the shelves. The closest I came was using a bunch of 4′ long shelves, which would have come to more than $200 after tax. I really wasn’t wanting to paint lumber for this project, but I found 8′ long pieces of wood that were 6″ deep (perfect for this project) at under $7 a board. I ended up buying six of those and paying less than $50, and I already had a gallon of white paint at home.

Painting the shelves instantly turned a one day project into two, as each board needed two coats of paint, and I had to wait for them to dry between coats. I painted the boards three at a time, painting one side and one edge of each board and waiting for them to dry before flipping them over and doing the other side. I probably could have figured out a more efficient way to do all that painting but I wasn’t in any particular hurry. In between each coat I came inside and piddled.

The next morning I brought in two of the pieces of wood. Since each piece was 8′ long and the wall was a little over 15′ long, I put one piece in place, put the other one in place, and marked where the two overlapped with a pencil. Then I took the second one back out to the shop, cut it on the line, and used it as a template for two of the other boards. The final result was three 8′ boards, and three that were just over 7′.

I used some 4″ metal brackets to attach the shelves to the wall. I attached each bracket to a wall stud, and then to the top of the shelf instead of the bottom. I don’t typically recommend doing this — shelves can hold a lot more weight if the metal bracket goes underneath the wood — but I did not want the brackets to show from underneath, and I knew that the lunchboxes did not weigh very much.

Vintage lunchboxes are 7.75″ tall, so I cut a couple of 2×4 spacers that were 8″ tall and used them to build the next level of shelves. With each shelf balanced on top of the 2×4 spacers, I used a stud finder to locate the studs in the wall, attached the brackets to the studs, and screwed them down into the shelves. Before finalizing anything, I verified that each shelf was level using a (spoiler) level.

Once the second row of shelves was complete, I repeated the process to get the top shelf attached. While I did that, Susan brought three large boxes full of lunchboxes in from the garage.

The only thing left to do was the fill the shelves with lunchboxes. I had to use a ladder to put the lunchboxes on the shelves and could only carry a few lunchboxes at a time, which meant I made about twenty trips up and down the ladder. This was by far the worst part of the project. By the time I was done, my knees were killing me!

As I put the last lunchbox on the top shelf, I discovered I had four lunchboxes left over. Two of them were duplicates, and the other two were newer ones that I might get rid of. Somehow, the shelves were literally the perfect size.

The lunchboxes are mounted in such a way that unless you’re inside my office, you can’t see them at all. I love it. Nobody outside my room would ever know they were there, and yet every time I look up from my computer I can see them all. I love those vintage lunchboxes, and get a lot of joy from looking at them. Susan was right, they weren’t doing anybody any good sitting in boxes out in the garage.

If you’re interested in hearing about the techniques I use to build shelves and some of the display shelves I’ve made over the past couple of decades, check out the latest episode of You Don’t Know Flack, where I talk about exactly that.

Link: You Don’t Know Flack 195: Shelves

Cheater Spacer Shelves

During this week’s furlough, I decided to tackle a few projects around the house that I’ve been putting off for far too long. One of those projects involved creating a pair of “spacer shelves” for our upstairs entertainment center.

The built-in entertainment in our upstairs den is really nice, but the shelves are way too tall. Take a look at the shelves to the right of the television in the (terrible) picture above. Each shelf is almost 18″ apart; probably great for displaying photographs or trophies, but terrible for things like DVDs.

Here you can see some of my Blu-ray movies. Above them there’s almost 11″ of space, easily enough for an entire row of movies.

Fortunately, the home builder left a few leftover pieces of wood out in the garage. Some of them are an exact match for this entertainment center and the rest are pretty close, but all of them will work.

The first thing I did was measure the height of a DVD case. It’s about 7 1/2″ tall, so I figured with a shelf that’s 8″ tall, I could easily convert one of these cubbies into two.

Supplies required: tape measure, pencil, t-square, saw.

The inside of each cubbie is 26″ wide, and the pieces of wood left behind in the garage are 48″ long. With two 8″ blocks for support and one 26″ shelf, that left me 6″ to spare. Perfect!

This literally took less than five minutes, and that’s with getting all the cobwebs and spider eggs off the wood.

Back upstairs, I inserted one of the 8″ blocks on each side of the cubby hole, and placed the 26″ shelf on top of the blocks. I didn’t use any screws because there’s literally no place for any of the pieces to go. You could either push the blocks all the way to the back or pull them all the way forward. I thought everything looked better flush with the front, so that’s what I did.

After I was sure everything fit, I went back to the garage, cut a second pair, and placed them on the shelf above that.

With the additional spacer shelves in place, I was able to fit all our disc-based video games along with all my Blu-ray movies (I don’t have very many) on the shelves without having to stack them horizontally. Success!

Because it worked so well, I decided to do the same thing to the other side.

One unexpected benefit of these shelves is, because they don’t go all the way to the back, there’s a lot of space for things like cables and power supplies.

I have been meaning to build these cheater spacer shelves for several years now. From start to finish, including taking everything off the shelves and putting them back in place, it took less than an hour!

LoveThyShelf.com Consolodated into Robohara.com

Whenever I begin a new project I like to write a “mission statement” for the purpose of setting the scope of the project. Likewise, whenever I end a project, I like to document that as well. This posts marks the end of a project: LoveThyShelf.com. I registered LoveThyShelf.com back in 2011. The following is from my initial post on that site:

As a collector of many things, storing and displaying those things has been an issue for much of my life. Back when I was in mid-high, my parents owned and ran a small computer store. Shortly after the store permanently closed, some of the display shelves ended up in my bedroom. There I used them to display my various books and toys, and I can’t think of a time since then when I haven’t surrounded myself with shelves. Left to my own vices, I’d probably mount shelving units in every room.

Throughout the years I have met many fellow computer, video game, and collectible enthusiasts, all of which who have had to implement shelving in some form or another to display their collections.

LoveThyShelf.com’s mission statement is to (A) share pictures of functional, creative, and wonderful shelves; (B) share the stories behind those shelves; (C) share plans for building shelves. Note that I am not limiting the scope of the site to custom or homemade shelves; I am just as interested in sharing clean implementations of store-bought shelves as well.

It seemed like a good idea at the time, so what happened? First I’ll say that my love and appreciation of shelves has not diminished. I still love seeing unique shelves and seeing other people’s shelving and storage solutions, particularly custom or creative ones. Here’s what kept the site from growing:

01. I quickly found that my posts over “there” took away from my posts over “here” — with only so many hours in the day, it was rare that I would write and post an article for both sites. So while the site was new I was researching, drafting and writing several posts a week about shelves over there, but as the newness wore off I returned here for posting content.

02. I was really hoping more people would submit pictures of their shelves. I got less than half a dozen submission from people after asking publicly multiple times. A lot of people simply told me that they didn’t think anyone would want to see their shelves (I did!). For me, hearing and writing about other people’s shelves was my favorite part of the site, but unfortunately it never caught on. Without feature articles like those the website turned into “hey look at this picture of these shelves I found,” which got pretty old pretty quick.

03. The site never gathered any traction. While I am a big believer in focusing projects, this one might have been a little too focused.

The LoveThyShelf URL expores this week and I won’t be renewing it. All the posts from that site have been exported and imported here at robohara.com under the new “LoveThyShelf” WordPress category. I spent some time last night going through and updating all the picture links on those posts, so they should appear just like they did over there.

I actually kind of think that this will lead to more posts about shelves instead of less, as this solution will still allow me to occasionally post about new interesting shelves I find along the way.

Cheap Shelves

The following shelves, created by Digital Press forum member PSony, utilize a combination of track/brackets and metal L-shaped brackets for support.

The white track/brackets, L-shaped brackets, and white laminate wood can all be found at most home improvement locations. While PSony uses his shelves for video games, these could obviously be adjusted to store just about anything.

Letter Shelves

Practical? Maybe. Awesome? Definitely. Letter-shaped shelves! I think these would be super-awesome if they spelled out what was on the shelves, like “DVDS” and “MOVIES” and “CHILDREN’S SKULLS” …

More pictures available HERE.

My Little Pony Collection Shelves

So, what’s a lady with one of the largest collections of My Little Ponies to do? Add a collection of My Little Shelves, that’s what! Amy has one of the largest My Little Pony collections around, and a sampling of off-the-shelf shelves looks like the perfect way to display her collection. Nice job, Amy! Thanks to husband John for the photos. (Amy’s husband, not mine.)

TV Shelves

Last week was “Big Trash Pickup” day in our neighborhood and I saw at least half a dozen CRT televisions sitting out by the curb as garbage. I should have picked them up and built a set of these.

It doesn’t look like they would store a lot, but they’ll sure hold more than a flat panel television.

White Boxes

At first glance, the shelves in the picture below look just like normal shelves:

They’re not. They’re actually individual boxes, stacked up.

The selling point? If you ever move you can just pick up your boxes and go. The downside, other than the fact that big boxes full of books are heavy, is that these boxes are $40/each. That means a wall of boxes would cost approximately four million dollars (give or take; I didn’t go the math).